Today we’re going to cover how to set up a TikTok business center, how to create a TikTok ads account, and how to link your TikTok ads account to that TikTok business center.
Why would you want a TikTok Business Center?
The most common reason is that it enables you to run multiple TikTok ads accounts. For example, if you are an ad agency running advertising for multiple companies, or if you yourself have multiple ads accounts that you want to manage under one roof, then a TikTok Business Center is the way to go.
However, even if you are just managing one ads account, I would recommend setting up a business center. It’s simply better hygiene and provides an easy way to give people access to different settings. (For those of you familiar with the Facebook world, the TikTok Business Center is the equivalent of the Facebook Business Manager.)
Here’s what TikTok themselveshave to say about the matter:
First things first, we’ll need to create an ad account.
Enter your sign-up information and select “Send Code” in the Verification Code field to receive a verification code to your email.
Complete any captchas you receive.
Enter the verification code from your email, select the checkbox agreeing to the terms and conditions (and the checkbox regarding updates from TikTok if you would like), and hit “Sign Up”. It is worth noting that you also have the option to sign up using your phone or to sign up through TikTok directly, but we’ll use our email for this example.
Enter your account information, select the checkbox agreeing to the terms and conditions, and hit “Register”.
Fill in your business information on the TikTok Ads Manager page. Note that there are two different payment options: Automatic Payment, in which you’ll be automatically
billed on either a recurring date or when you reach your billing threshold; and Manual Payment, where you’ll manually add your desired balance, all ads will be paid from that balance, and the ads will stop running when that balance is used up until additional funds are added.
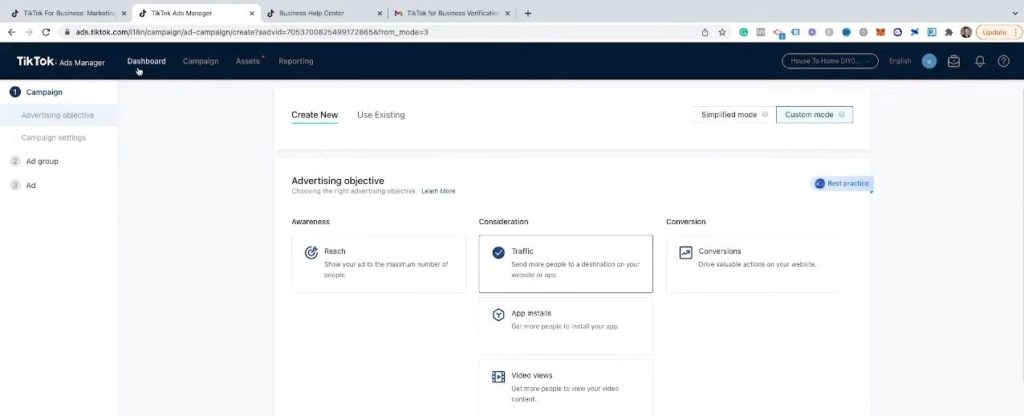
Select either Simplified Mode or Custom Mode for your Ad Manager. Personally, I recommend Custom Mode, since it gives you more options within the platform. For a deeper dive, check out myfull TikTok ads tutorial.
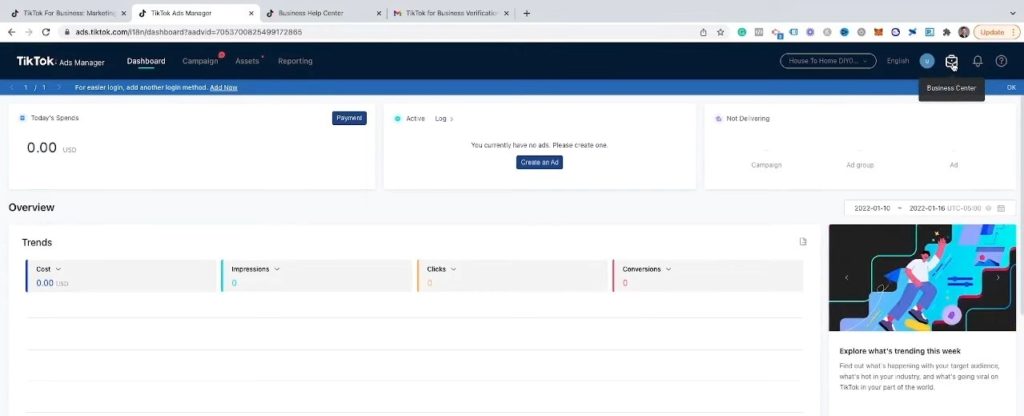
Our TikTok Ads Account is all set up! You’ll be brought to a page to start setting up an ad campaign, but we can skip this for now and head over to the Dashboard so we can add this account to a TikTok Business Center account as promised.
How do I create a TikTok Business Center?
Once on your TikTok Ad Account Dashboard, click the Business Center button in the upper right.
Fill out your business center name and time zone in the resulting window, and optionally add a profile image. I will skip adding the profile image for now. Once this information has been entered, hit Create.
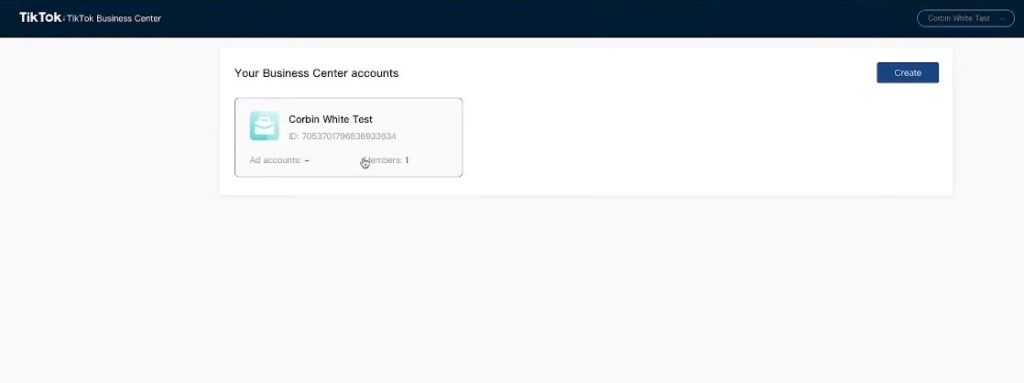
Your business center has been created!
How do I connect my TikTok Business Center to my Ad Account?
After completing the previous steps, you’ll be brought to a list of your business center accounts. Click the account you just set up.
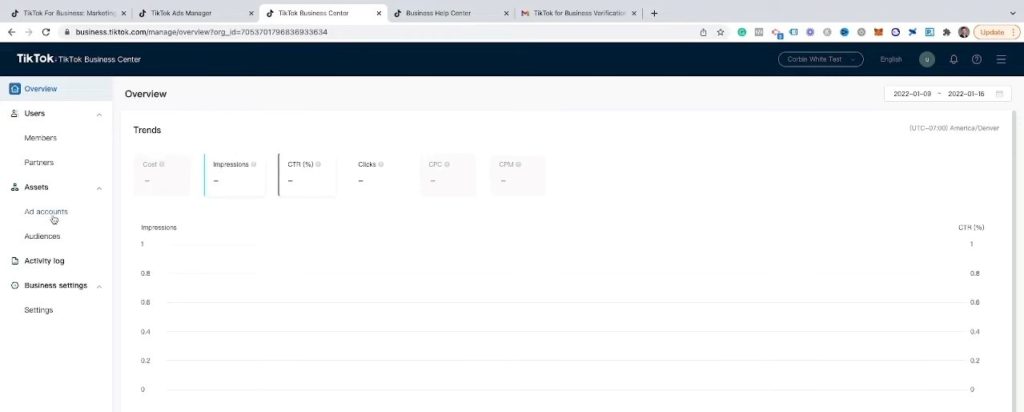
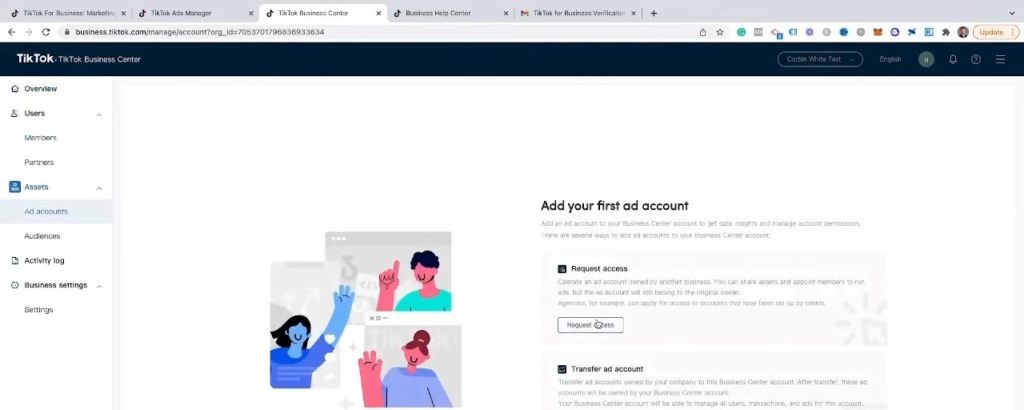
You’ll be presented with an overview of your business center account. As mentioned previously, this is a shell that gives you the ability to add and manage multiple ad accounts. To add our ad account, let’s click on Ad Accounts in the left menu, under Assets.
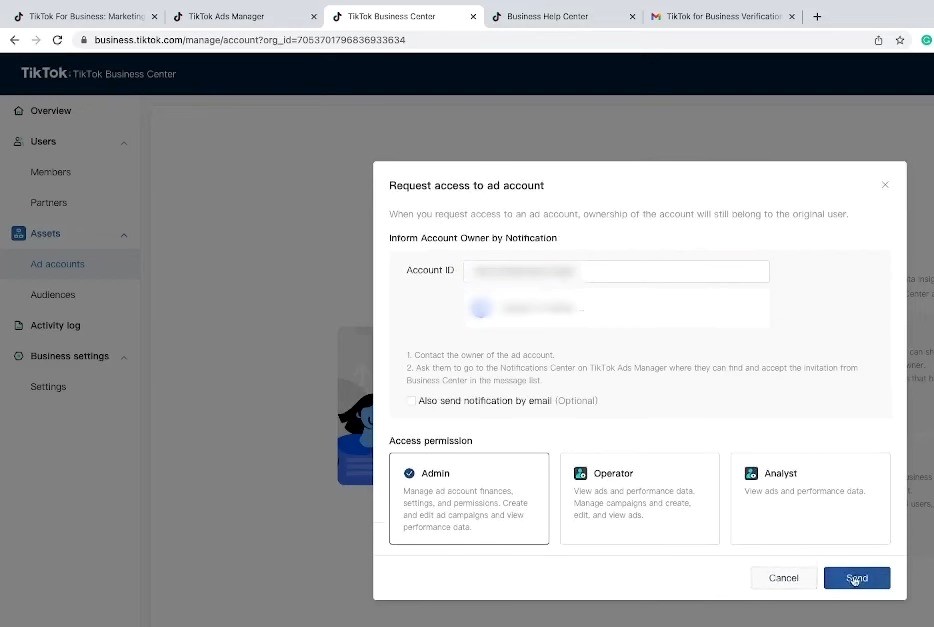
Select Request Access to request access to the ad account we just created.
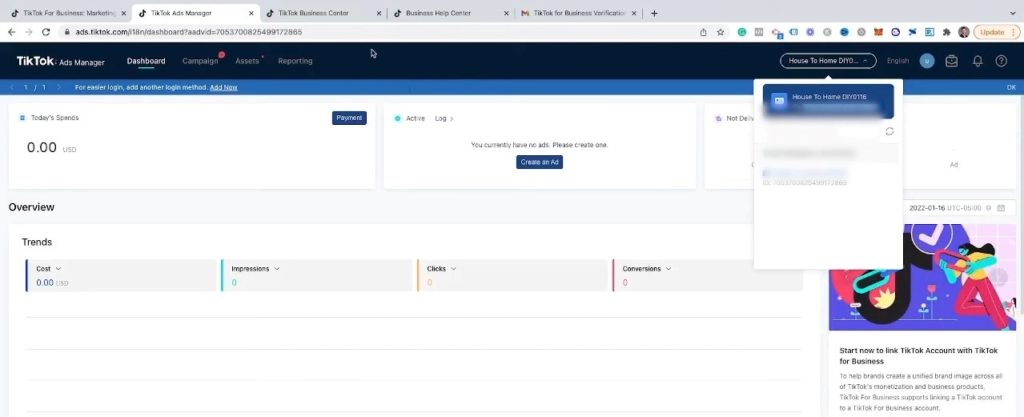
You will be prompted for the Account ID of your ad account. You can obtain this by going back to the Ad Account Dashboard and clicking on the button in the upper-right corner as shown below. Copy this ID to your clipboard.
Paste this ID into the access request window we saw previously. You can choose either the Admin, Operator, or Analyst access permissions to this ad account; if you will be running ads for someone, I recommend Admin. Once you have made your selection, hit Send.
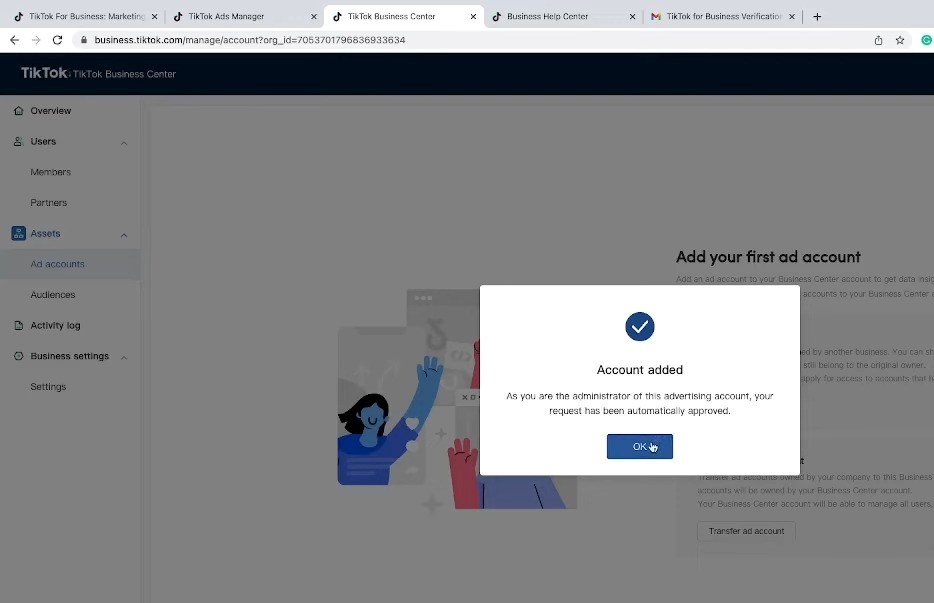
If you are the owner of the ad account, you should see an automatic approval as shown below. If not, the owner of the ad account will have to approve the access request first, which they will receive a notification for.
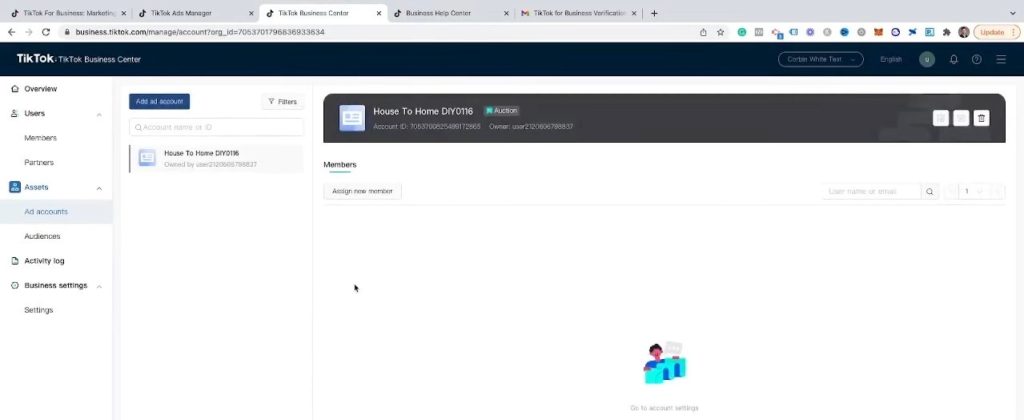
Refresh the page and you should now see the ad account within your business center!
What can I do with my TikTok Business Center?
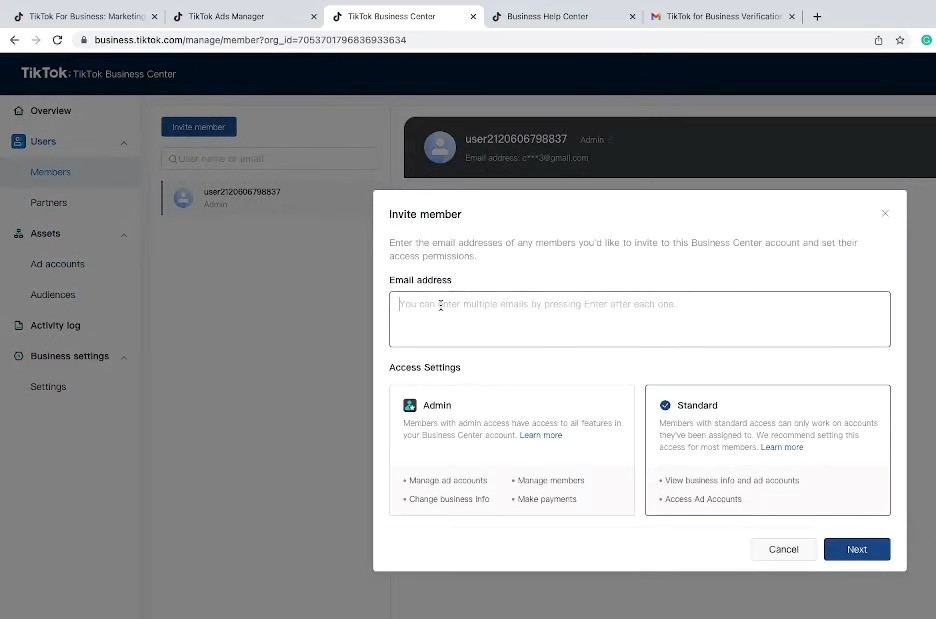
You should have access to options such as sending invites to new members and assigning them to ad accounts with the appropriate access settings:
Adding business center partners:
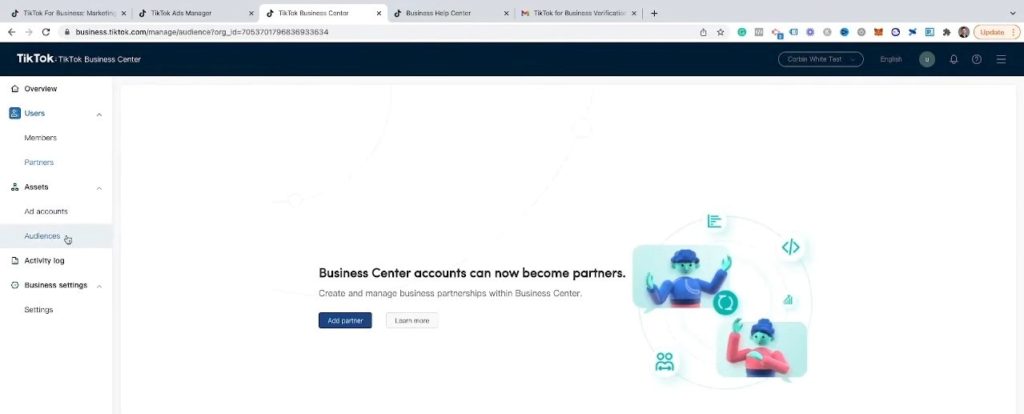
And sharing and testing different audiences:
These are just some of the benefits of having a TikTok business center, so if you will be managing multiple TikTok ad accounts—or even if you just have one—I hope you’ll take advantage of all of the power it gives you!
*This post contains affiliate links. If you use these links to buy something we may earn a commission. Thanks.*
How to Stop Competitors & Bots from Clicking on Your Ads (Click Fraud)
What’s up everybody, it’s Corbin here from ZoCo marketing. Today, I’m going to be answering one of the most common questions I get asked when I’m helping people run Google ads. How do I prevent competitors from clicking on my Google ads? Or how do I prevent bots from clicking on my ads?
The sad reality is that click fraud is out there and it can waste your ads spend. Google has made some really good steps forward to help prevent this from happening, but they do not exclude 100% of those frauds and a lot of fraud traffic can slip through the cracks.
How to Identify Bot Traffic
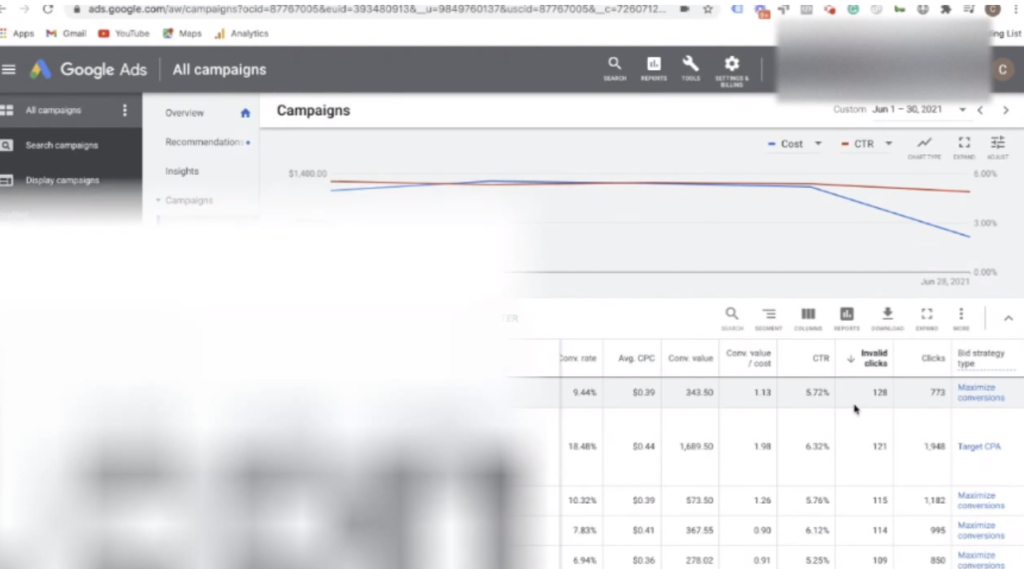
To check if your campaigns and/or ads are getting a lot of bot traffic, open your Google ads and go to your Campaigns. Locate the columns and select Modify Columns for Campaigns.
Search for “invalid” and you’re going to find something here called invalid clicks, select Apply. This will give you an idea of what percentage of clicks going to your ads have been identified by Google as bot clicks.
Fortunately, Google does not charge you for these invalid clicks. They automatically filter those out, which is awesome but it still is not enough. I wish that I could say that this covers all your bases, but unfortunately, you still get a lot of competitors and a lot of other bots that Google just hasn’t identified. Nevertheless, whenever you open your campaigns and see a lot of invalid clicks this means you probably have a problem with click fraud.
How to stop Click Fraud?
All right, how do we actually prevent click fraud from happening? How do we prevent competitors from seeing our ads and from clicking on them and ultimately save money? Now, there are three different solutions. The first two are kind of hacky, more manual process processes and the last one is a fully automated solution.
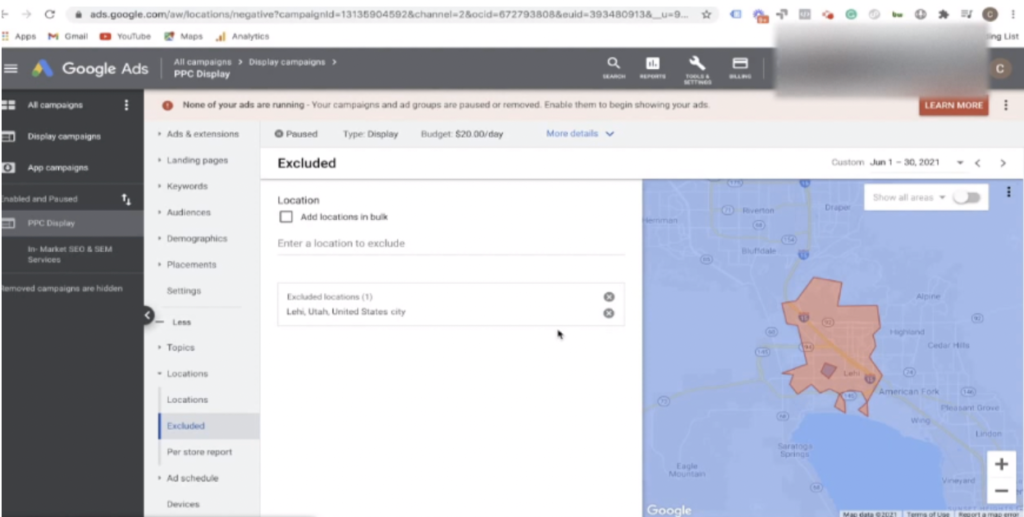
1. Exclude location
Go to your campaigns, from the Google ads drop-down, select the more+ button and click on locations. This will essentially allow you to exclude locations. Ideally, you want to find the city or Zip code where your competitor’s office is located and exclude that location from showing.Excluding a whole city can exclude potential customers from the excluded area. So, if you do know the zip code, I do recommend going that granular. If you don’t know where your competitor is located try Googling what city your competitor’s location is in, that typically works
The major con to excluding location is that you obviously will miss out on potential customers that live in that area. They won’t be able to see your ads. The pro to this hacky process is that your ads will not go to your competitors that live in the excluded area.
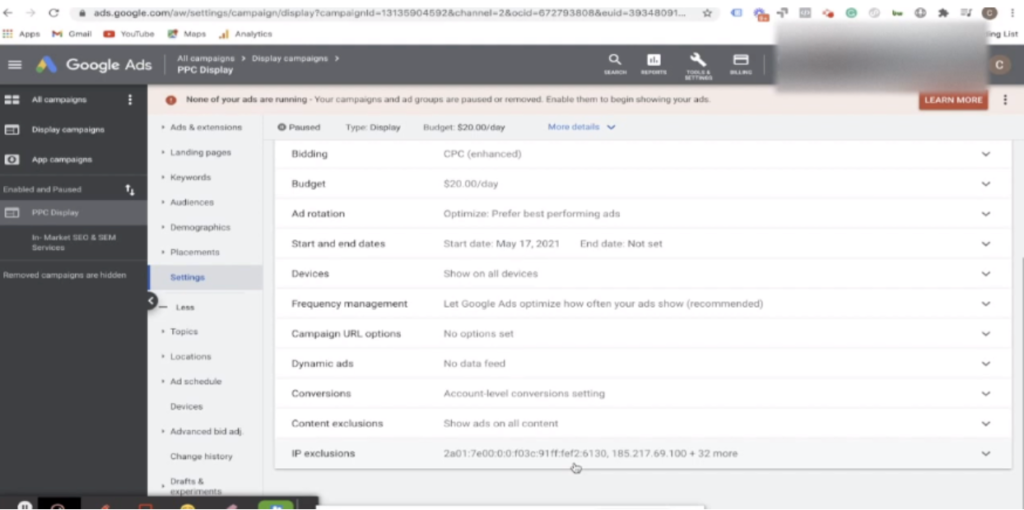
2. IP Exclusion
From your campaign dashboard, go to settings, then additional settings. Here, you can exclude specific IP addresses. If somehow you managed to get your competitors’ IP address, you could include it there. Additionally, if you recognize other IP addresses that are constantly clicking your ads, you could manually add the IP addresses to the exclusion list.
The con of this process is that it is extremely manual and difficult. For example, you could exclude 100 IP addresses in a day then a month later new ones pop up. This is why an automated process is recommended.
3. ClickCease
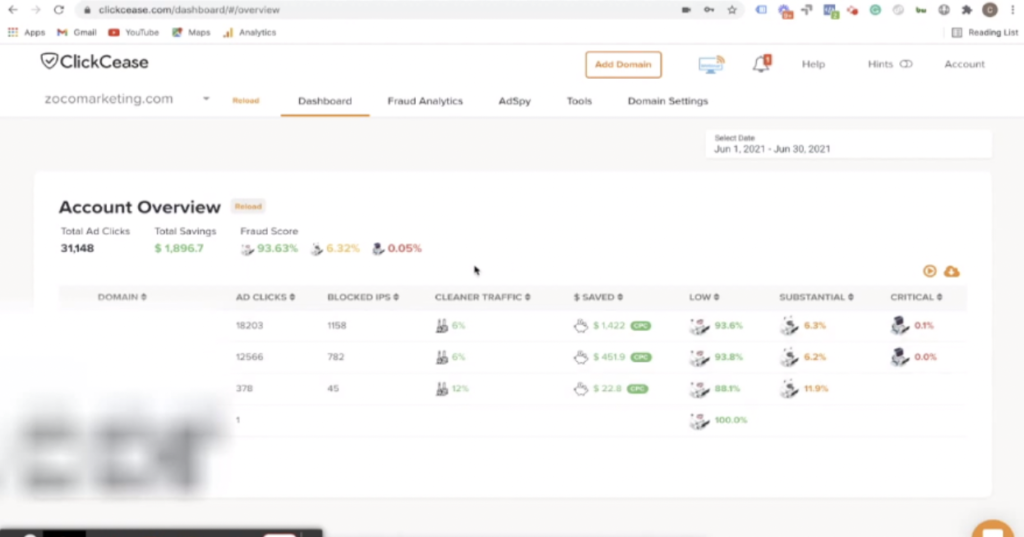
ClickCease is an automated software that helps in preventing click fraud. I use it one my own accounts and it has personally saved me thousands of dollars. It is very simple to set up and is the easiest way to prevent click fraud. ClickCease allows you to operate several accounts and gives you a breakdown of each account showing you money saved that would have gone to your competitors or bots. You could use this saving towards real potential customers that you want to see your ads. Below you can see a screenshot of how much ClickCease has saved me this month alone (Over $1800).
Clicking into the actual domain gives you even more data about what’s going on with your ads. You’ll notice that it shows you how many IP addresses are automatically blocked-something you don’t have to go through manually as demonstrated in the previous solution.
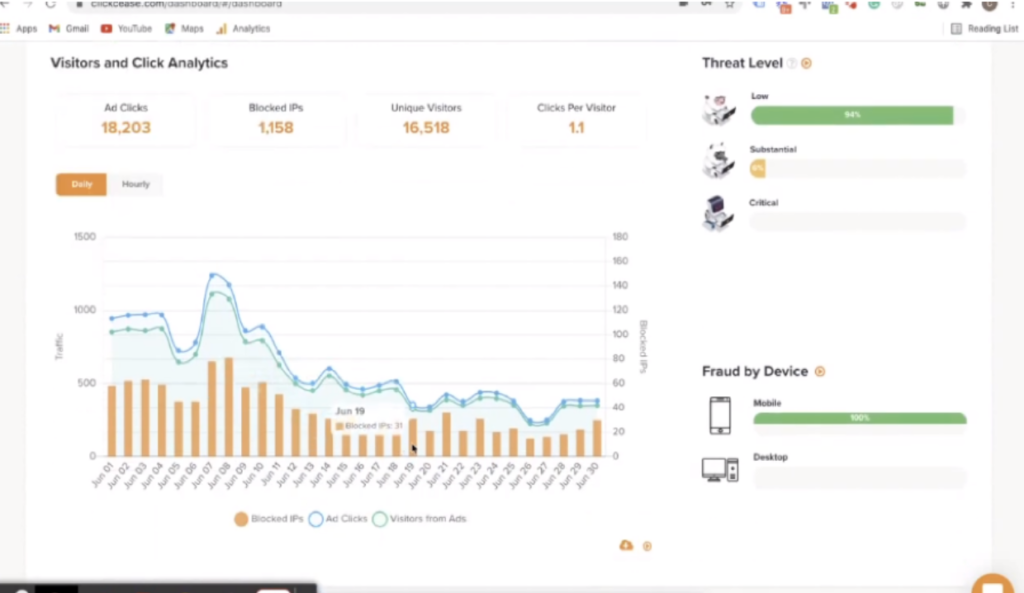
If you scroll down, it shows the campaigns that are bringing in the fraudulent clicks and also shows the fraud type like over threshold, fraudulent devices, or high bounce rates. This will give you an idea as to why such clicks have been blocked.
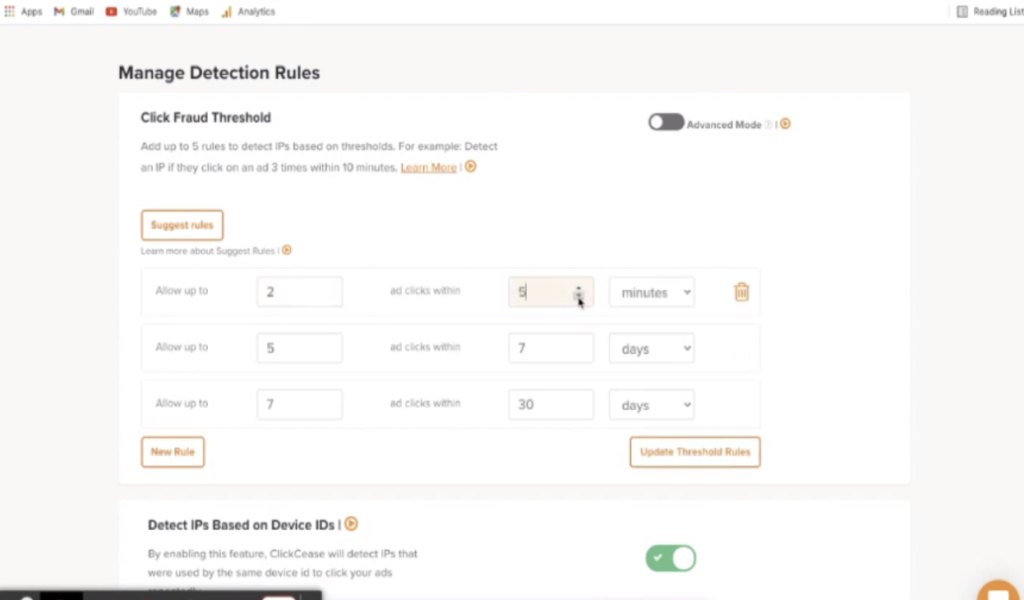
From your domain settings, you can manage detection rules that would be ideal for you. You could set the number of clicks per minute. These customizations can limit the number of clicks from your competitors.
Typically, I like to leave it in the default settings. Every once in a while, ClickCease is smart enough to send a recommendation whenever it notices an abnormality in your ads and recommends adjustments. This is proactive and saves you as much money as possible.
You can get ClickCease by clicking this link here, Upon setting up your domain, you will be given a code that would walk you through the three-minute process of setting up your accounts.
Hopefully, this will save you a lot of money in the click fraud and helps answer those questions or concerns that you may have.