fbpx
How To Get Your First 1000 Followers On Pinterest

How To Get Your First 1000 Followers On Pinterest

If you are looking for how to get followers on Pinterest or grow your current following on Pinterest, regardless of your account size, you’ve come to the right place. In this blog post, I will guide you through the process used to get more followers on your Pinterest account by sharing actionable insights and strategies that have helped me and countless others succeed on the platform.


By the end of this post, you will understand the importance of studying your niche, learning effective creative techniques, and discovering a powerful new feature within Pinterest.


Study The Niche Of Your Followers On Pinterest

This is the first step to get more followers on Pinterest. Understanding your niche is crucial to the development of your Pinterest. Here are two ways to study your niche:


Using Pinterest Analyzers


Use a tool like Pin Inspector, a paid app, and connect it to your Pinterest account.Pin inspector


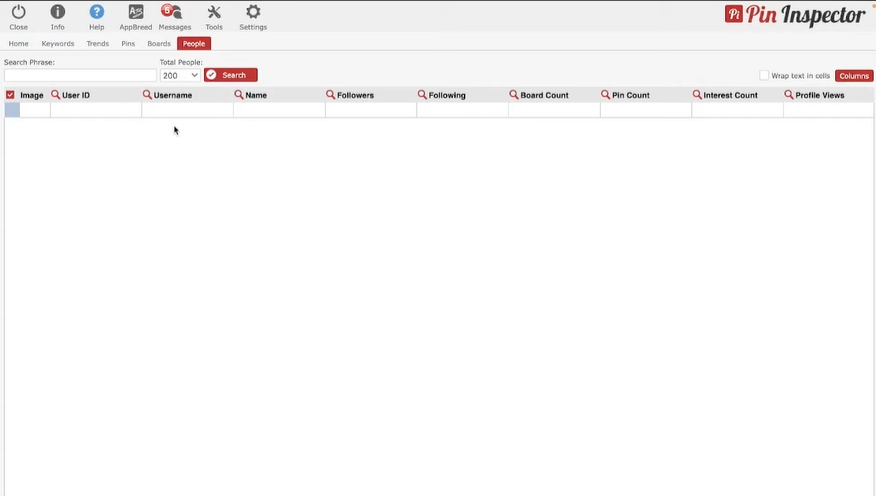
Enter your niche keywords in the search bar, e.g., “chicken recipes.”Pin Inspector sample


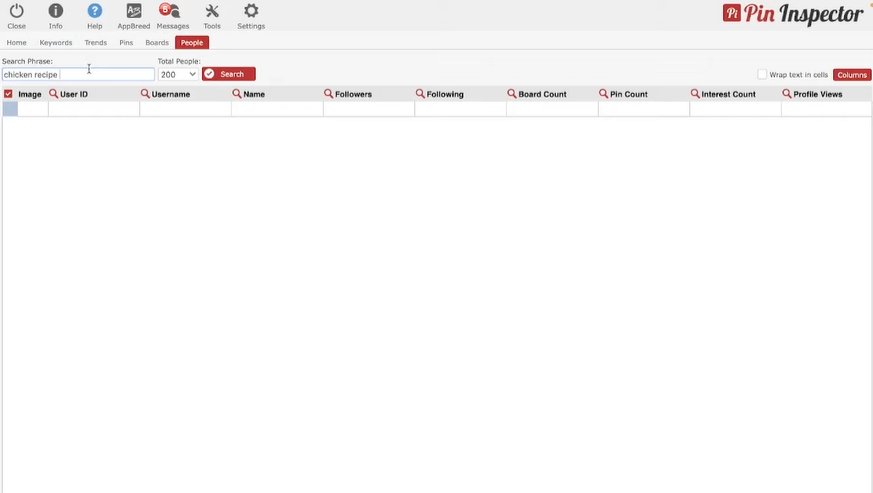
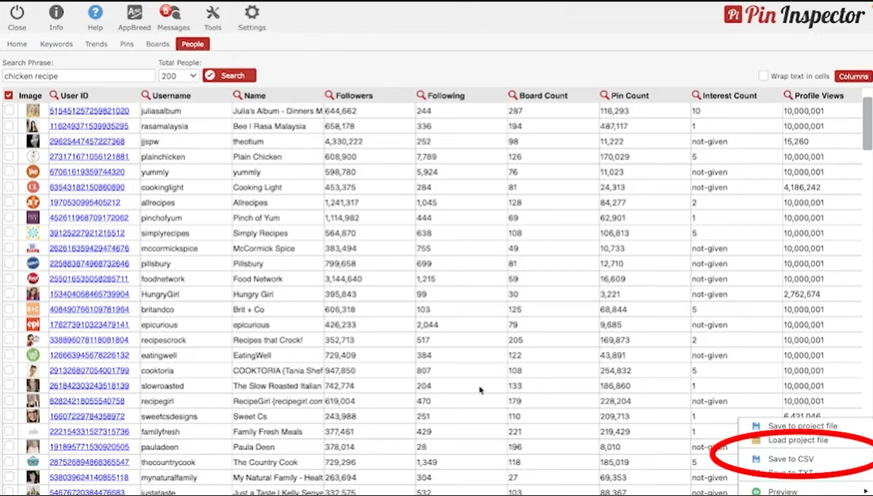
Export the data from your Pinterest to a CSV file and copy it to a Google sheet.

Pin Inspector To CSV


Calculate the pin-to-follow ratio by dividing the follower count by the total pin count.Pin to Follow Ratio


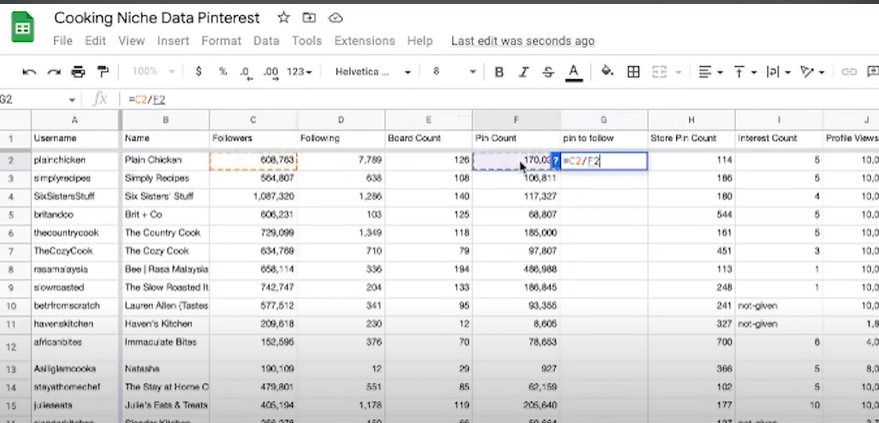
Determine the average pin-to-follow ratio for your niche.

Average pin to follow ratio

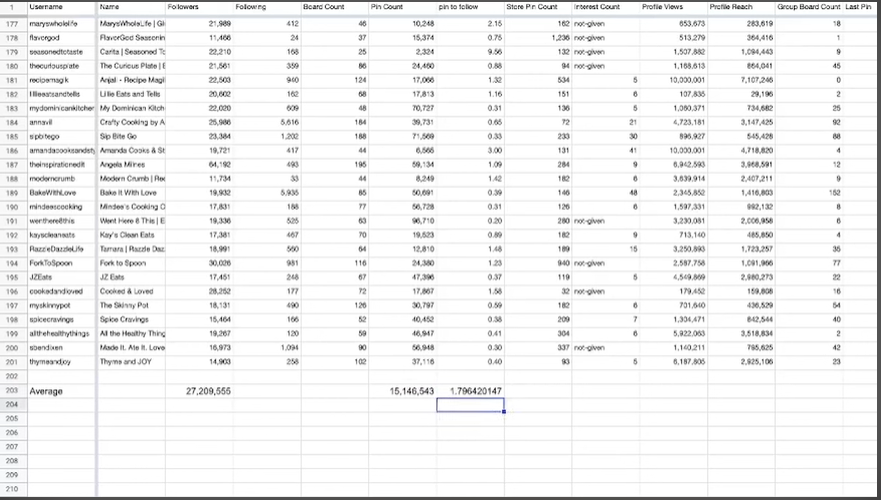
Identify the profiles with the highest pin-to-follow ratio. These people post the least amount of content to get the most followers on Pinterest as they are likely to have successful pinning strategies.

Analyze these top profiles to understand what types of creative formats and fonts resonate with your niche’s users.


Manual Research

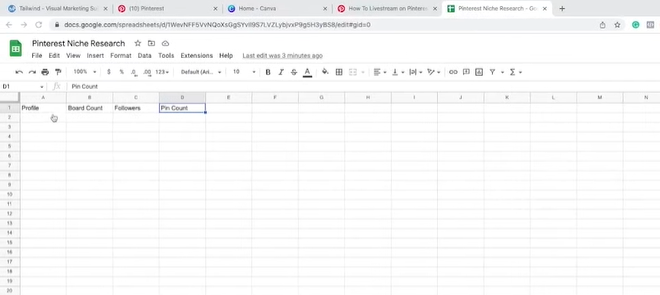
Create a Google sheet with columns for profile, board count, followers, and pin count.

Pinterest Manual Research Blueprint

Manually search for profiles within your niche on Pinterest.

Identify profiles with follower counts similar to your target or current following.

Copy the profile URL and relevant information (board count, followers, pin count) into the Google sheet.

Manual Research Information

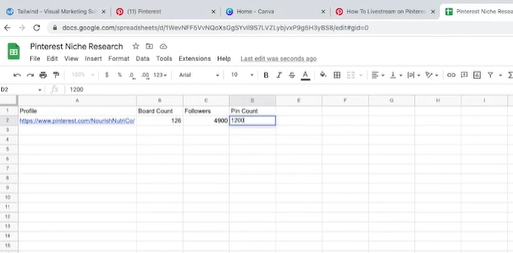
Calculate the pin-to-follow ratio for each profile by dividing the follower count by the total pin count.

Use this information to understand the average pin-to-follow ratio for your niche.

Focus on profiles with high pin-to-follow ratios and analyze their pinning strategies.


Note: This method takes a considerable amount of time. Hence, using only 5-10 people for your analysis is advisable.


Best Practices for Creating Engaging Pins For Your Followers On Pinterest

We will examine the art and science of creating intriguing pins that draw viewers in and drive traffic which helps you get more followers on Pinterest. We’ll go through the key components of attractive pins, give tips on creating aesthetically appealing images, and show you how to maximize the visibility of your pins.


Pin Types


Hack-type videos

Hack videos

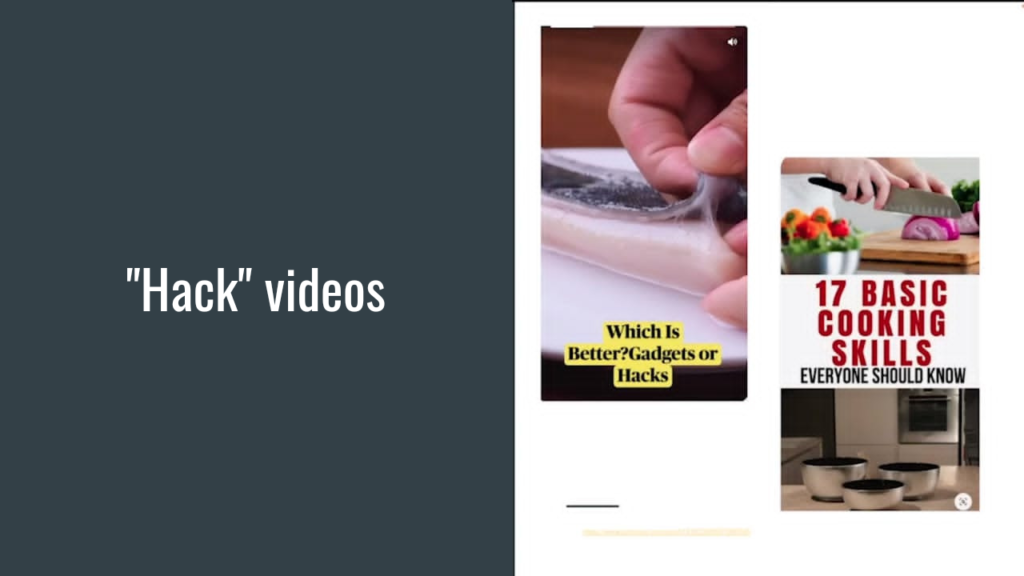
These short, visually appealing videos highlight clever life hacks and suggestions that appeal to users looking for innovative and practical solutions. These videos have grown in popularity and effectiveness as an efficient approach to engaging viewers, sparking their curiosity, and providing them with practical information they can apply in their lives.


This is accomplished by combining compelling graphics, brief explanations, and a dash of creativity. The potential of hack-type videos can improve your content strategy and capture viewers looking for useful, time-saving solutions.


Steps or countdown videos

Steps or Countdown Videos

Steps or countdown videos on Pinterest have grown in popularity as a template for presenting information in an interesting and aesthetically pleasing way. These videos simplify difficult procedures or ideas into a list of steps to follow or a countdown, making it simple for viewers to follow along and quickly understand the main principles.


Steps or countdown videos have developed into an efficient tool for content creators and brands to grab viewers’ attention and educate them while providing them an enjoyable and educational viewing experience.


Utilize arrows

Arrows Videos

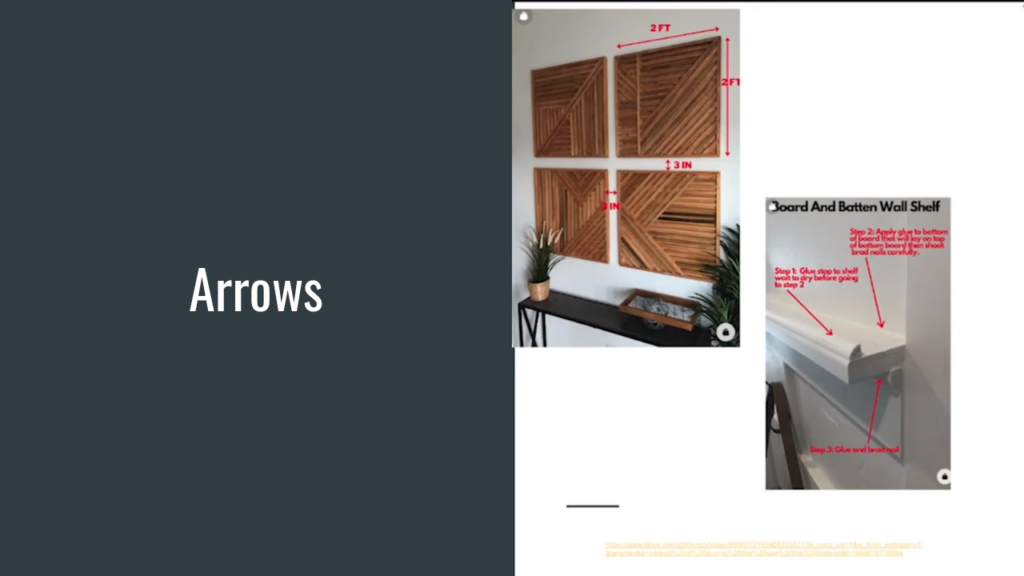
Using arrows in your Pinterest visuals can be a game-changer when grabbing and directing users’ attention. These straightforward yet effective visual cues act as signposts, drawing users’ attention to crucial information, distinguishing characteristics, or calls to action within your pins. By strategically implementing arrows, you can build a direct visual path that guides people through your material. 


Arrows can be added to your pins in a variety of ways. For instance, you can use arrows to draw attention to important photos or views of products. This grabs the interest of viewers and entices them to keep exploring. Additionally, arrows can point towards text elements, emphasizing key messages or descriptions you want to convey.


Infographics

Infographics

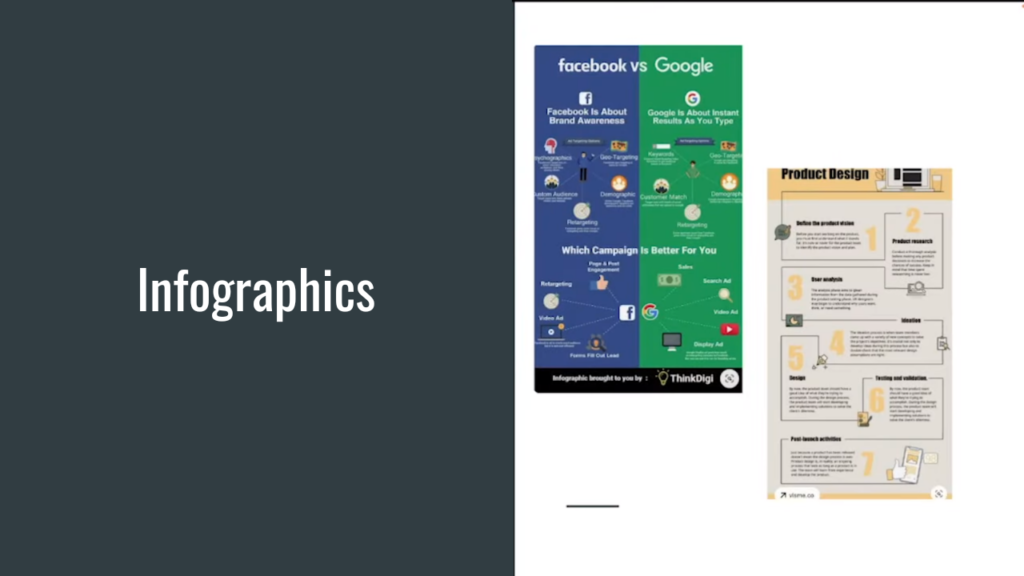
On Pinterest, infographics are a powerful and aesthetically striking way to present complex information in a condensed and easily understandable format. These visual representations combine text, icons, charts, and illustrations to present data, statistics, or step-by-step processes visually appealing and engagingly. 


You can quickly and efficiently grab people’s attention and convey important information with infographics in your Pinterest post. You can use infographics to highlight the most crucial details, deconstruct material into visually appealing portions, and clarify complicated topics. 


Infographics stand out among the vast content on Pinterest with their aesthetically pleasing layouts and brilliant color schemes, making them highly shareable and raising the possibility of user engagement.


Include captions or text

Captions or Text for Followers On Pinterest

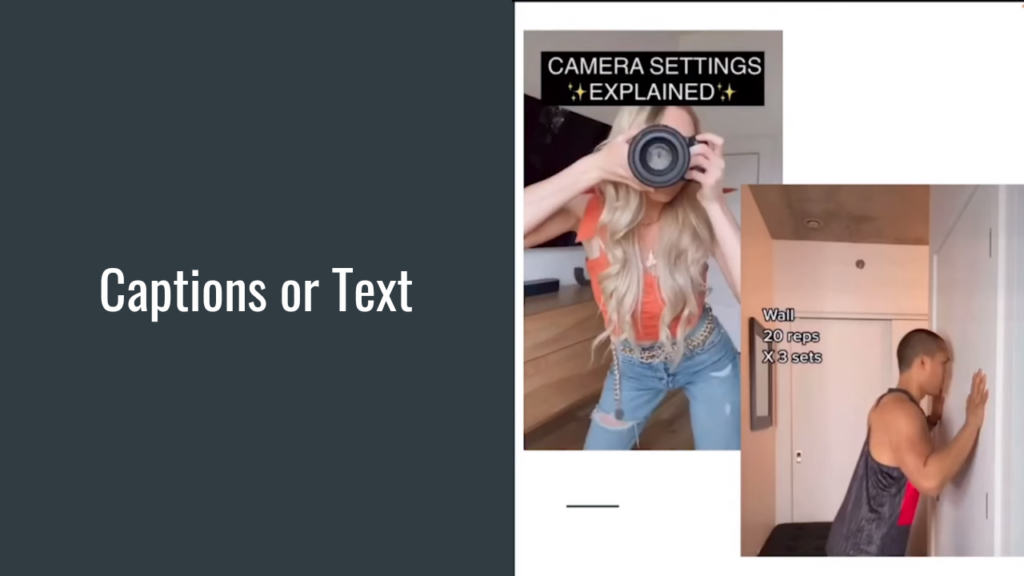
Text and captions act as strong hooks to draw viewers and encourage further exploration. They can emphasize important qualities, advantages, or special selling aspects of your goods or services.


Captions can be used to compel viewers to take action or visit your website, and they can also pose thought-provoking questions, spark curiosity, or convey a feeling of urgency. Keep captions and phrases brief, understandable, and simple to read when including them.


CTAs (Call to Action)

Feel free to include a CTA at the conclusion of your pins to encourage users to follow you for more material in your niche. CTAs should be used barely and strategically.


AB Testing

Experiment with different variations of your pins to see which ones perform best. Use tools like Canva to create multiple versions and track their performance.

Remember, these techniques may vary depending on your niche, so it’s essential to study profiles that are famous on Pinterest to discover what works best.


Track The Growth Of Your Followers On Pinterest

To check your growth on Pinterest, you’ll need to use a tool like Tailwind, which offers services that help you track your progress starting from the day you sign up with them. They have both paid and free versions. However, I use the paid version because it gives me access to many other tools that I would need to track my growth. 


Pinterest Live

Pinterest Live

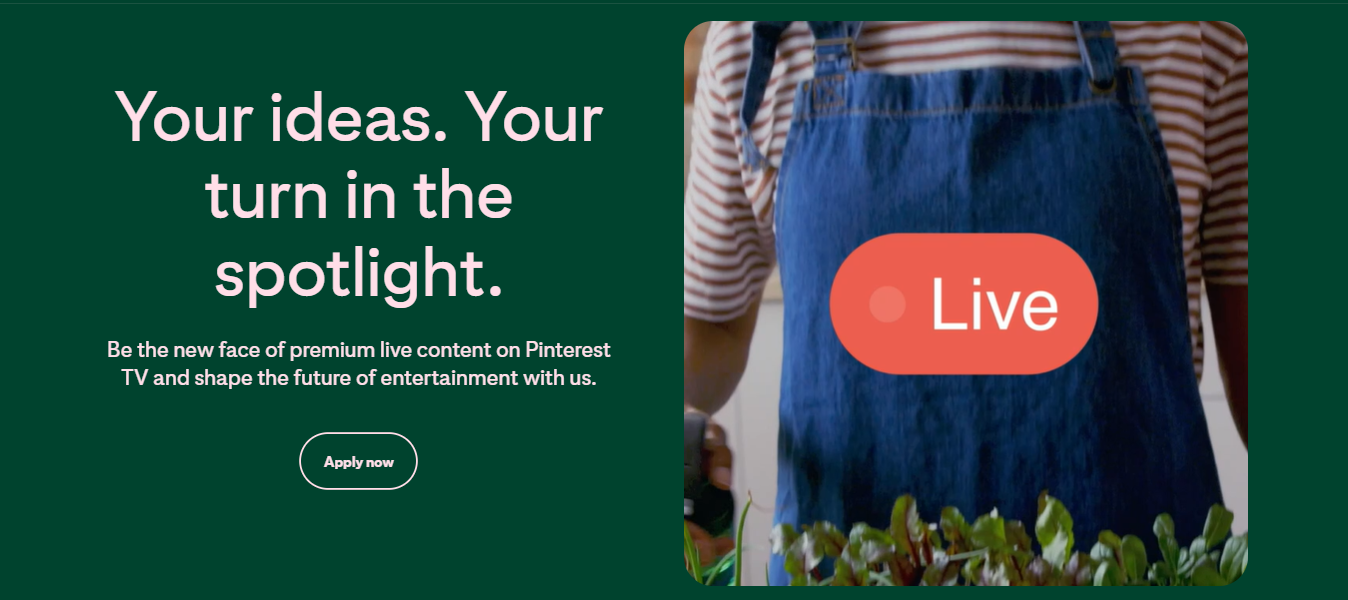
Pinterest’s new Go Live Beta feature has the potential to be a game-changer for content creators looking to grow their accounts. Hosting live episodes on the Pinterest TV live stream platform can attract a larger audience and experience strong growth. The feature focuses on one live episode at a time, meaning that when people tune in, all eyes are on you. 


This heightened visibility can increase engagement, more followers, and potential monetization options. Pinterest accepts applications from all creators, so take advantage of this opportunity to apply and exponentially grow your Pinterest account. Take advantage of the chance to be an early adopter and reap the benefits of the Go Live Beta feature.


Conclusion

Growing your Pinterest following requires strategic planning, creative techniques, and continuous testing. By studying your niche, analyzing famous profiles, and implementing effective pinning strategies, you can increase your chances of reaching your first 1000 followers on Pinterest. Remember, followers are not the sole measure of success, but they can contribute to other important metrics like sales, clicks, and impressions.

Google Analytics 4 E-commerce Tracking for Shopify

Google Analytics 4 E-commerce Tracking for Shopify

Google Analytics 4 E-commerce Tracking for Shopify


Amazing news for Shopify users! Shopify has finally come up with native integration to Google Analytics 4. If you’re looking to learn the fastest and easiest way to get Google Analytics 4 E-commerce tracking for your Shopify store, this article is the game-changer you need! This integration allows you to monitor crucial metrics such as add to cart, added payment info, and ultimately, the revenue inside your Google Analytics 4 account. In this article, we will walk you through this easy setup process, including debugging and troubleshooting to ensure that it is working as perfectly as you expect it to. Let’s dive right in!


Getting Started with Shopify Google Analytics 4 Integration

There are a couple of prerequisites you need to ensure seamless integration. First, you need to have admin access to both your Shopify account as well as your Google Analytics 4 account in order for this connection to work.

Additionally, if you had previously set up Google Analytics 4 through any alternative ways in the past, either by putting it directly into your theme.liquid or through Google Tag Manager, you have to delete that code before proceeding.

To do that, follow the steps below:

  1. Log into your Google Analytics account and under the Admin tab, click on ‘Data Streams’.
  2. Click on the little arrow to the right of your data stream and a popup with your data stream details will show up.
  3. Scroll down to ‘View Tag Instructions’ under the Google Tag section and click on it to view the Installation Instructions.
  4. Copy the code and proceed to your Shopify store to confirm if it is hard-coded into your theme.liquid for deletion.

Install your Google Tag

  1. In your Shopify Account, under the sales channels, click on the ‘Online Store’ tab and on ‘Themes’.
  2. Click on the three dots in your current theme settings and click on ‘Edit Code’ as shown below.

Shopify Themes


  1. You will be directed to your theme.liquid. Press Command + F on your keyboard and paste the copied code to run a search to make sure that the code does not already exist.

Shopify theme.liquid

Most people probably do not have this already set up. However, if you do, you can proceed to delete the code to ensure that you’re not double-tracking inside your Google Analytics 4.

  1. Similarly, you will need to pause your ECOM event and the GA4 configuration inside your Google Tag Manager if you previously set up your Google Tag Manager before the native integration. Simply go to the ‘Tags’ Tab in your Tag Manager, select both tags and click on the little pause icon before running this setup.

Google Tag Manager

However, if you have never installed Google Analytics 4 on your website, nor deployed it through Google Tag Manager, then you are ready to proceed.


Setting up Google Analytics 4 E-commerce tracking for Shopify

  1. To begin your setup, go to your Shopify account, navigate to the ‘Online Store’ tab and select ‘Preferences’.


2. Scroll down to the Google Analytics section and click on ‘Manage Pixel Here’, if you use the Google Channel App. If you do not already have the Google Channel App, you will be prompted to set it up. You will then be redirected to the following view:

3. Once on this setup page, ensure that the email associated with the Google channel app also has admin access to your Google Analytics 4 account to enable the connection. If you have access to multiple Google Analytics 4 accounts, choose the desired account from the dropdown and click on the ‘Connect’ button.


4. You will be notified once your Google Analytics 4 setup is successful as shown below.


That’s it! It is as easy as that. You have successfully established the connection between your Shopify store and Google Analytics 4, enabling e-commerce tracking effortlessly. Your Google Analytics 4 account will now track revenue, add to cart, and all other metrics.


Troubleshooting Shopify Google Analytics 4 E-commerce Tracking

To ensure that the integration is working correctly for your Google Analytics 4 account, it is important to go through a quick troubleshooting process.

  1. Open the Admin section of your Google Analytics Account and click on the ‘DebugView’ tab in the ‘Property’ Column to initiate the verification process.


Google Analytics 4 DebugView


  1. Install the “Google Analytics Debugger” Chrome extension if you haven’t already.

Google Analytics 4 Debugger


  1. Visit your Shopify website and ensure that the GA Debug extension is ON to allow it to access your site.


  1. Return to Google Analytics and observe the debug mode in action, capturing page views.

Page Views on Google Analytics 4

  1. To fully test the e-commerce tracking, complete a checkout process and test a payment. Go to your Shopify website and add one of your products to cart.
  2. Monitor Google Analytics for various events, such as ‘user engagement’, ‘page view’, ‘view item’, and ‘add to cart’. The events will reflect automatically just from the couple of button clicks that you performed in Shopify.

Google Analytics 4 data


  1. It gets better! Go back to your Shopify website, check out, and pay for the product to go through the entire payment process.
  2. Once the payment is processed and confirmed, go back to Google Analytics 4, and you will notice that a purchase event has fired through. Click on the ‘Purchase’ event to view various information such as the campaign, the currency, medium, value, tax, and shipping, among others.

Google Analytics 4 Purchase Data


  1. Super easy! You have verified the successful implementation of Google Analytics 4 E-Commerce Tracking for your Shopify account. Every piece of information will be passed through as it should.
  2. If you’re simply testing purchases in your Shopify store, go to the live store, click on the ‘Orders’ tab, select the specific order and hit the ‘Refund’ button. That way, you won’t have to suspend money when you’re going through these tests.


Unleash the Power of Data in Google Analytics 4 for Shopify

Now that you have seamlessly integrated Google Analytics 4 e-commerce tracking with your Shopify store, a wealth of insights awaits you. With the purchase data already loaded, you can go over to the Reports tab and the purchases will reflect in those reports. You can explore valuable data such as the Total Revenue, Users, and Average Engagement Time.


Google Analytics 4 e-commerce tracking with your Shopify store


Under the ‘Acquisition’ section, you can uncover your specific revenue sources. These insights can help you discover the effectiveness of your marketing campaigns, identify the most profitable customer acquisition channels, and unlock a world of growth opportunities for your e-commerce business.

Google Analytics 4 Acquisition


Alternative Setup for Simprosys Users

For those using Simprosys instead of the Google Channel App, you can still set up Google Analytics 4 E-Commerce Tracking. It will appear in the ‘Tracking Tags’ dropdown as an option labelled ‘Google Analytics 4 Tracking Event’. Click on it and follow all the provided steps in this article to complete the setup process.


Google Analytics 4 Simprosys vs the Google Channel App

Read: How To Connect Google Search Console To Google Analytics


What’s Next?

Now that you have revenue tracking in your Google Analytics, the next step is to set up your Google Shopping Ads Campaigns and start running ads within it.

If you are interested in learning how to do that, I recommend checking out our Full Guide on Google Shopping Ads.