Are you considering running TikTok ads for lead generation? If your answer to this question is yes, it’s vital to understand how to add the TikTok pixel to your website and set up lead firing events. This blog will walk you through these steps in detail, so buckle up and get ready to learn all you need to know about this.
Importance of Setting Up the TikTok Pixel and Lead Events
Before diving into the “how,” let’s first address the “why.” Essentially, setting up the TikTok pixel and lead events is essential for four main reasons:
- Understanding Cost per Lead: With the TikTok pixel, determining your actual cost per lead on TikTok becomes easier.
- Targeting the Right Users: The data obtained from the pixel helps create lookalike audiences, which makes your targeting more efficient.
- Campaign Optimization: TikTok Pixel data helps you refine your campaigns more effectively.
- Determining Lead Generation Efficiency: You can track which ads and campaigns generate leads and their associated costs.
Having established why you need to set up the TikTok pixel, let’s delve into how you can do this.
Setting Up The TikTok Pixel
Here, we’ll break down the process into two straightforward steps:
Add the Pixel Code to Your Website
- First things first, you need to create a TikTok Ads account.
- Once inside, head over to Tools, then Events, and create your pixel.
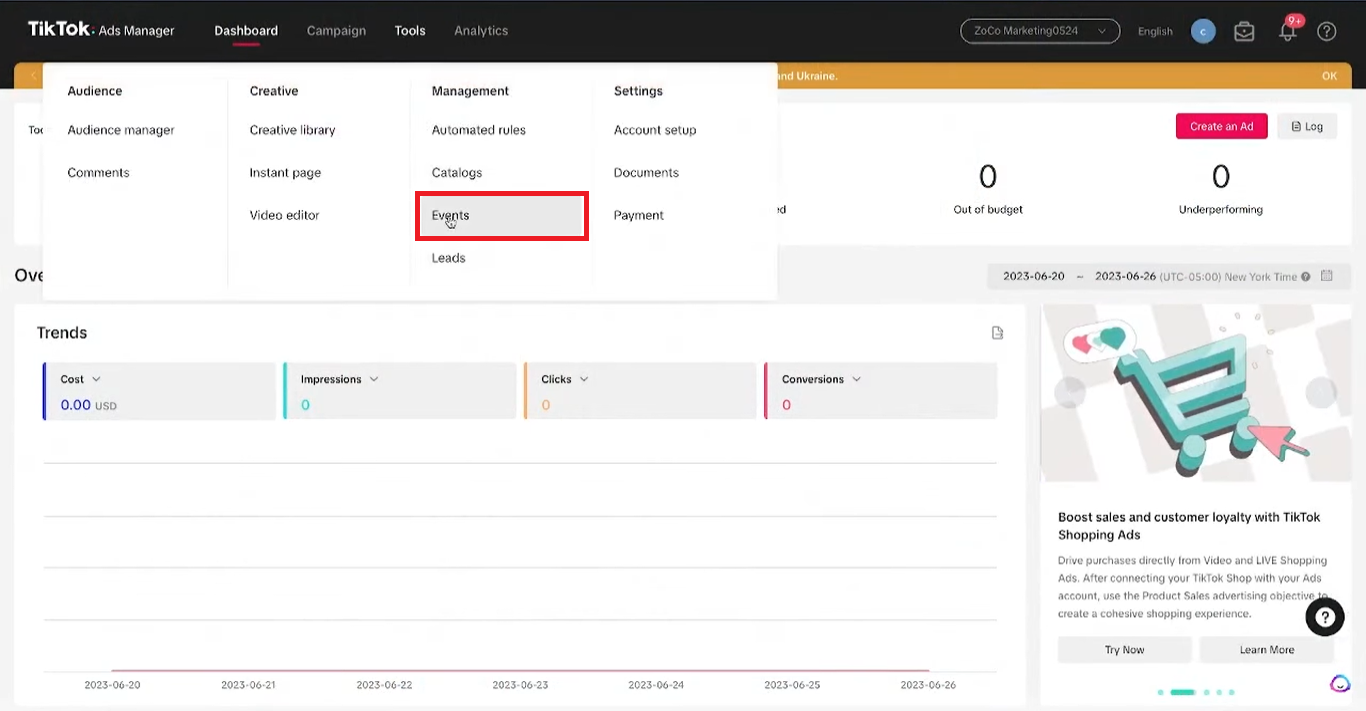
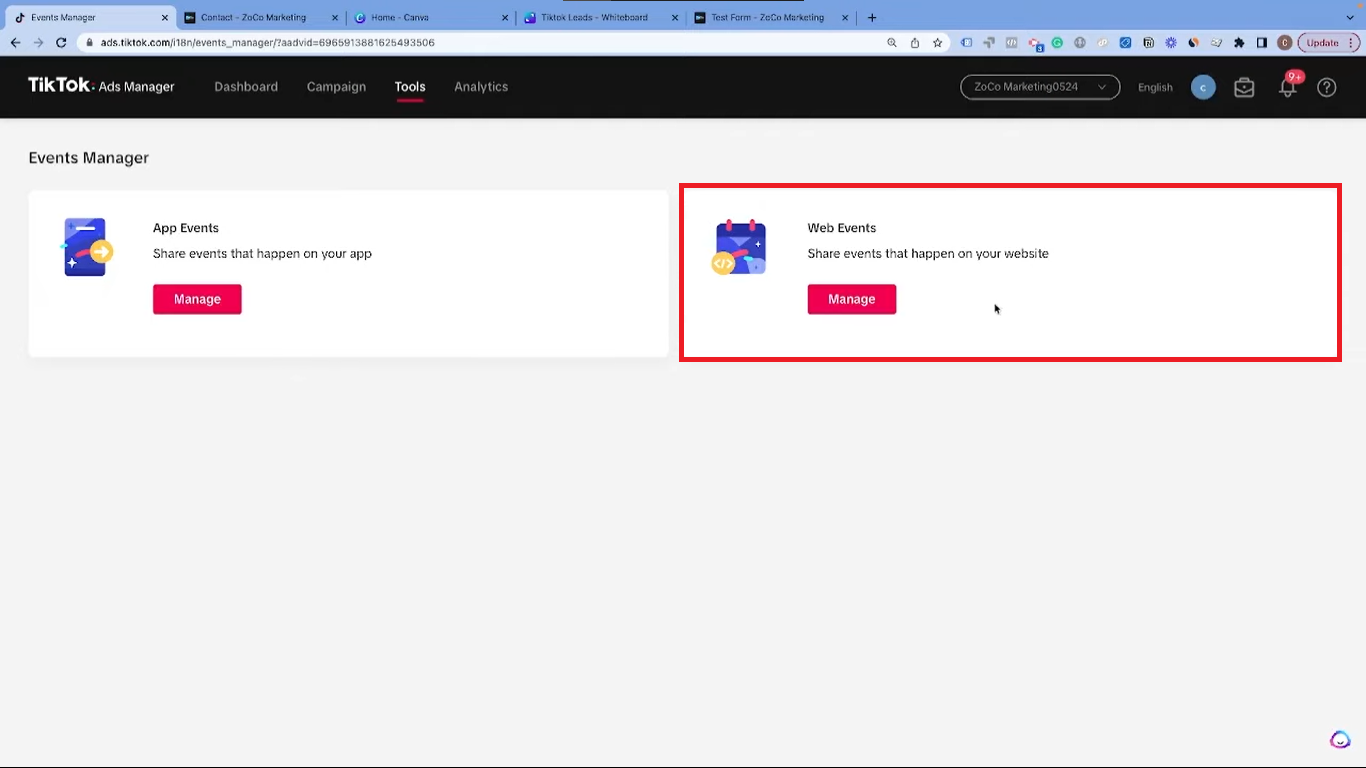
- Select web events, as that is what most of us will deal with.
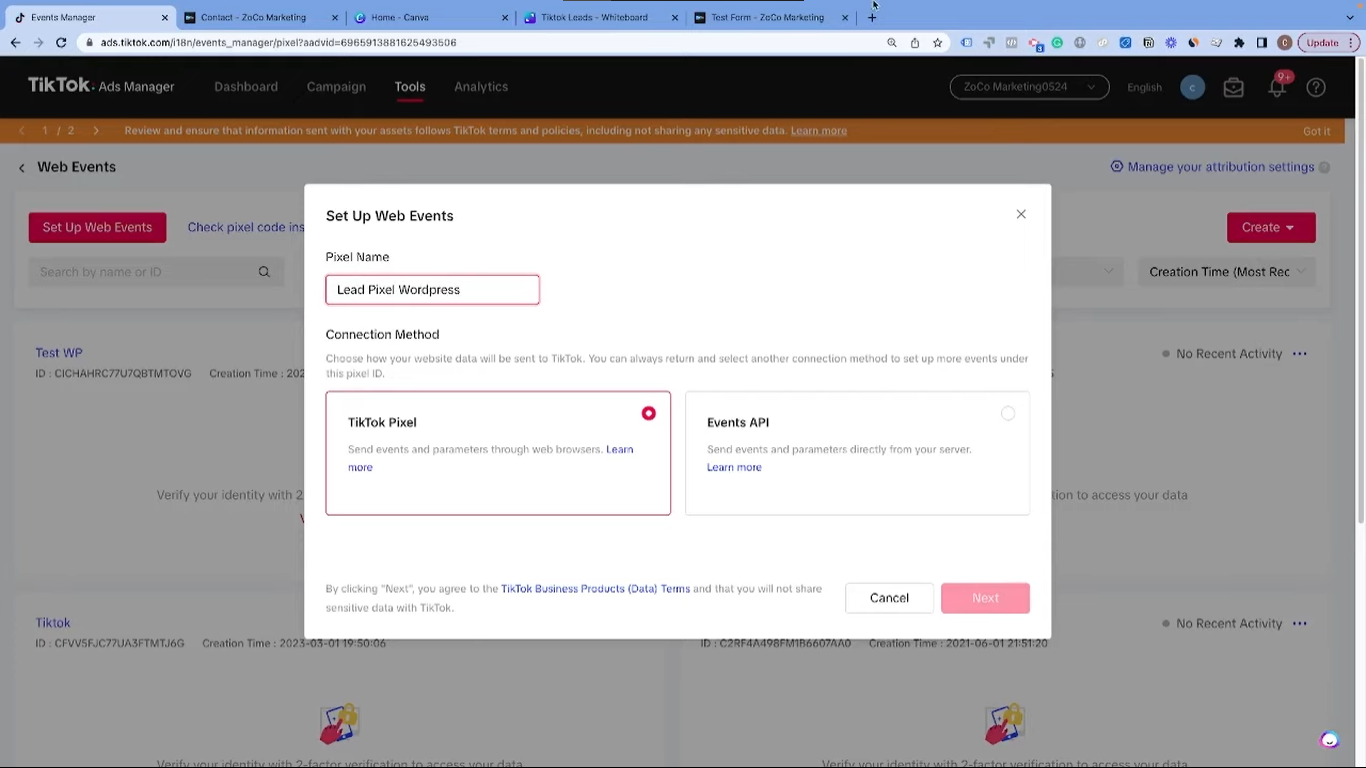
- Name your pixel appropriately and choose your website platform (in this guide, we’ll use WordPress as an example).
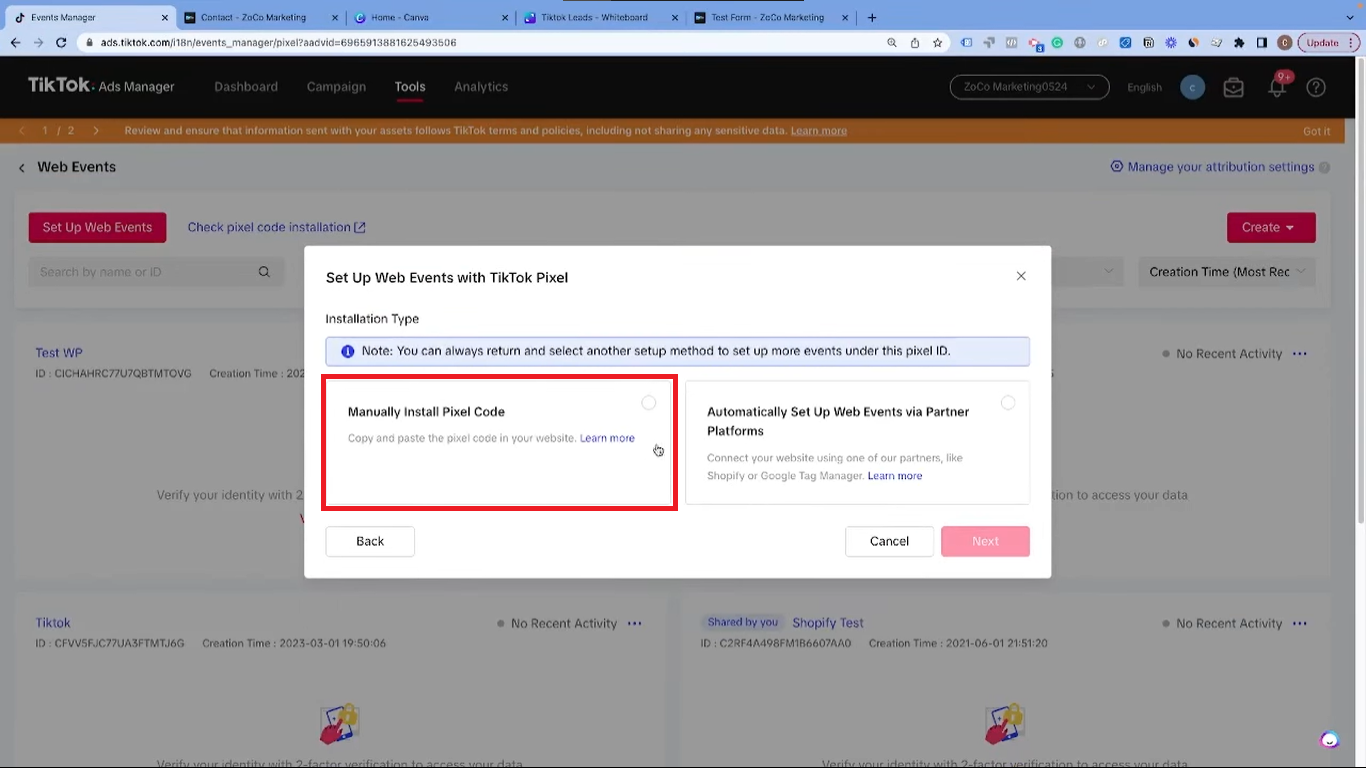
- You have two choices for installation; either install the code manually or set it up automatically with web partners. For most lead pixel setups, it is better to choose manual installation over the automatic installation with web partners.
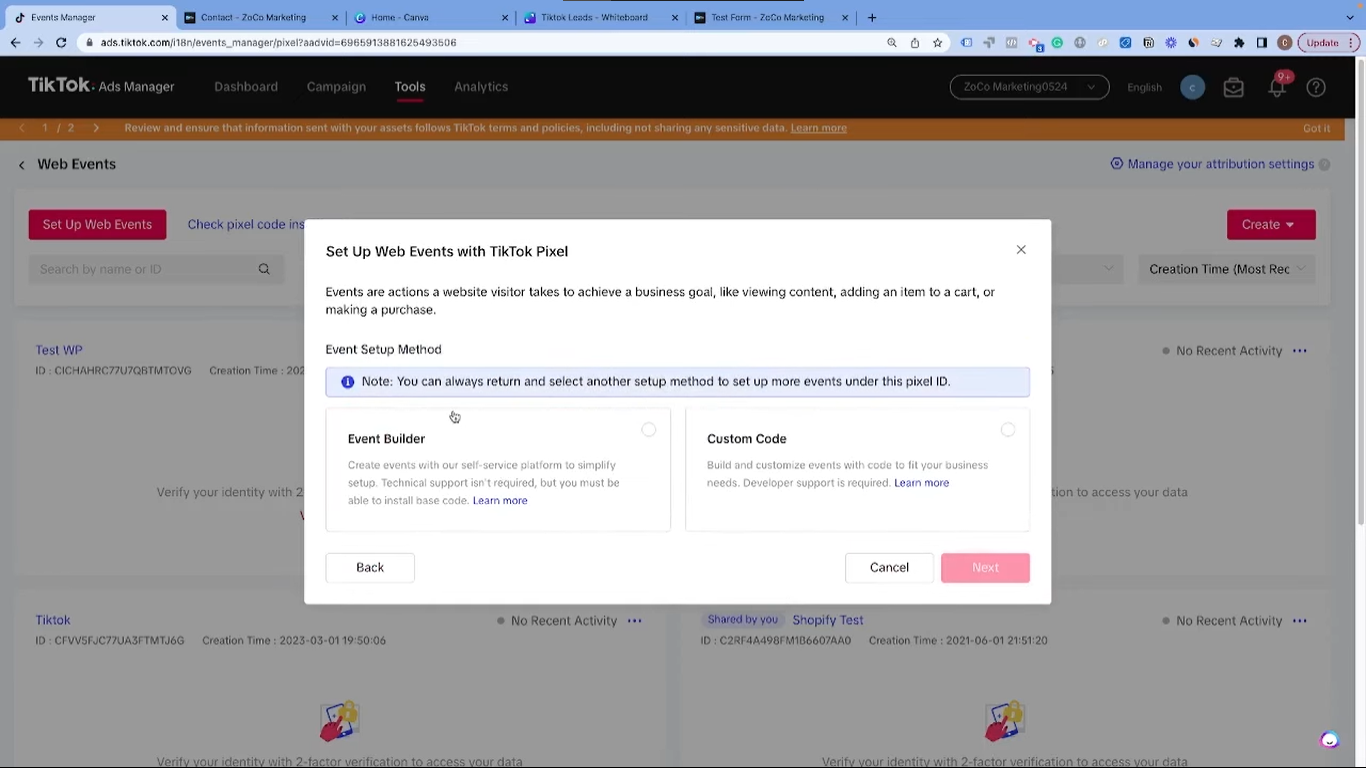
- After selecting manual setup, choose the event builder option unless you have more complex systems that need developer support.
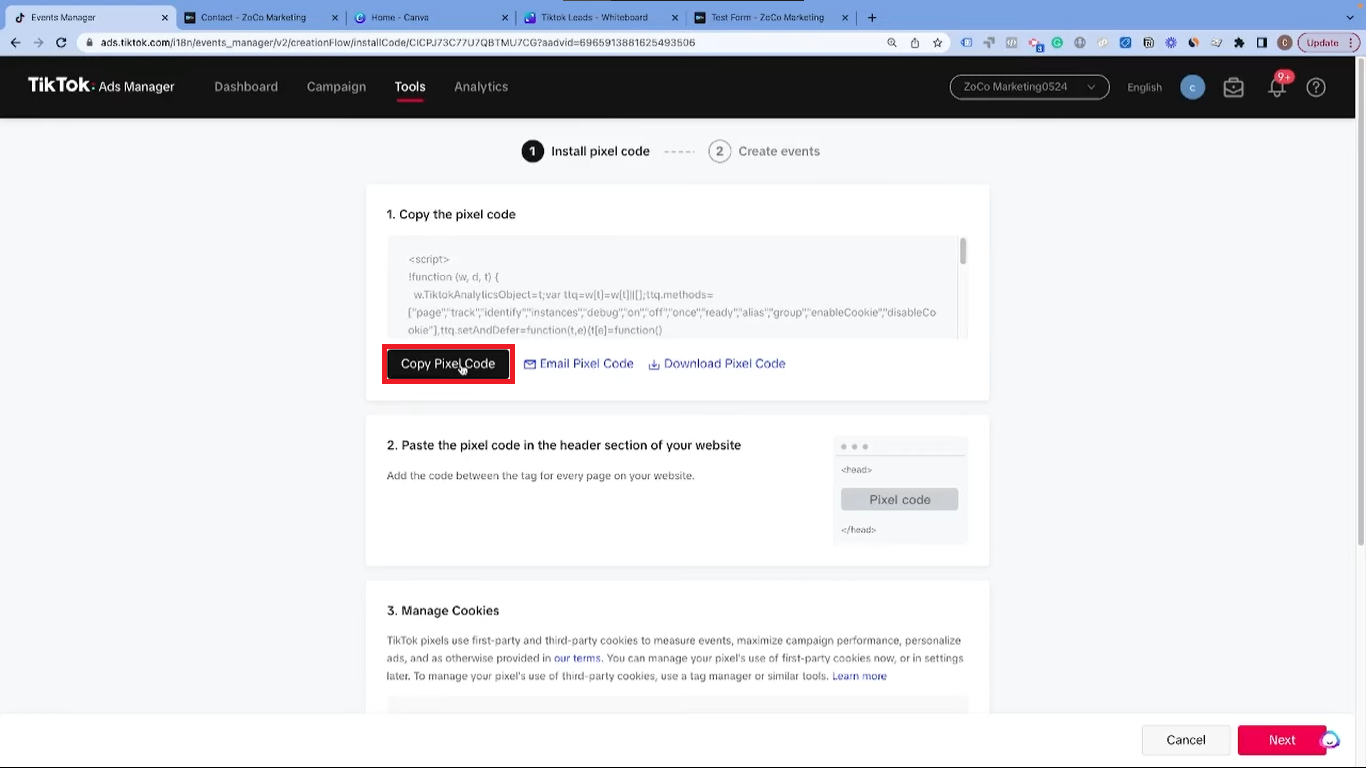
- Copy the pixel code provided.
Install the Code onto Your Website
To add the code to your WordPress website:
- Navigate to the plugins section of the website.
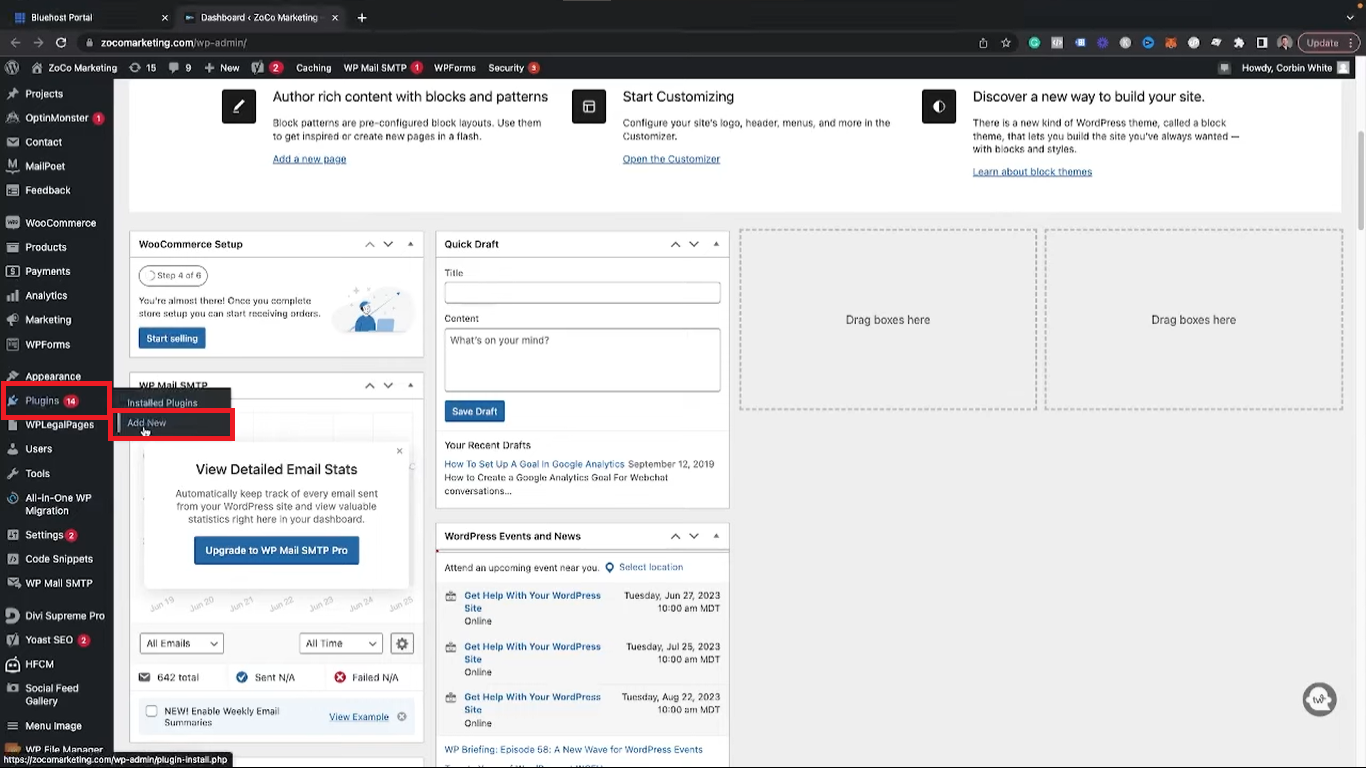
- Search for the “Headers and Footers” plugin.
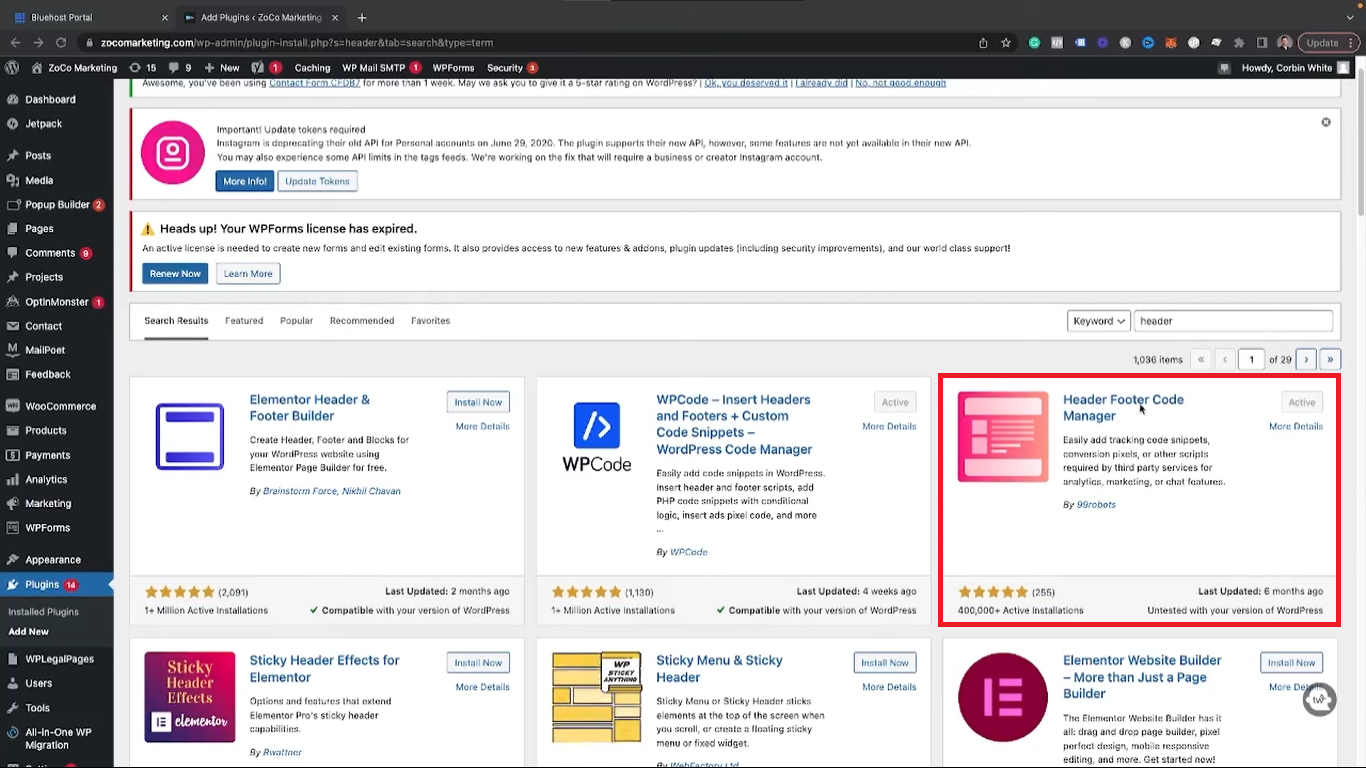
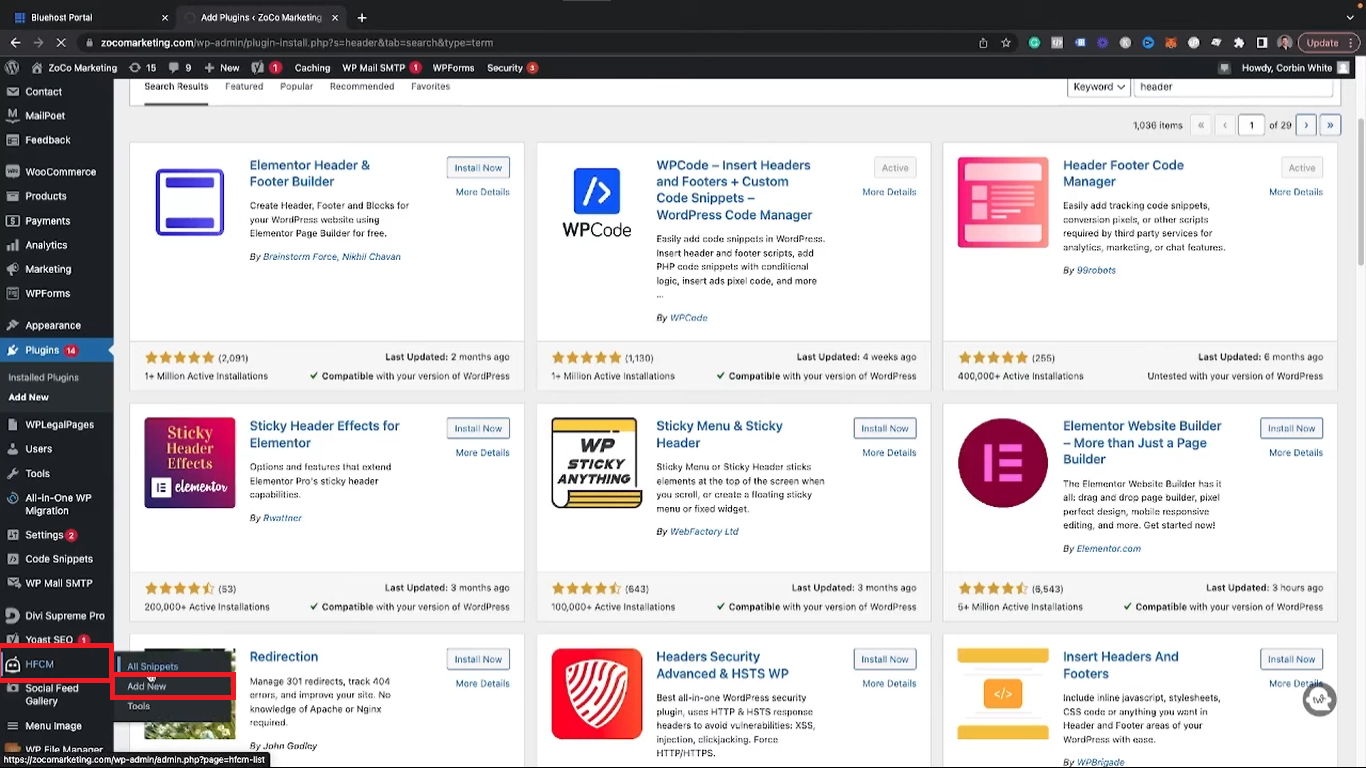
- Once installed, go to the “Headers, Footers, Code Manager” (HFCM) section and click on “Add New”.
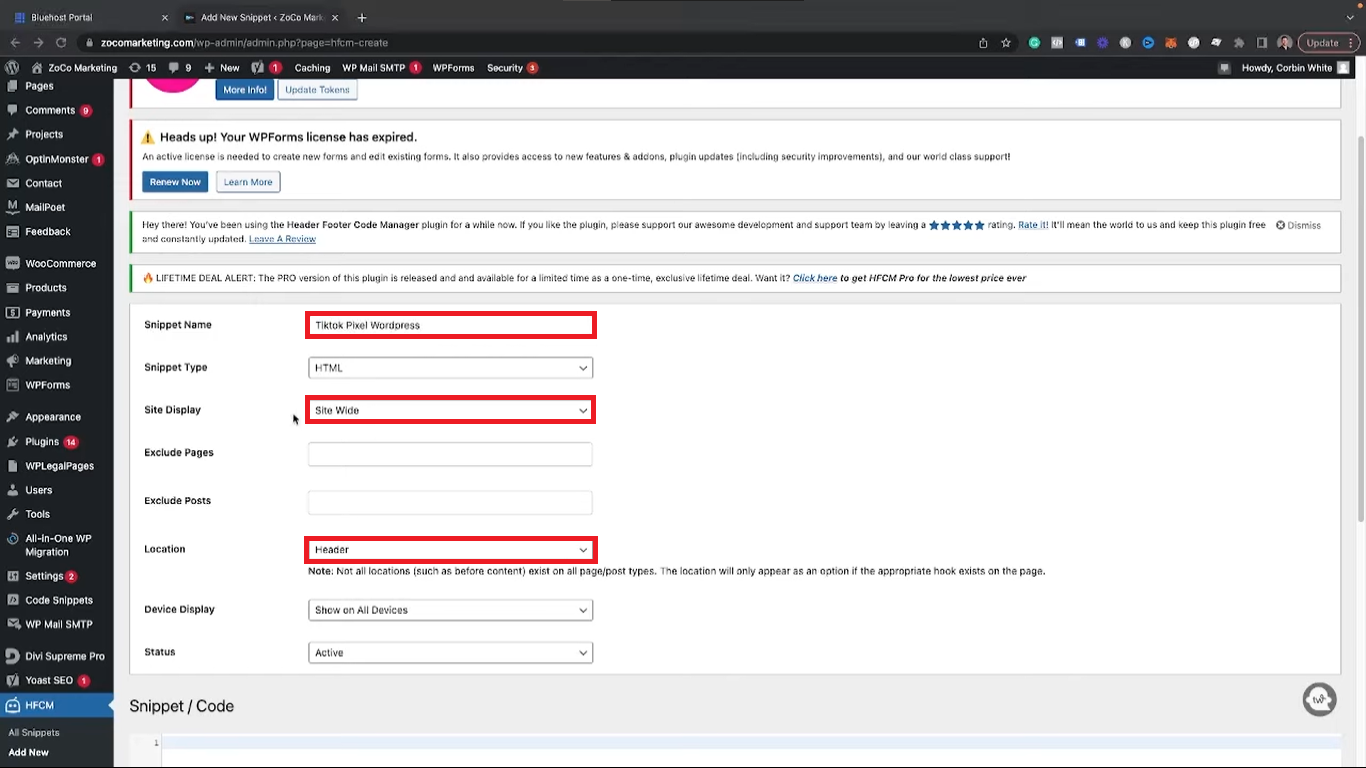
- Name your snippet (for instance, “TikTok Pixel”). Ensure it’s set to display site-wide and in the header.
- Paste your copied pixel code in the Snippet/Code section.
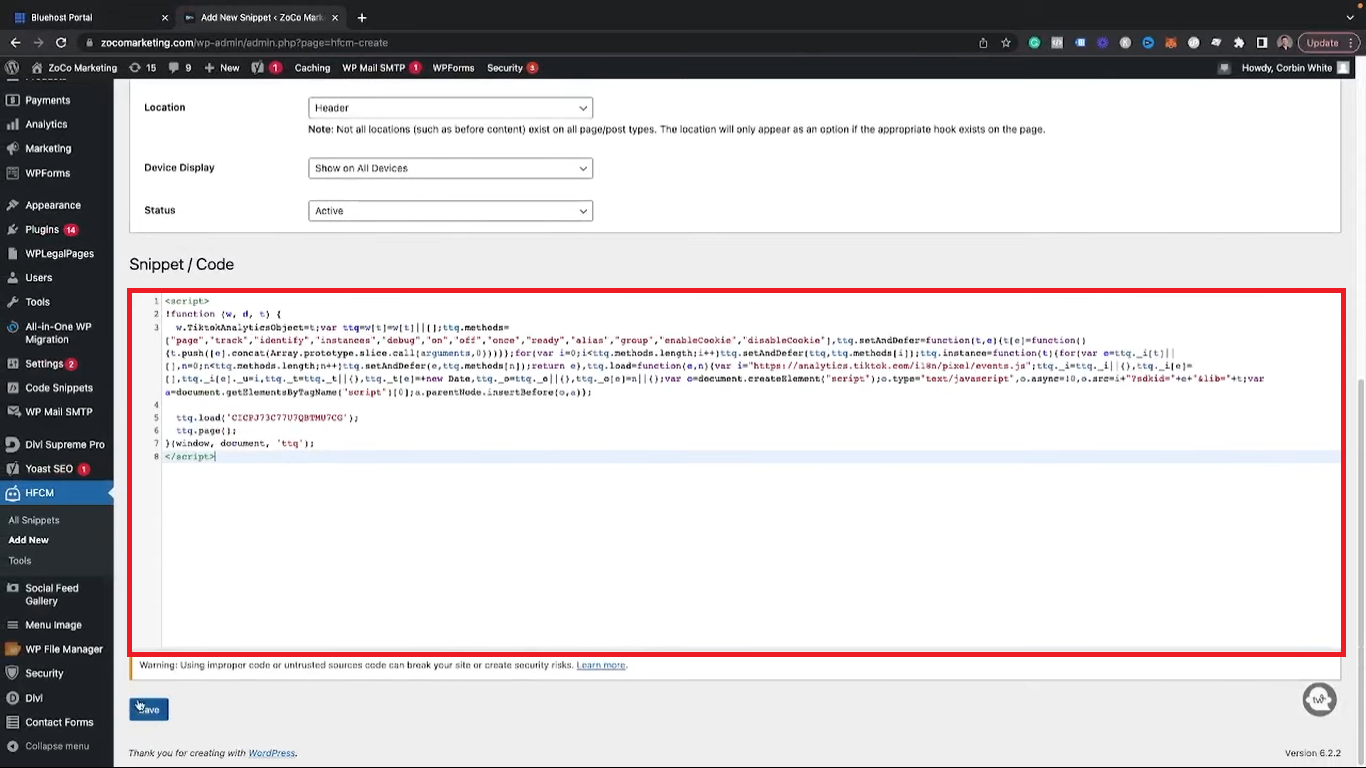
Now, your TikTok pixel is installed on your site.
Setting Up The Lead Event
Back on TikTok, you can now set up the lead event.
- After activating Automatic Events Matching, you can choose the event to track.
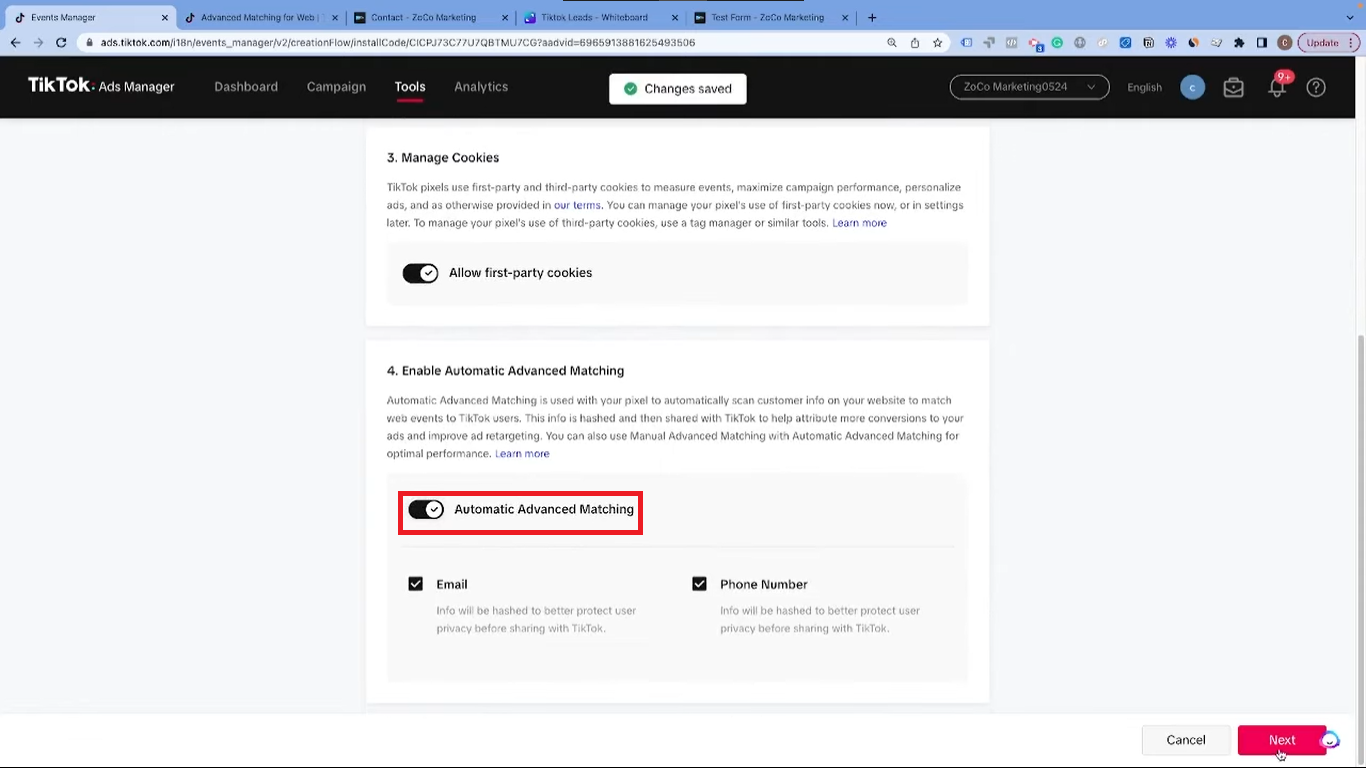
- If you generate leads, “Submit Form” or “Complete Registration” will likely be your go-to option.

Next, you need to decide how you’ll track this event. There are two ways: tracking a URL or tracking the click of a button.
To decide which method to use, you must understand how your website forms behave. If your form redirects to a new URL upon submission, you should track the URL. Alternatively, if your form stays on the same page, displaying a “thank you” message instead, tracking the click of a button is the most effective option.
Track a URL
This tracking method should be used if your website takes you to a different URL after submitting a form.
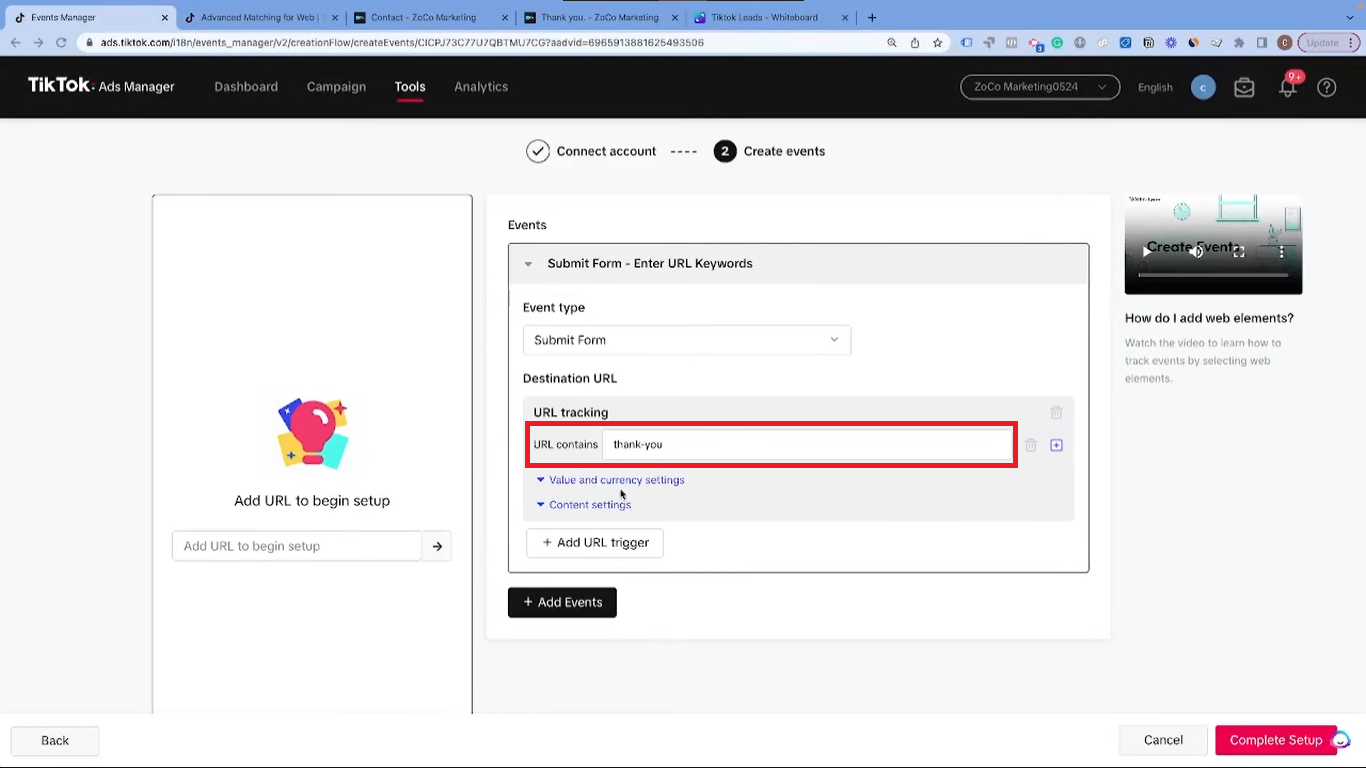
To set up URL tracking, enter the destination URL that fires after a form submission. For example, if your thank-you page URL contains “thank-you”, add that to TikTok.
Track a Button
This tracking method should be used if your website doesn’t redirect the user after submitting a form.
If you’re tracking a button click, the process is slightly different.
- Add the URL of the form’s website to Tiktok.
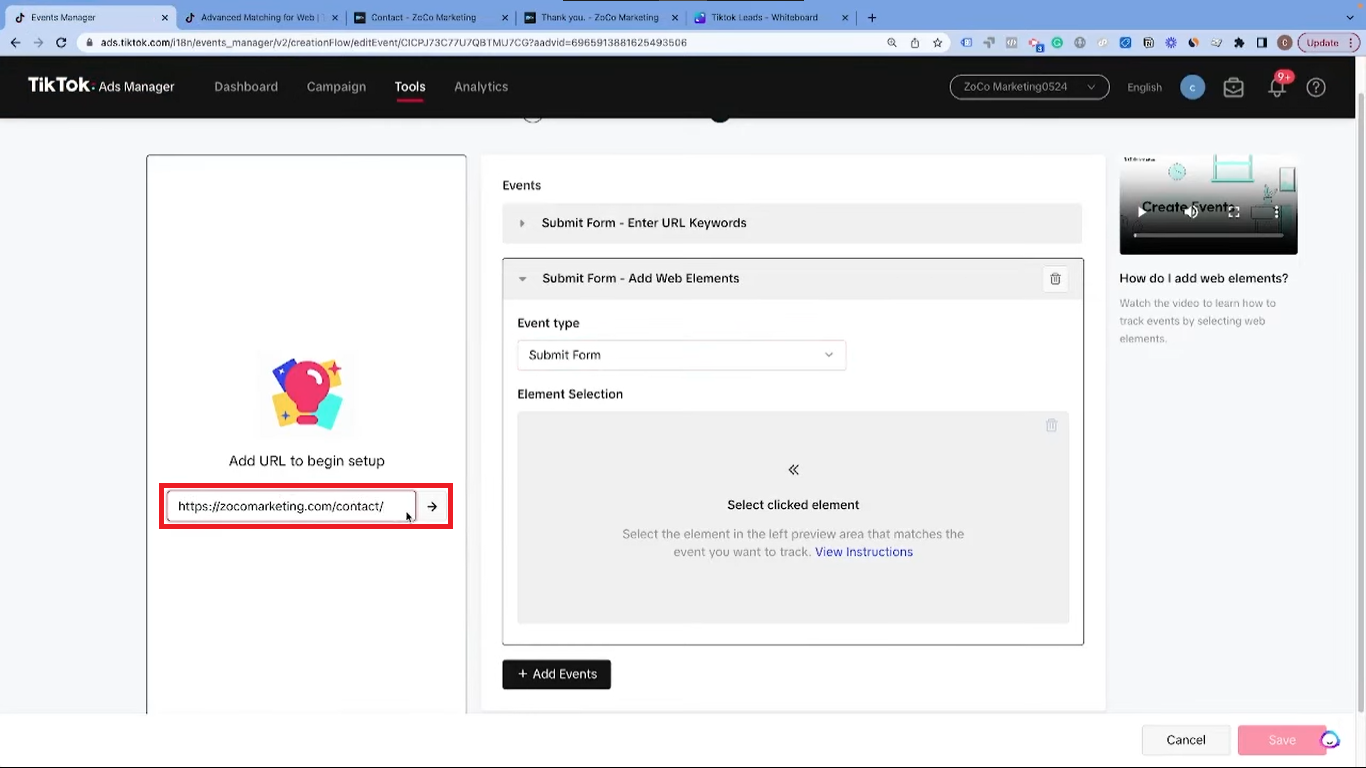
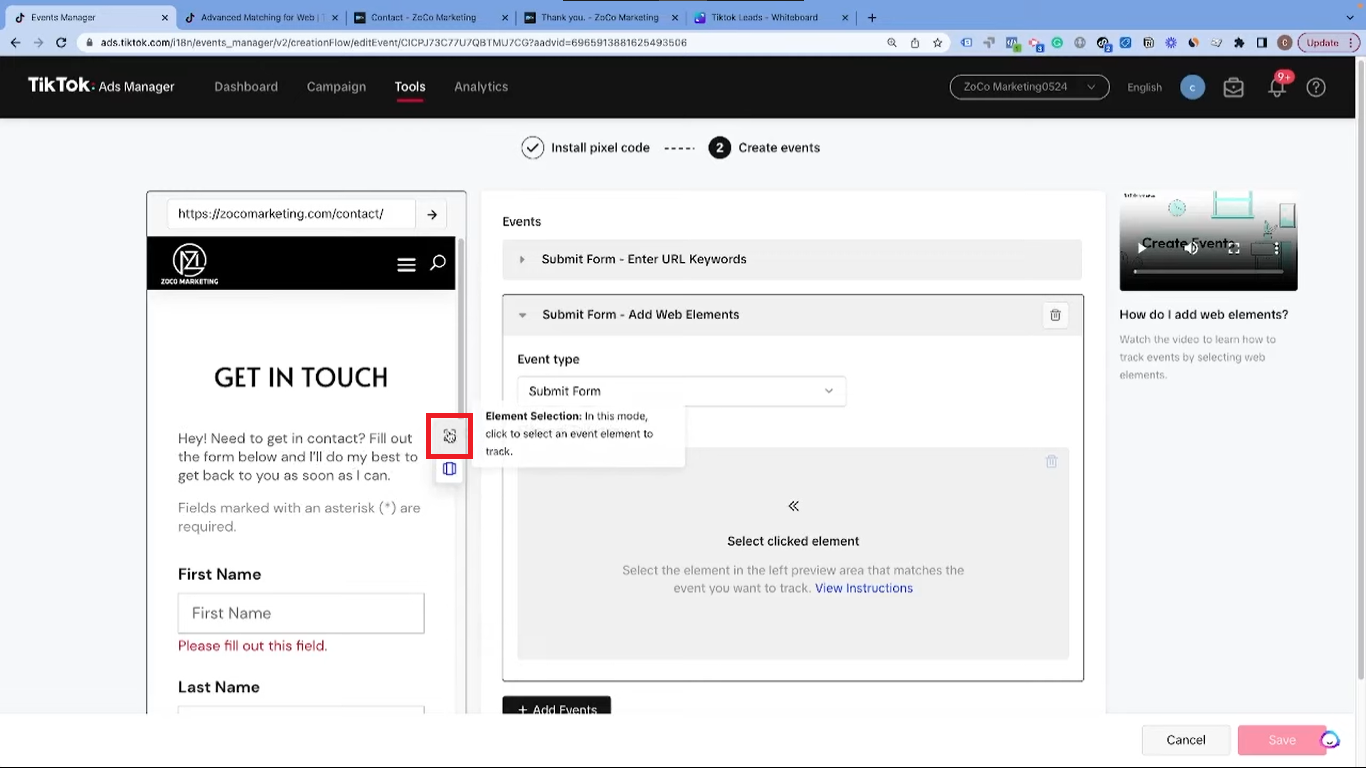
- Select the button you wish to track as an event using the “Element Selection” option, which allows you to select any element on your website and follow it as an event. Once selected, every click on this button will trigger the event on TikTok.
Tracking a URL is generally more reliable, as it only fires when a lead form is successfully submitted. Tracking a button click may result in false leads if the form submission fails, but the button click is registered.
Testing Your Setup
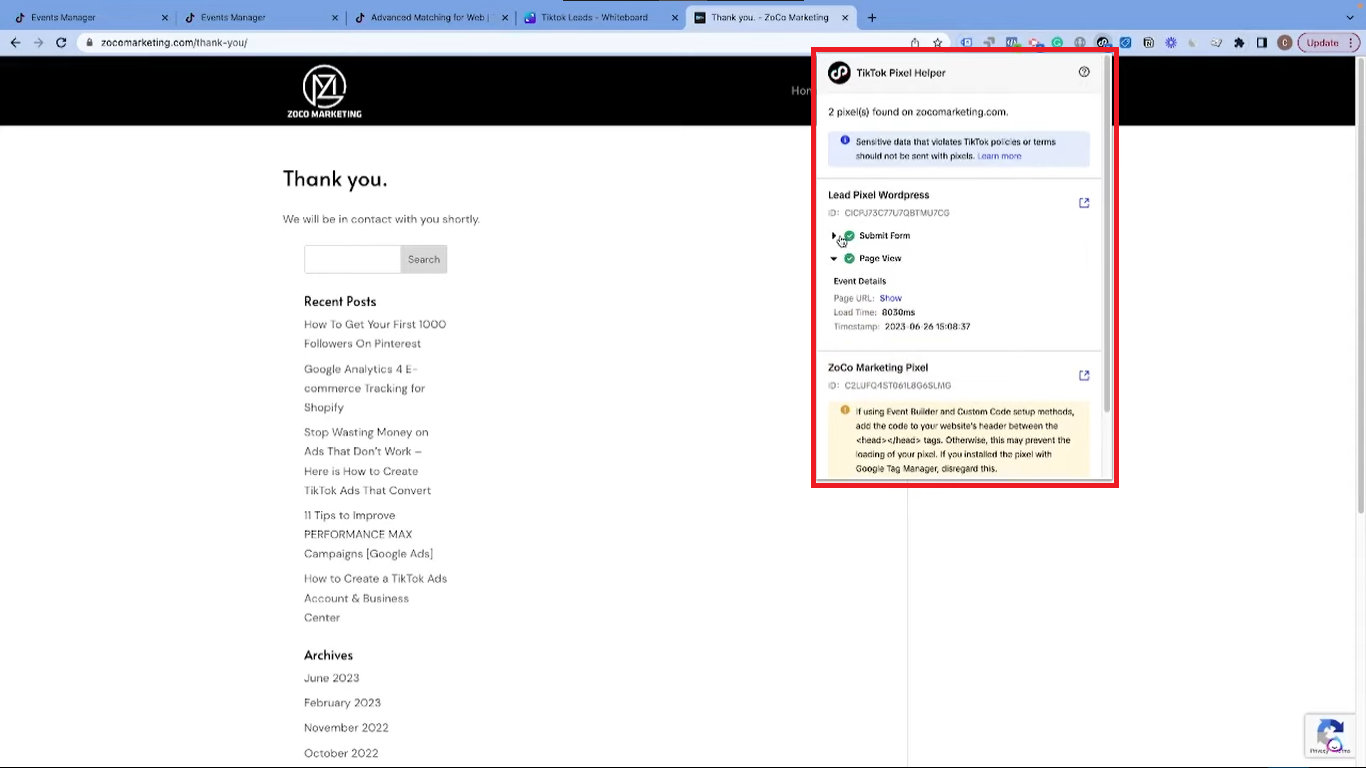
Finally, you need to confirm that your setup is working correctly. For this, use the TikTok Pixel Helper, a Chrome extension. Install it and visit your website to see the events you’ve set up on the pixel helper. This confirmation ensures that your setup is correctly tracking your lead generation attempts.
By following this guide, you can effectively set up your TikTok pixel for lead generation, giving you valuable insight into your campaigns, improving targeting, and increasing the efficiency of your lead generation process. Good luck!
