Google Analytics 4 E-commerce Tracking for Shopify
Google Analytics 4 E-commerce Tracking for Shopify
Amazing news for Shopify users! Shopify has finally come up with native integration to Google Analytics 4. If you’re looking to learn the fastest and easiest way to get Google Analytics 4 E-commerce tracking for your Shopify store, this article is the game-changer you need! This integration allows you to monitor crucial metrics such as add to cart, added payment info, and ultimately, the revenue inside your Google Analytics 4 account. In this article, we will walk you through this easy setup process, including debugging and troubleshooting to ensure that it is working as perfectly as you expect it to. Let’s dive right in!
Getting Started with Shopify Google Analytics 4 Integration
There are a couple of prerequisites you need to ensure seamless integration. First, you need to have admin access to both your Shopify account as well as your Google Analytics 4 account in order for this connection to work.
Additionally, if you had previously set up Google Analytics 4 through any alternative ways in the past, either by putting it directly into your theme.liquid or through Google Tag Manager, you have to delete that code before proceeding.
To do that, follow the steps below:
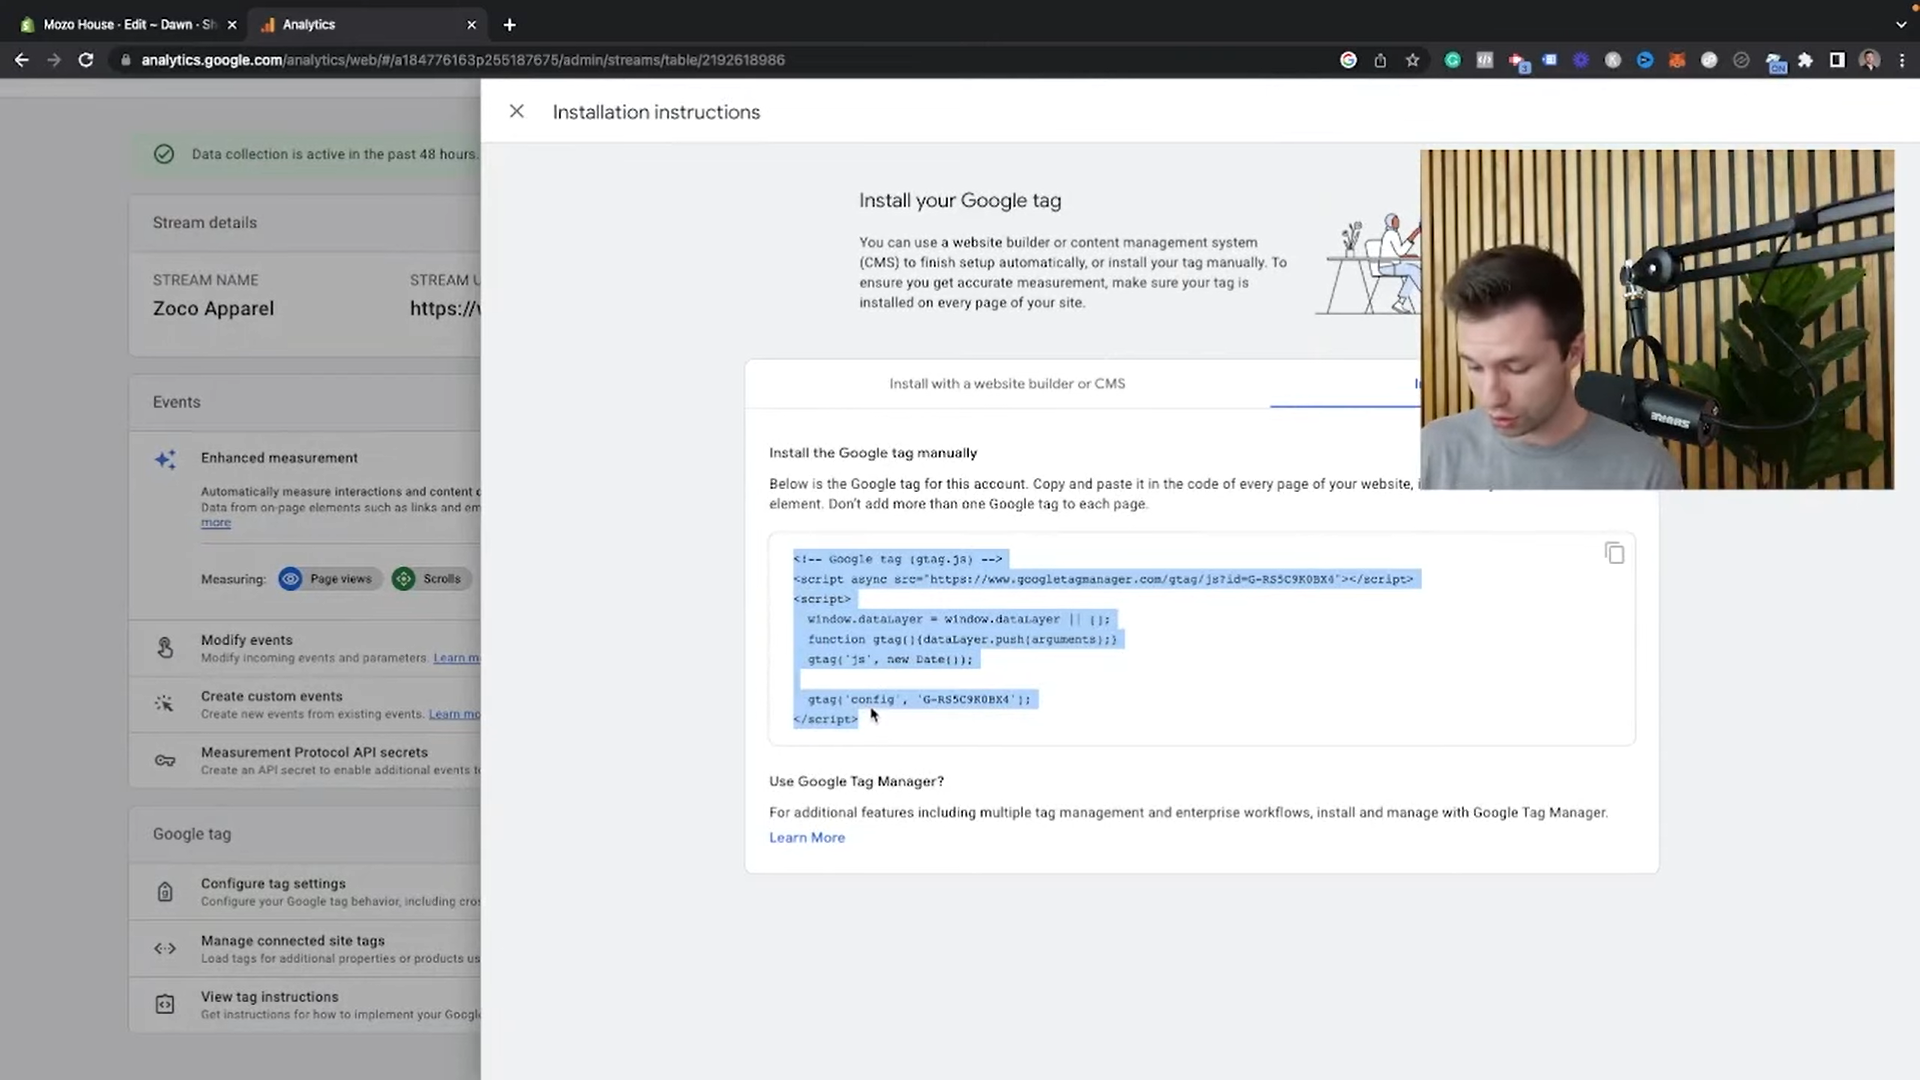
- Log into your Google Analytics account and under the Admin tab, click on ‘Data Streams’.
- Click on the little arrow to the right of your data stream and a popup with your data stream details will show up.
- Scroll down to ‘View Tag Instructions’ under the Google Tag section and click on it to view the Installation Instructions.
- Copy the code and proceed to your Shopify store to confirm if it is hard-coded into your theme.liquid for deletion.
- In your Shopify Account, under the sales channels, click on the ‘Online Store’ tab and on ‘Themes’.
- Click on the three dots in your current theme settings and click on ‘Edit Code’ as shown below.
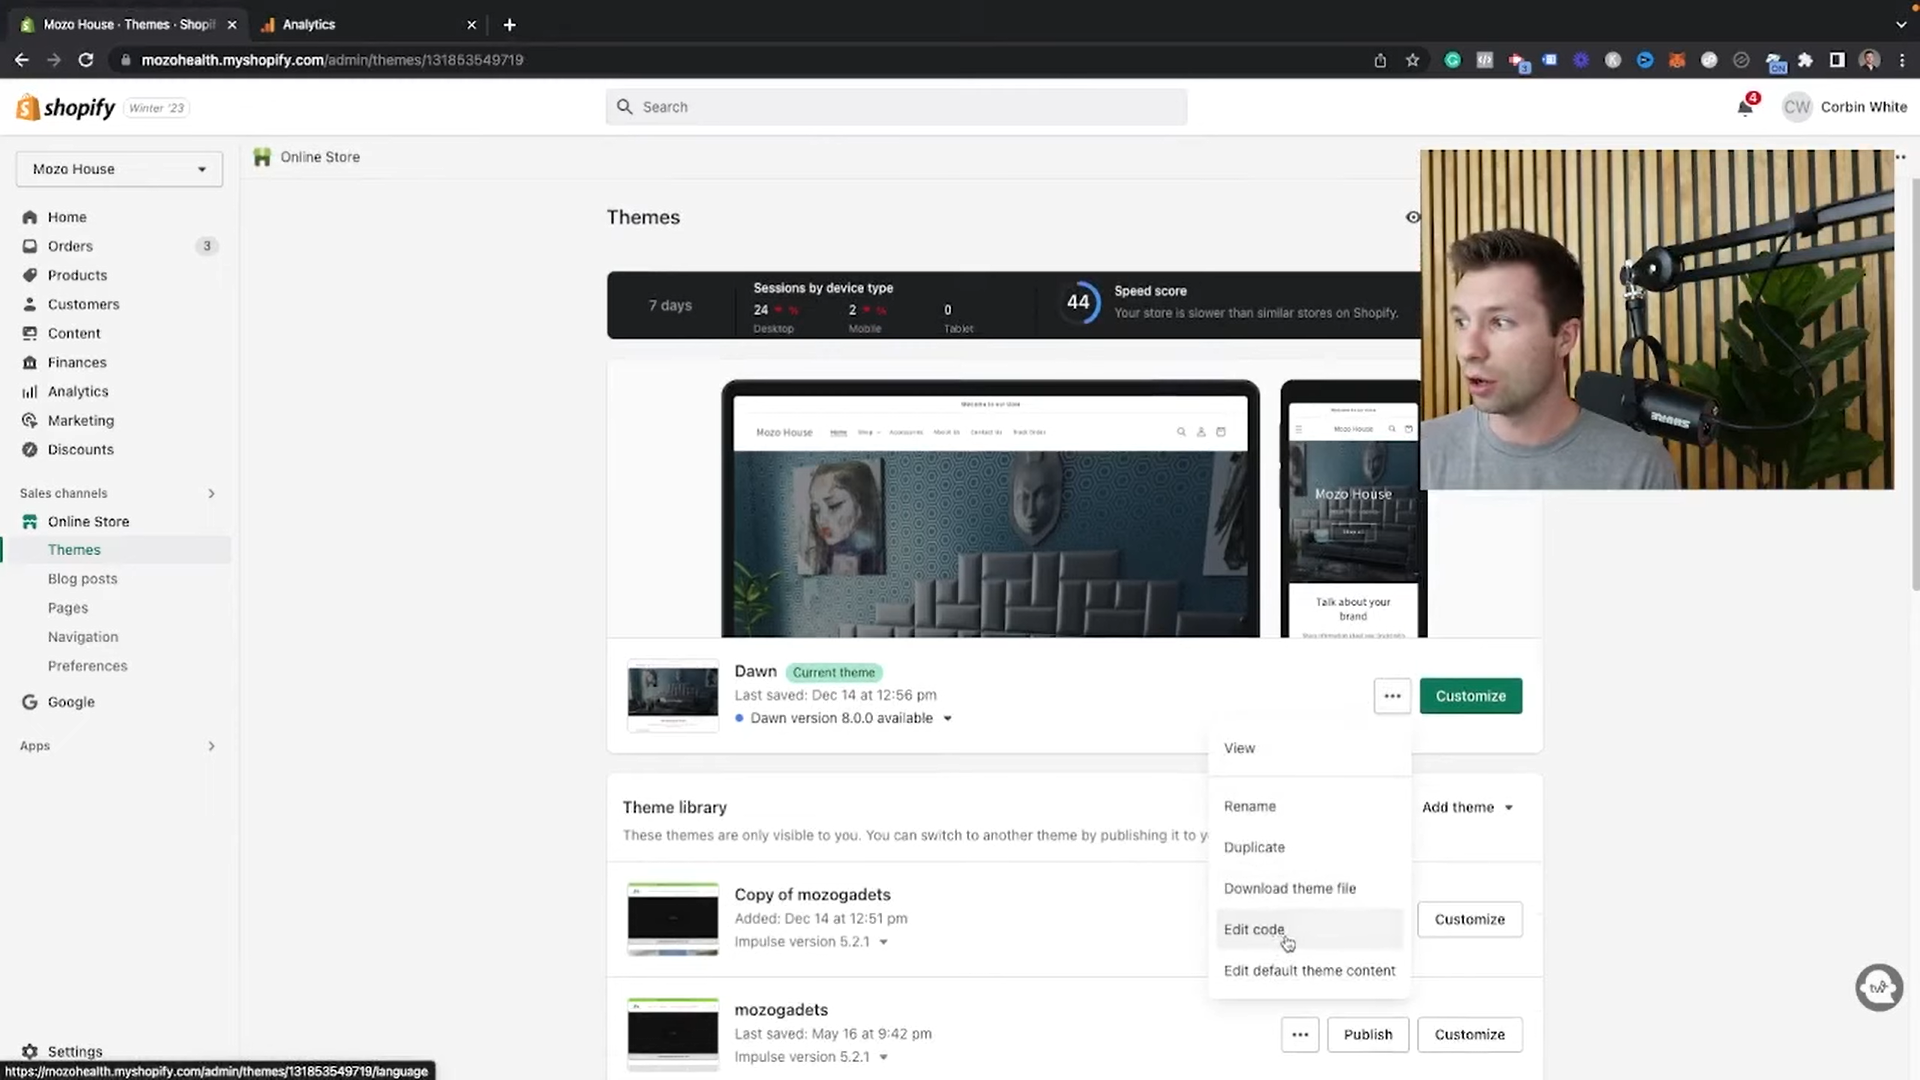
- You will be directed to your theme.liquid. Press Command + F on your keyboard and paste the copied code to run a search to make sure that the code does not already exist.

Most people probably do not have this already set up. However, if you do, you can proceed to delete the code to ensure that you’re not double-tracking inside your Google Analytics 4.
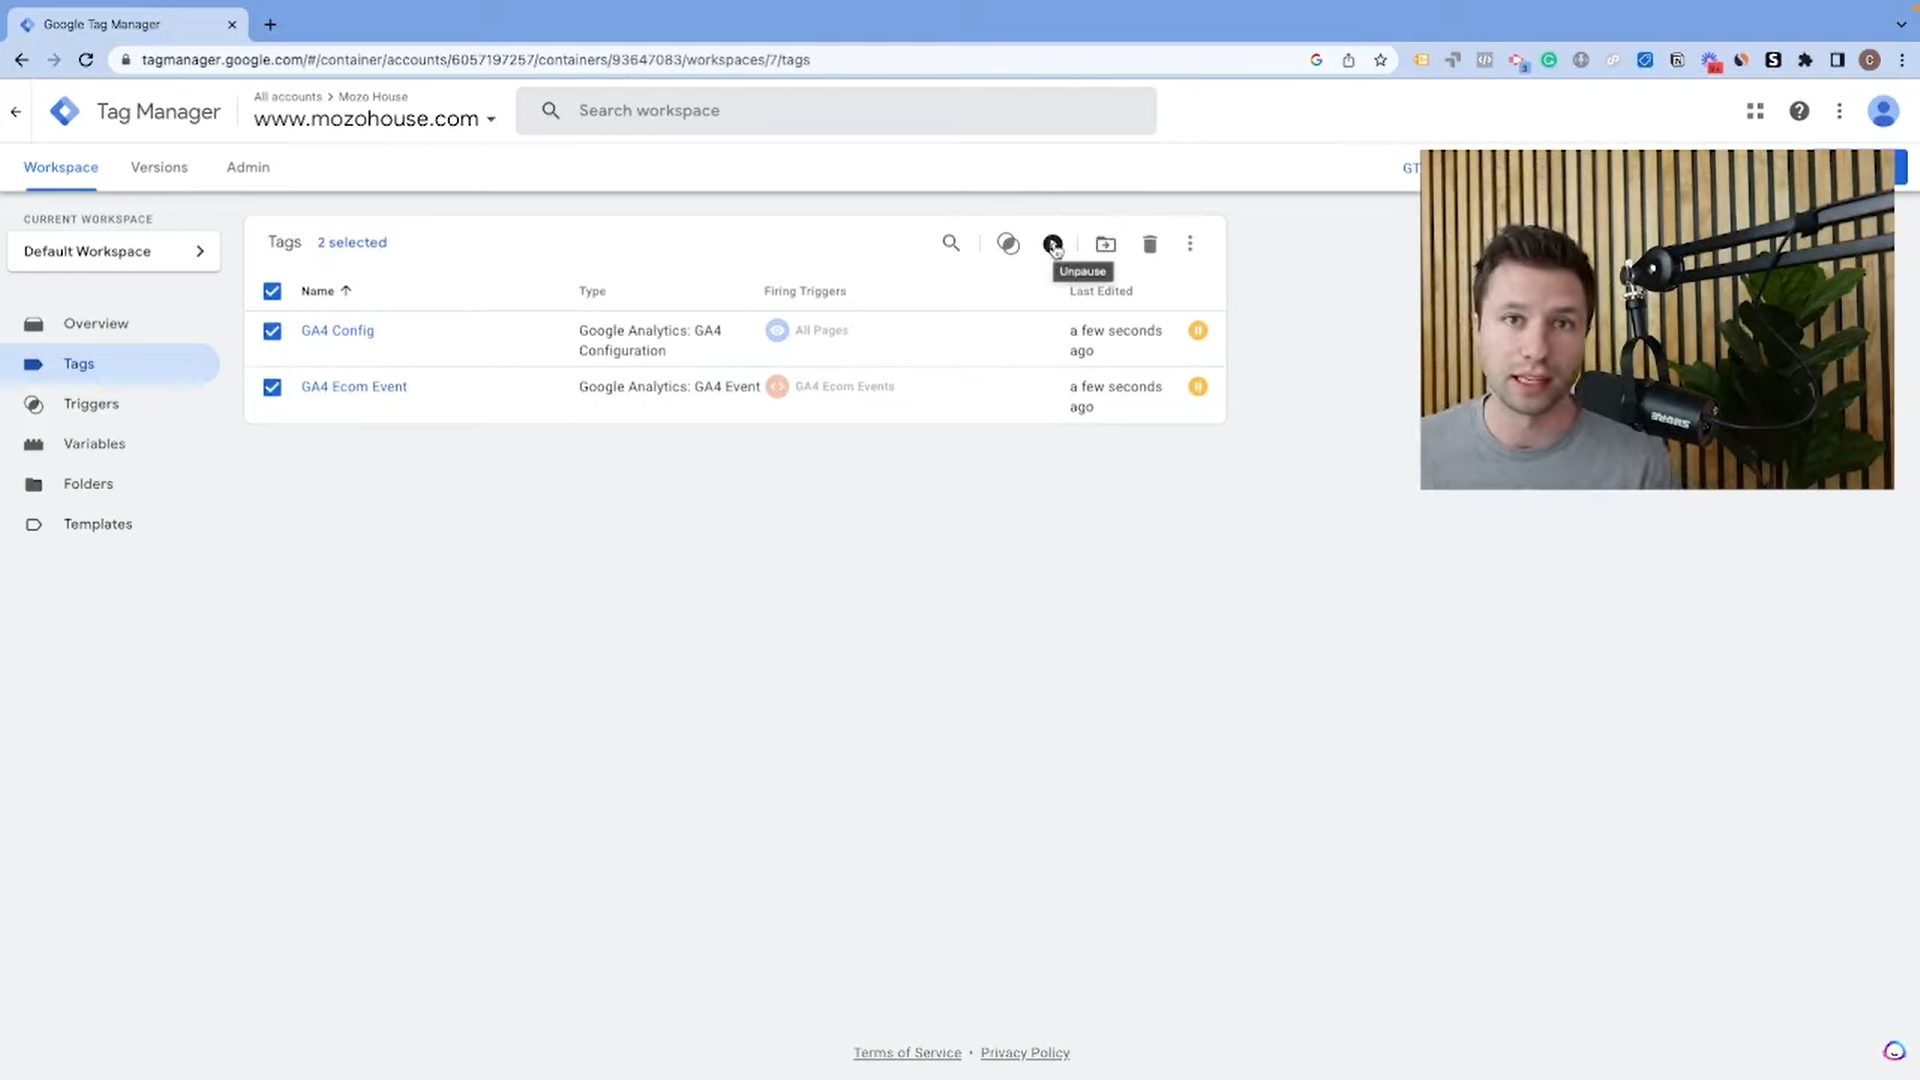
- Similarly, you will need to pause your ECOM event and the GA4 configuration inside your Google Tag Manager if you previously set up your Google Tag Manager before the native integration. Simply go to the ‘Tags’ Tab in your Tag Manager, select both tags and click on the little pause icon before running this setup.
However, if you have never installed Google Analytics 4 on your website, nor deployed it through Google Tag Manager, then you are ready to proceed.
Setting up Google Analytics 4 E-commerce tracking for Shopify
- To begin your setup, go to your Shopify account, navigate to the ‘Online Store’ tab and select ‘Preferences’.
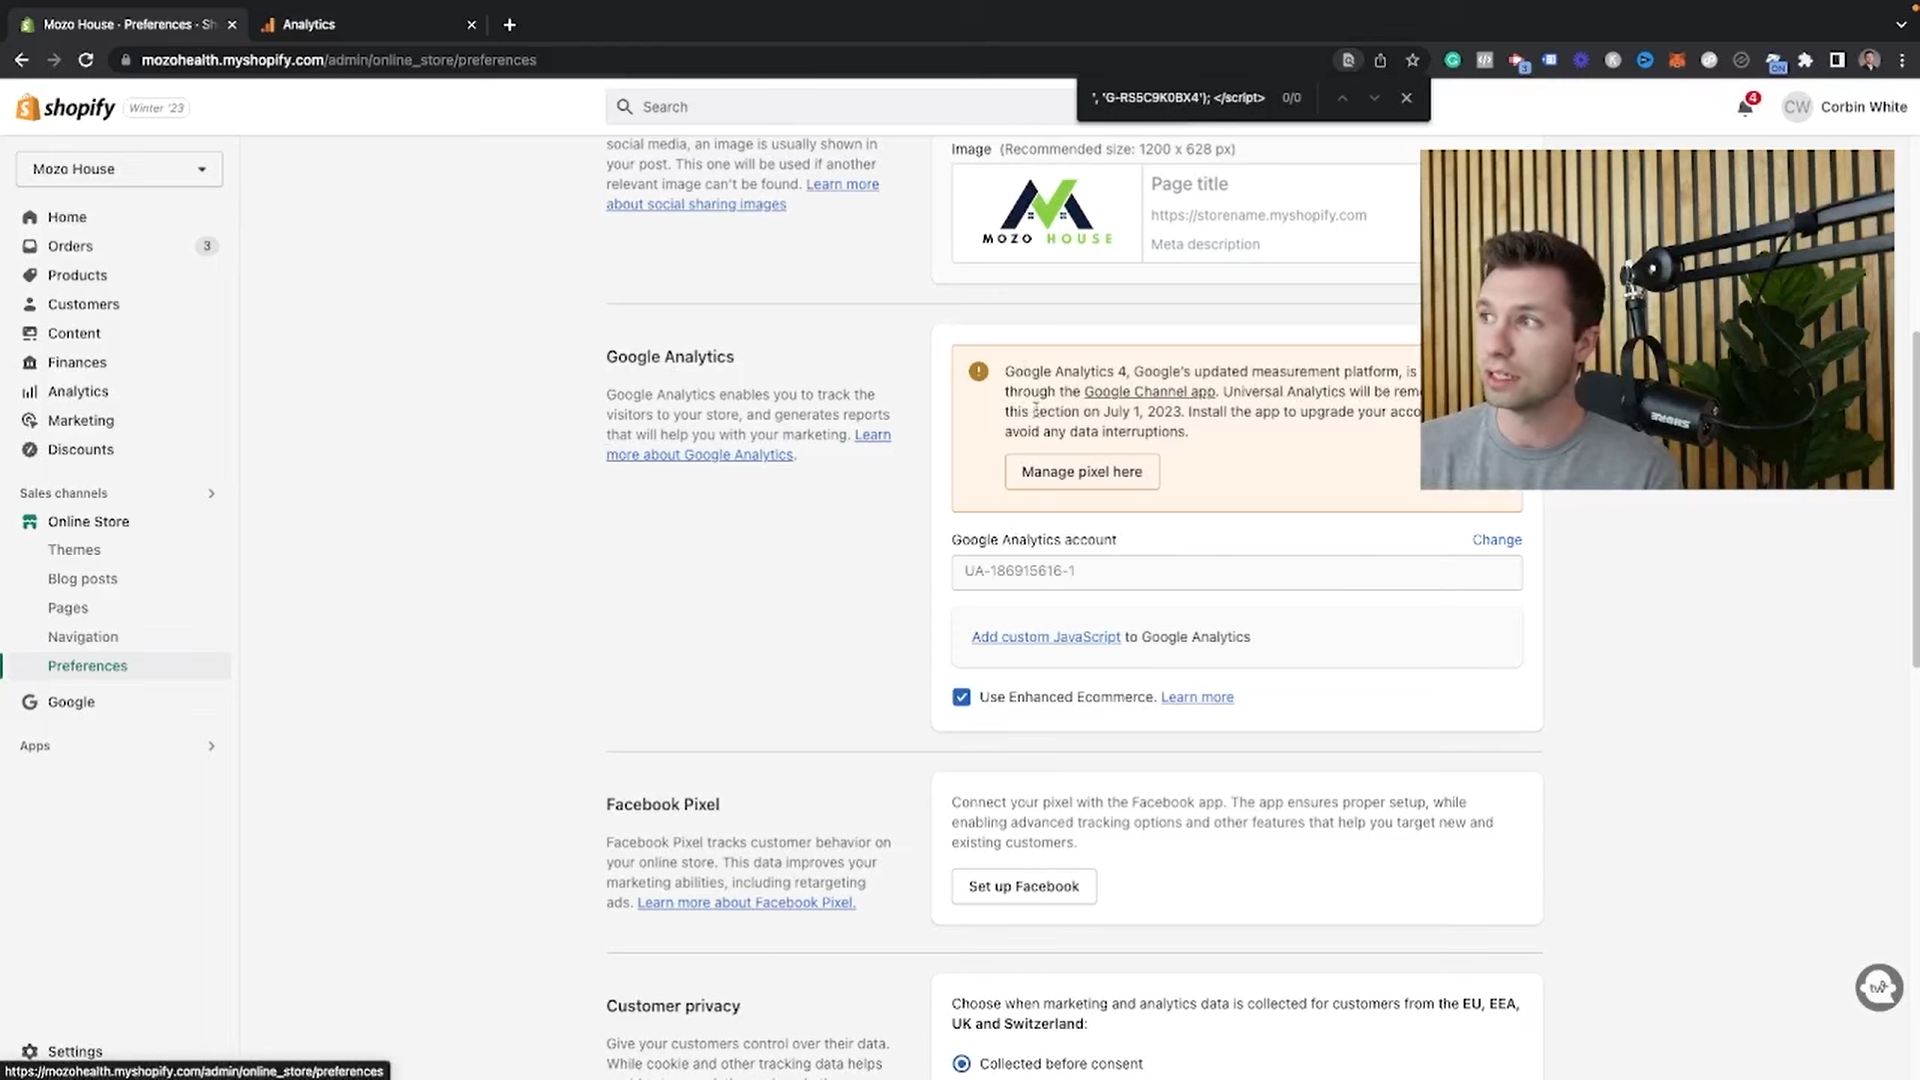
2. Scroll down to the Google Analytics section and click on ‘Manage Pixel Here’, if you use the Google Channel App. If you do not already have the Google Channel App, you will be prompted to set it up. You will then be redirected to the following view:
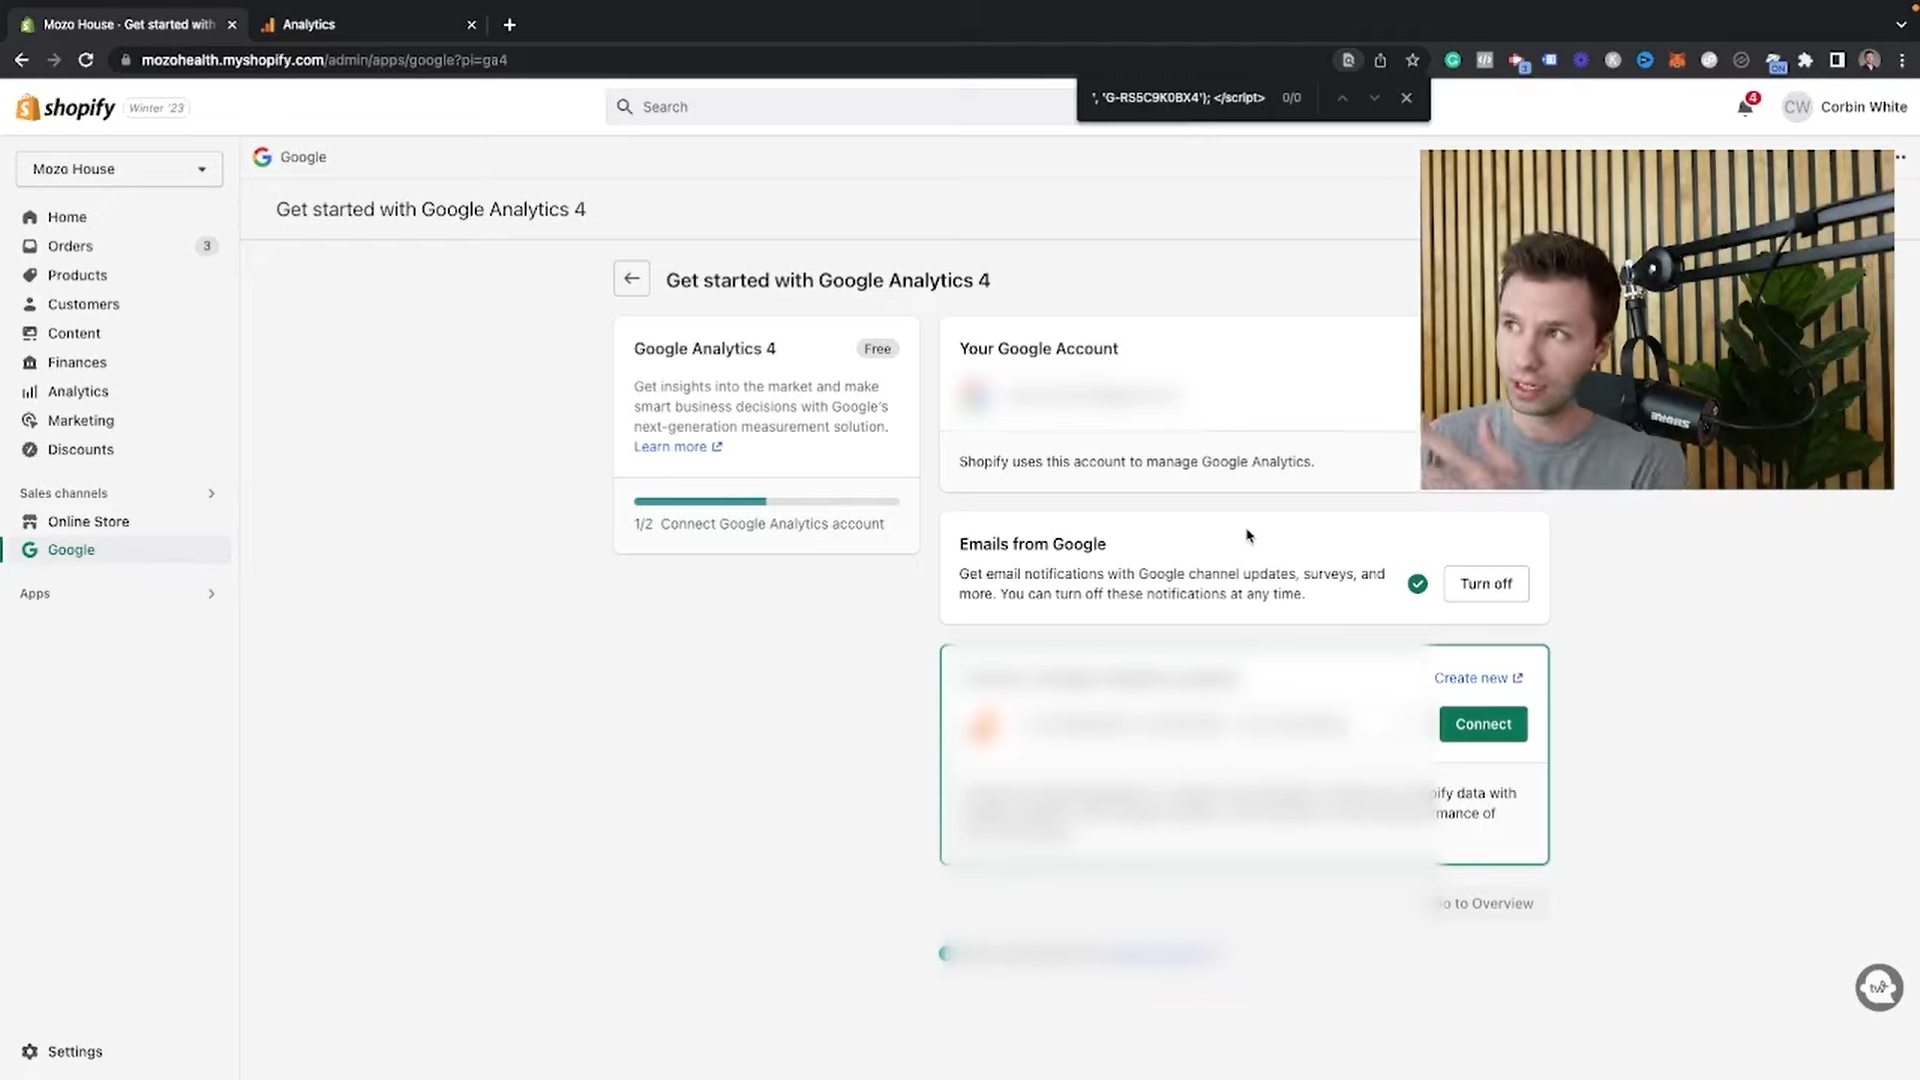
3. Once on this setup page, ensure that the email associated with the Google channel app also has admin access to your Google Analytics 4 account to enable the connection. If you have access to multiple Google Analytics 4 accounts, choose the desired account from the dropdown and click on the ‘Connect’ button.
4. You will be notified once your Google Analytics 4 setup is successful as shown below.
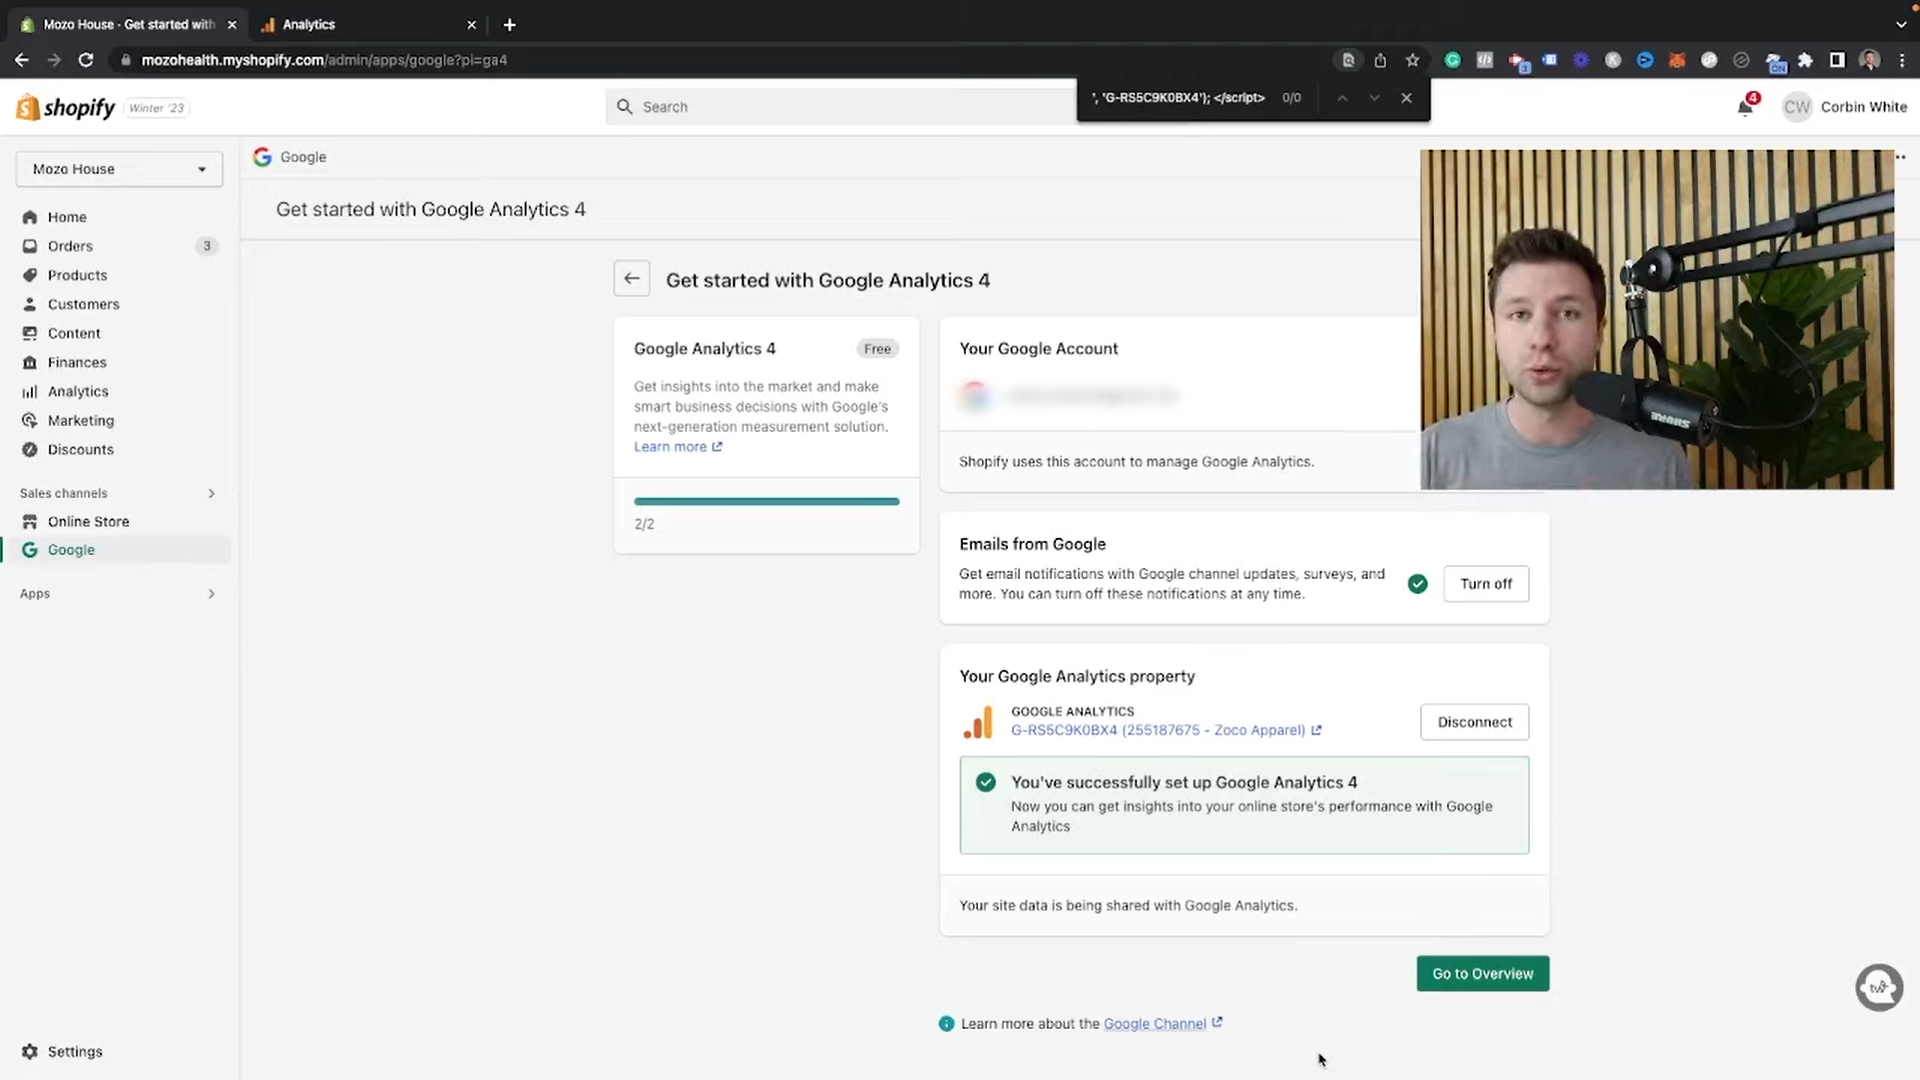
That’s it! It is as easy as that. You have successfully established the connection between your Shopify store and Google Analytics 4, enabling e-commerce tracking effortlessly. Your Google Analytics 4 account will now track revenue, add to cart, and all other metrics.
Troubleshooting Shopify Google Analytics 4 E-commerce Tracking
To ensure that the integration is working correctly for your Google Analytics 4 account, it is important to go through a quick troubleshooting process.
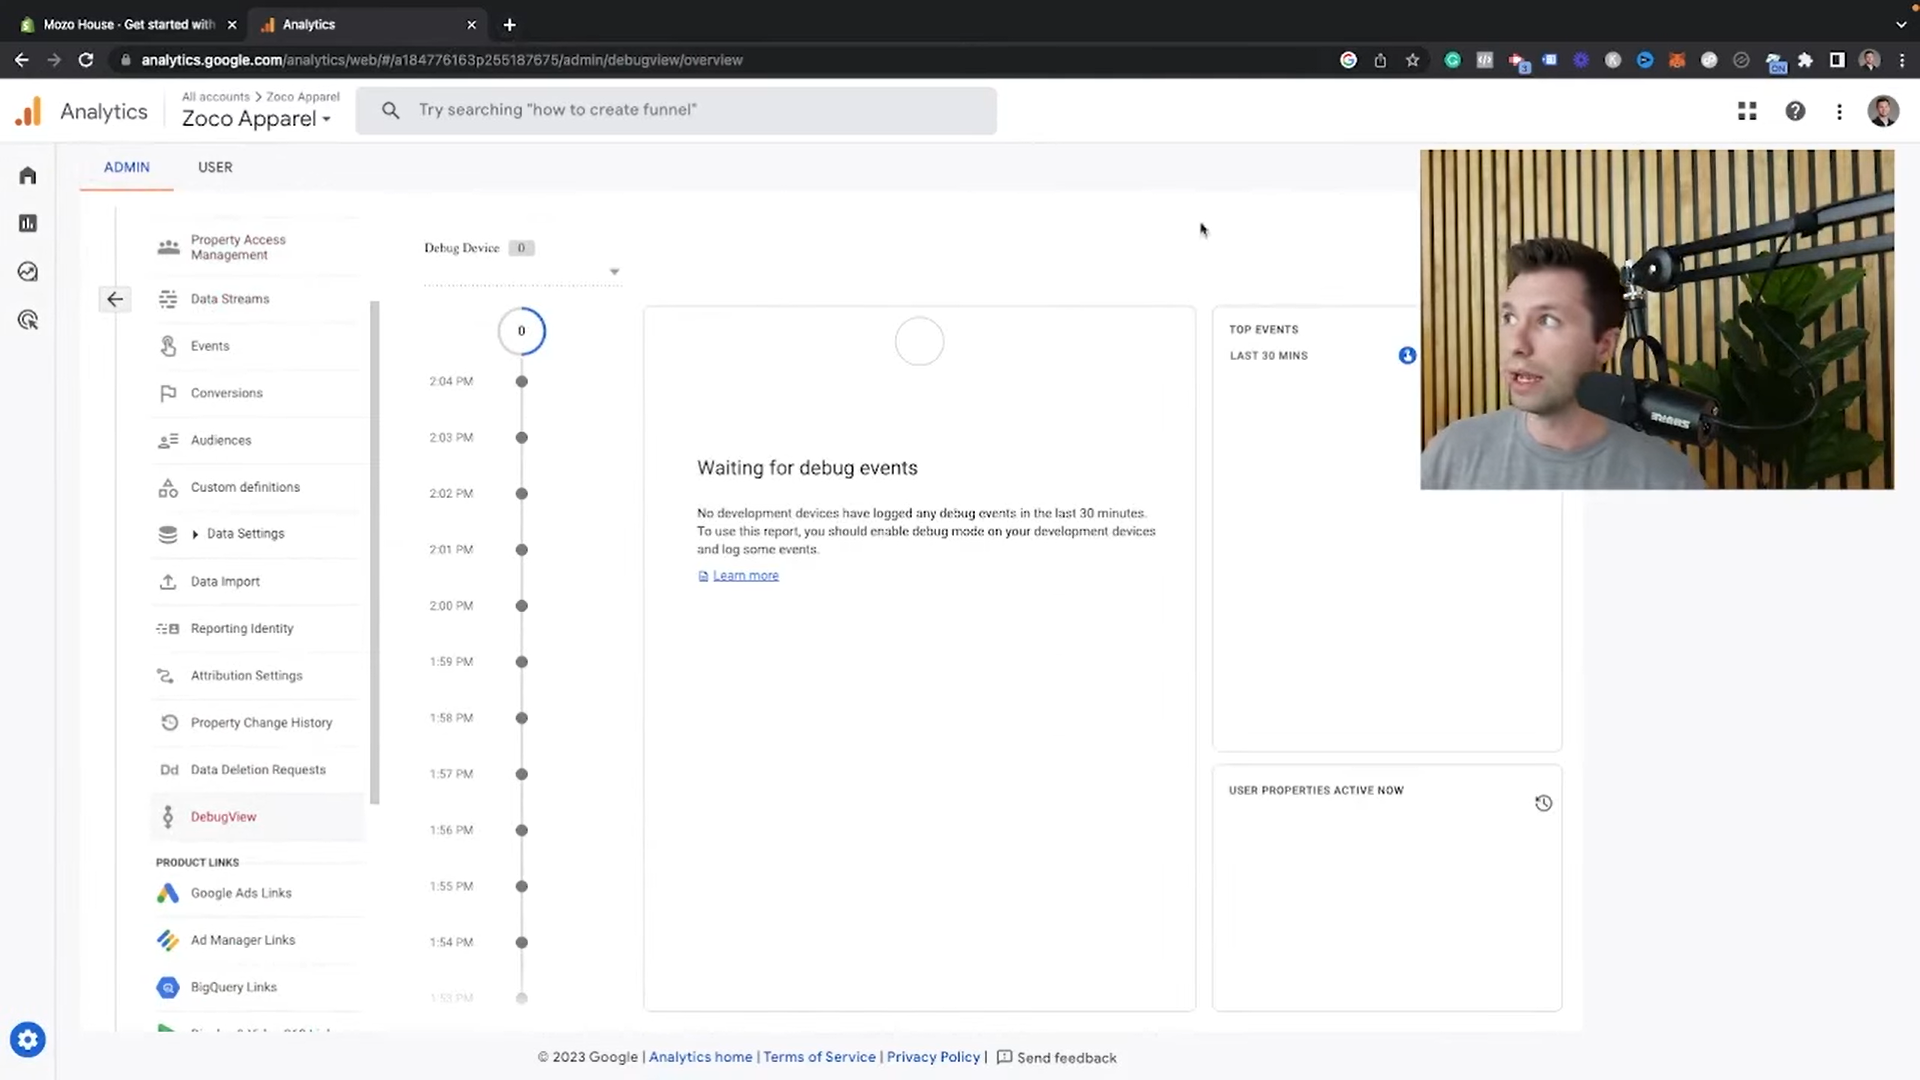
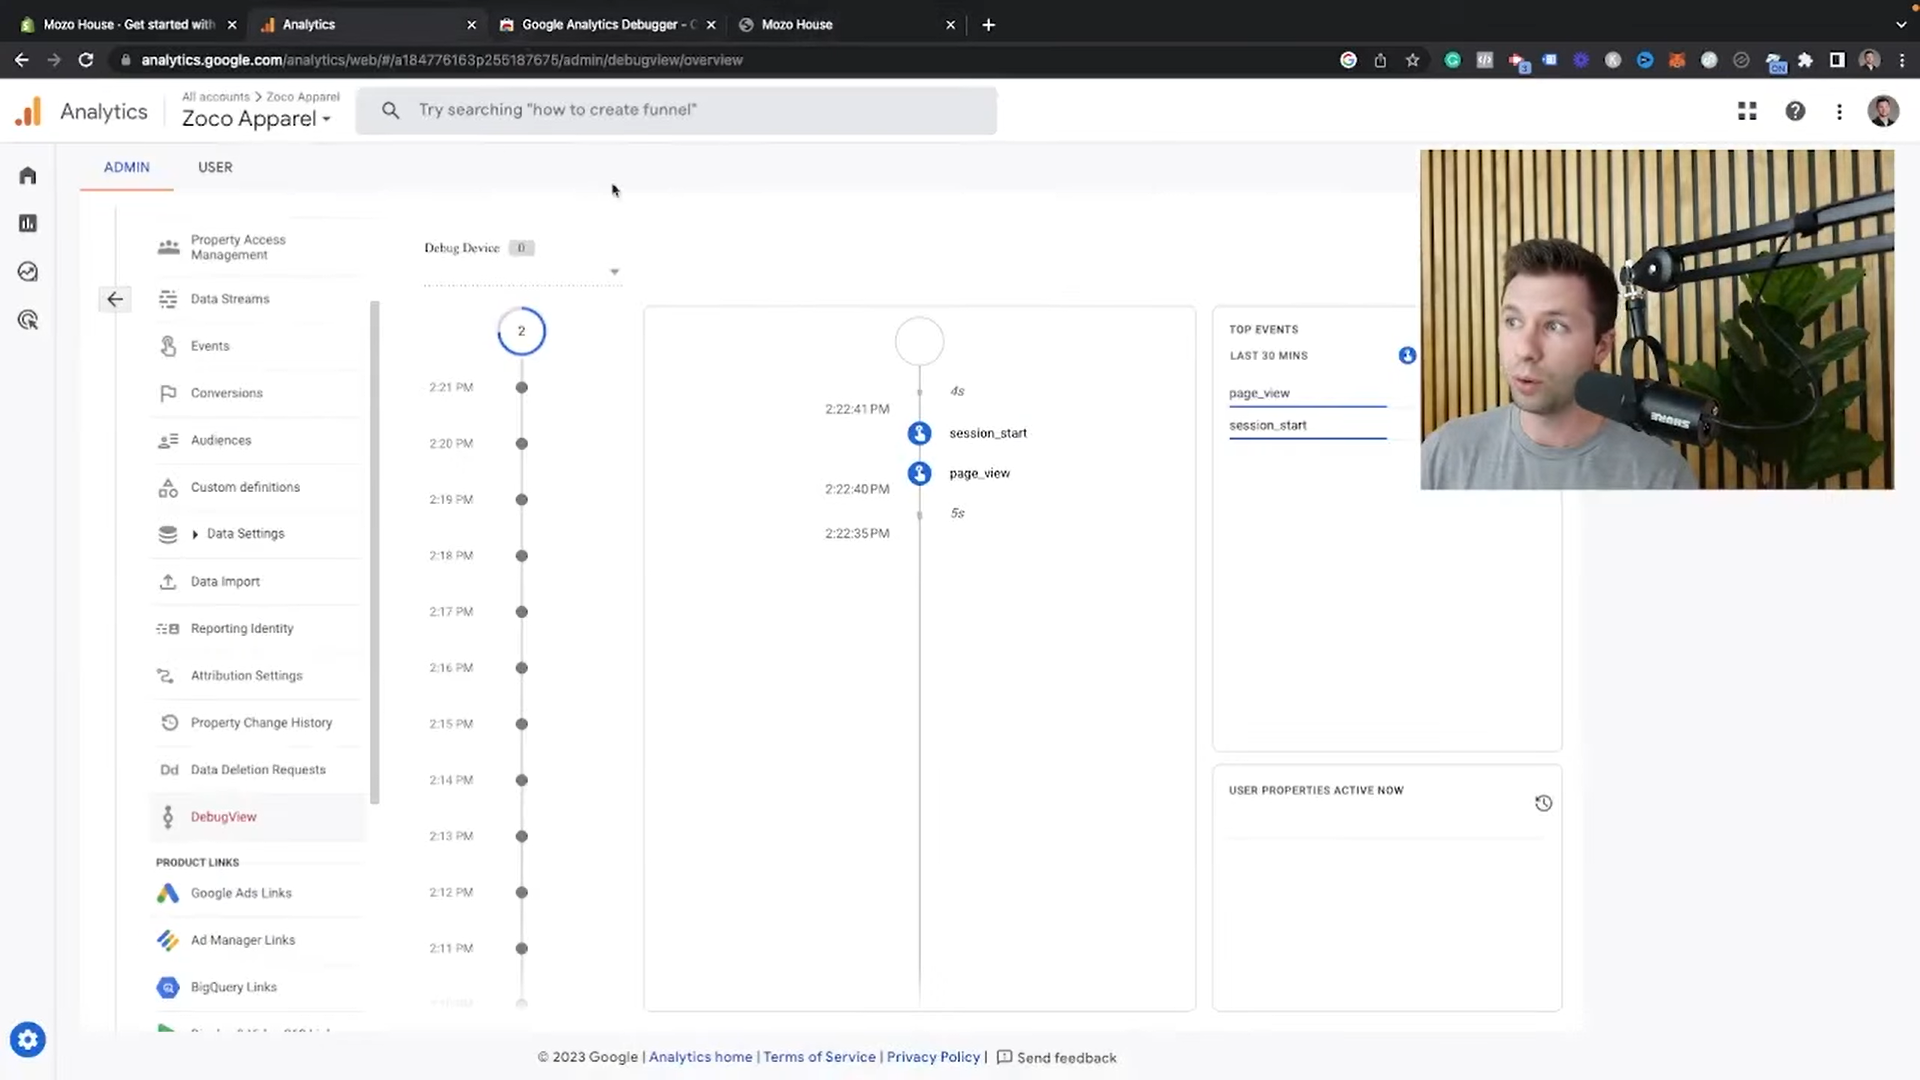
- Open the Admin section of your Google Analytics Account and click on the ‘DebugView’ tab in the ‘Property’ Column to initiate the verification process.
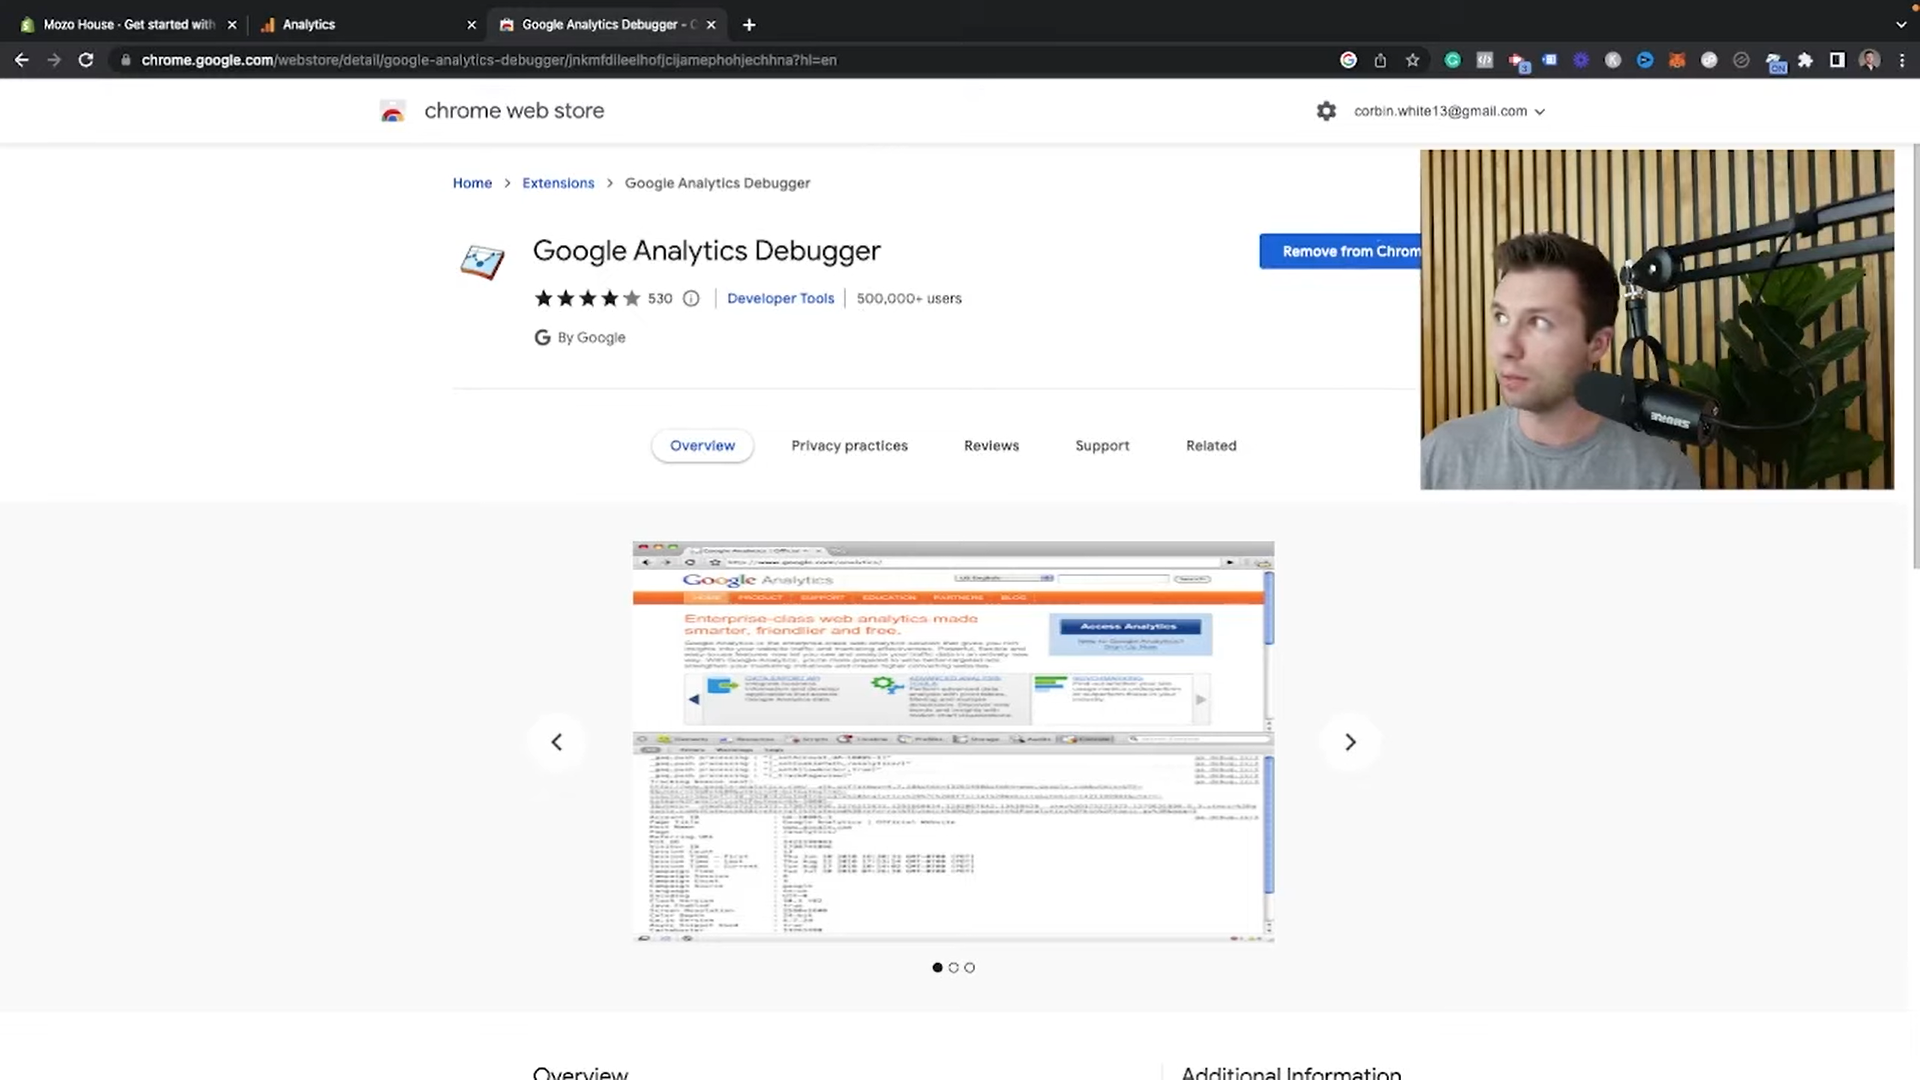
- Install the “Google Analytics Debugger” Chrome extension if you haven’t already.
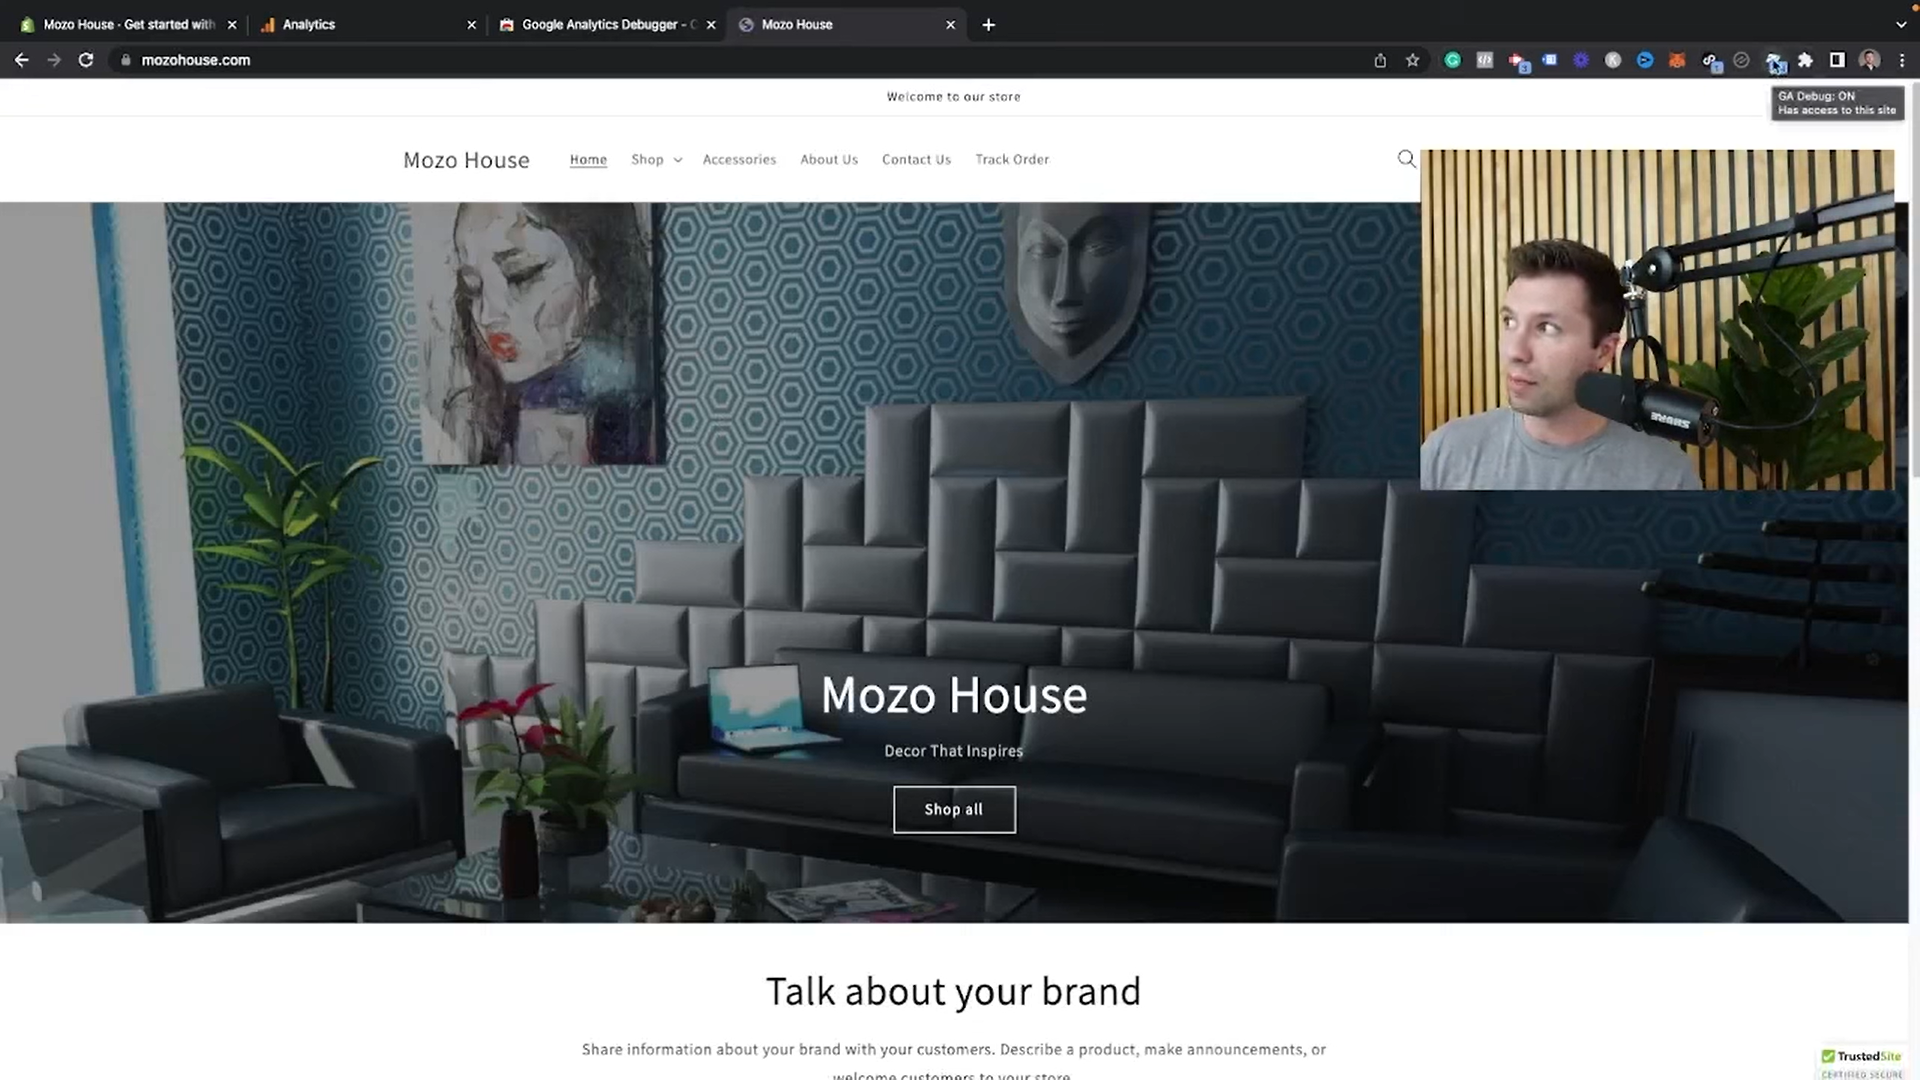
- Visit your Shopify website and ensure that the GA Debug extension is ON to allow it to access your site.
- Return to Google Analytics and observe the debug mode in action, capturing page views.
- To fully test the e-commerce tracking, complete a checkout process and test a payment. Go to your Shopify website and add one of your products to cart.
- Monitor Google Analytics for various events, such as ‘user engagement’, ‘page view’, ‘view item’, and ‘add to cart’. The events will reflect automatically just from the couple of button clicks that you performed in Shopify.

- It gets better! Go back to your Shopify website, check out, and pay for the product to go through the entire payment process.
- Once the payment is processed and confirmed, go back to Google Analytics 4, and you will notice that a purchase event has fired through. Click on the ‘Purchase’ event to view various information such as the campaign, the currency, medium, value, tax, and shipping, among others.
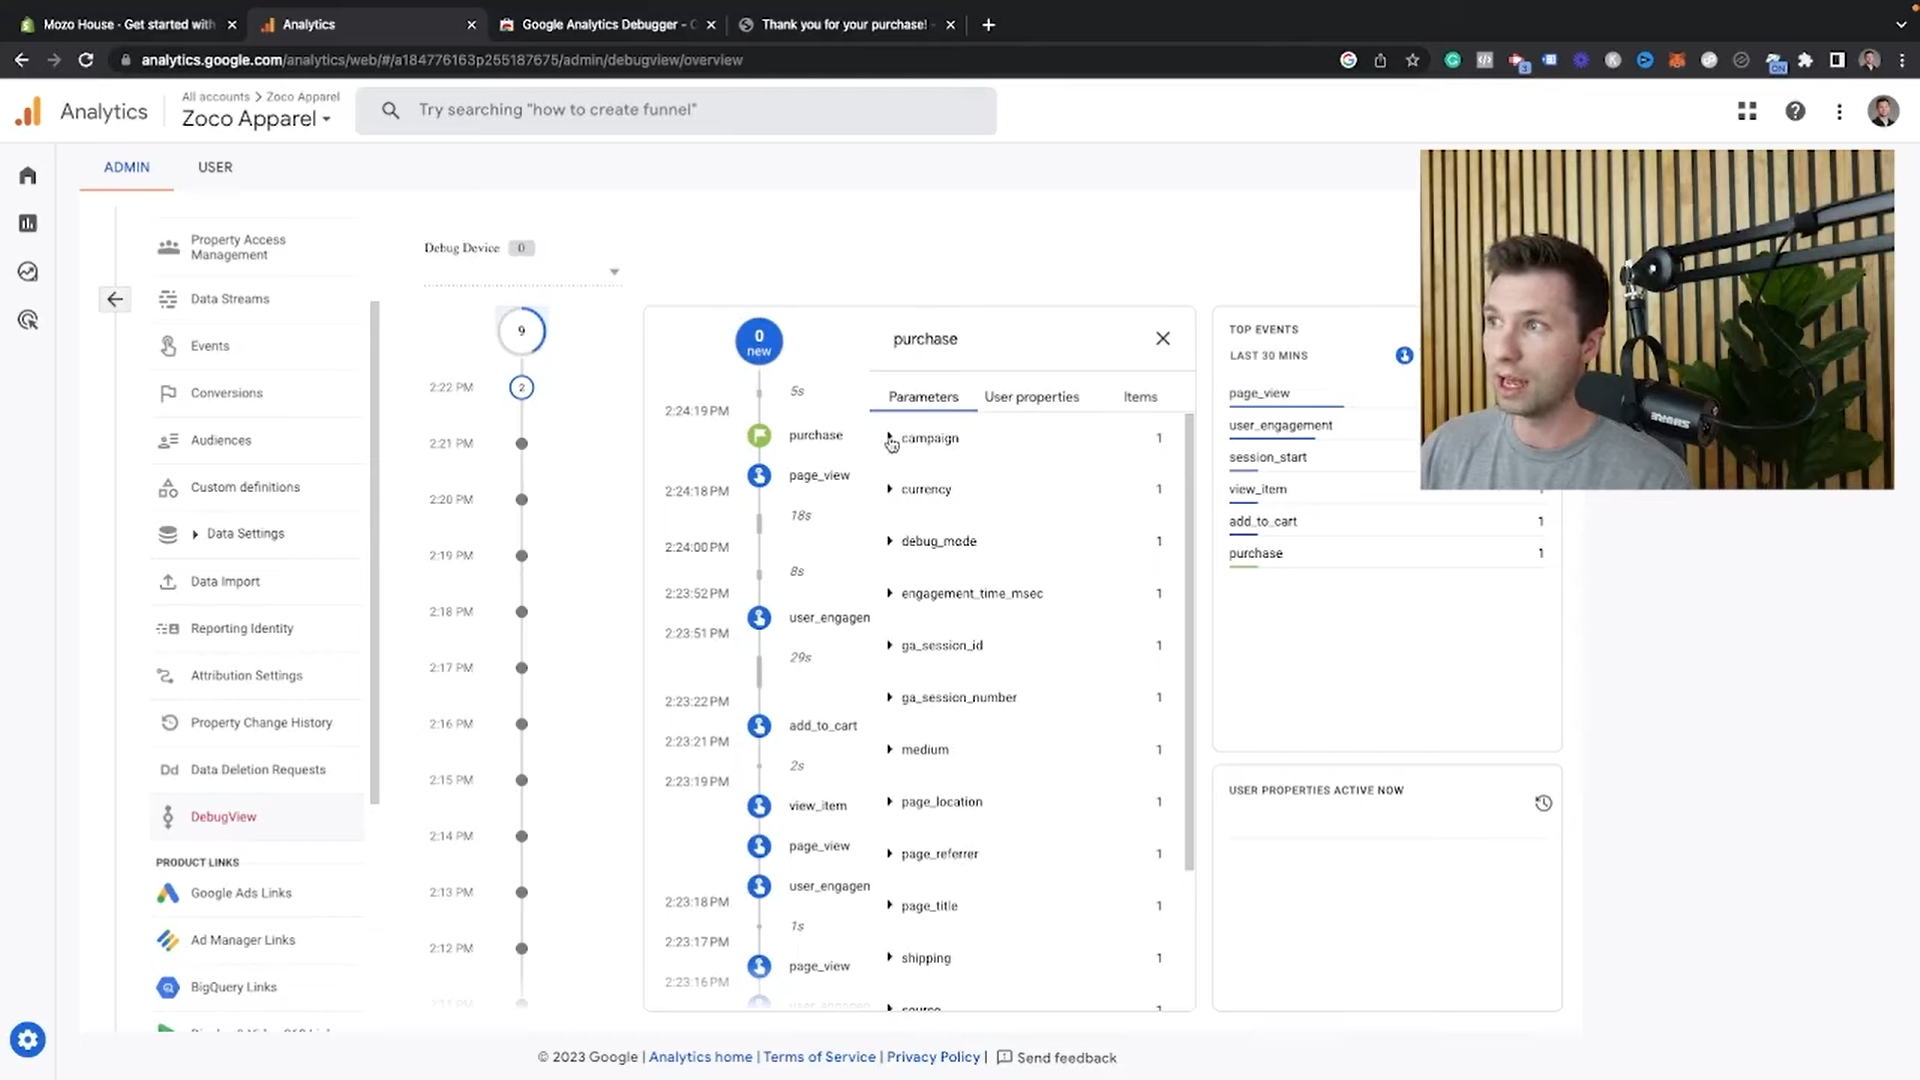
- Super easy! You have verified the successful implementation of Google Analytics 4 E-Commerce Tracking for your Shopify account. Every piece of information will be passed through as it should.
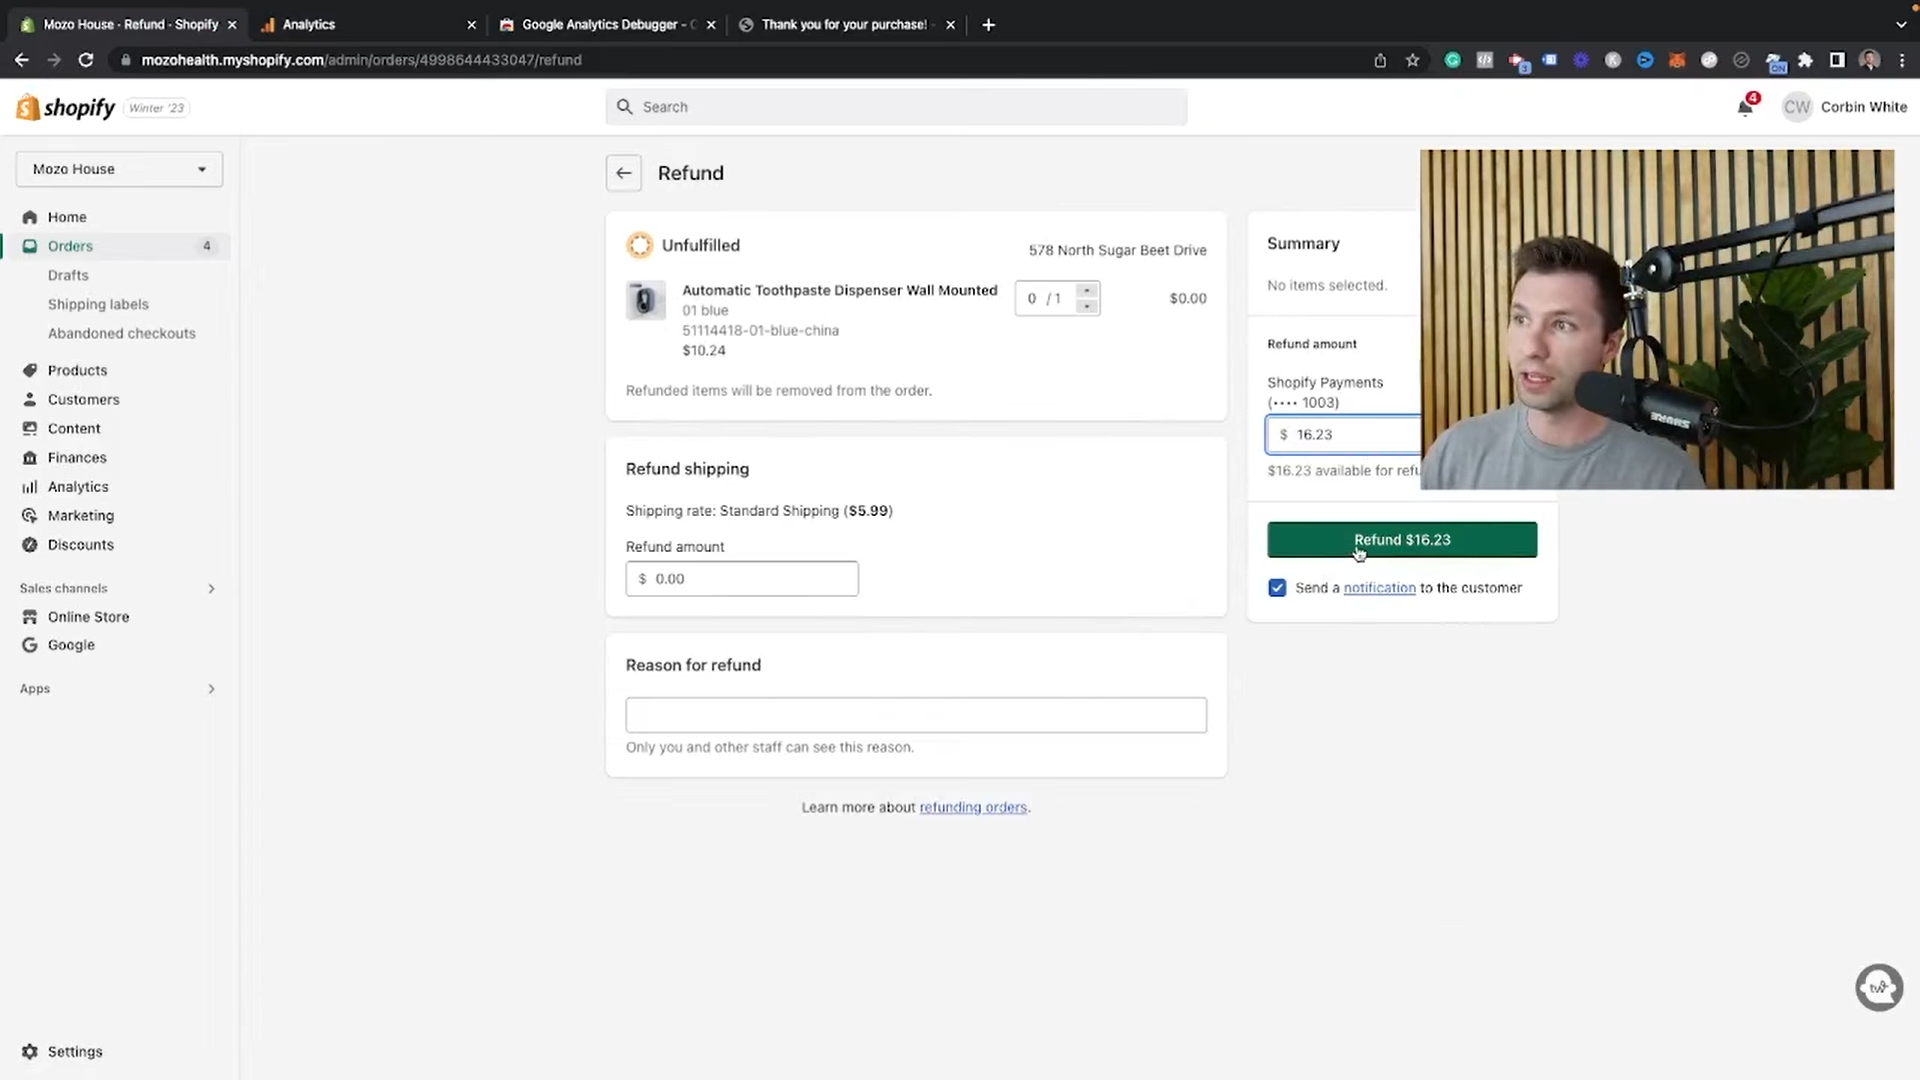
- If you’re simply testing purchases in your Shopify store, go to the live store, click on the ‘Orders’ tab, select the specific order and hit the ‘Refund’ button. That way, you won’t have to suspend money when you’re going through these tests.
Unleash the Power of Data in Google Analytics 4 for Shopify
Now that you have seamlessly integrated Google Analytics 4 e-commerce tracking with your Shopify store, a wealth of insights awaits you. With the purchase data already loaded, you can go over to the Reports tab and the purchases will reflect in those reports. You can explore valuable data such as the Total Revenue, Users, and Average Engagement Time.
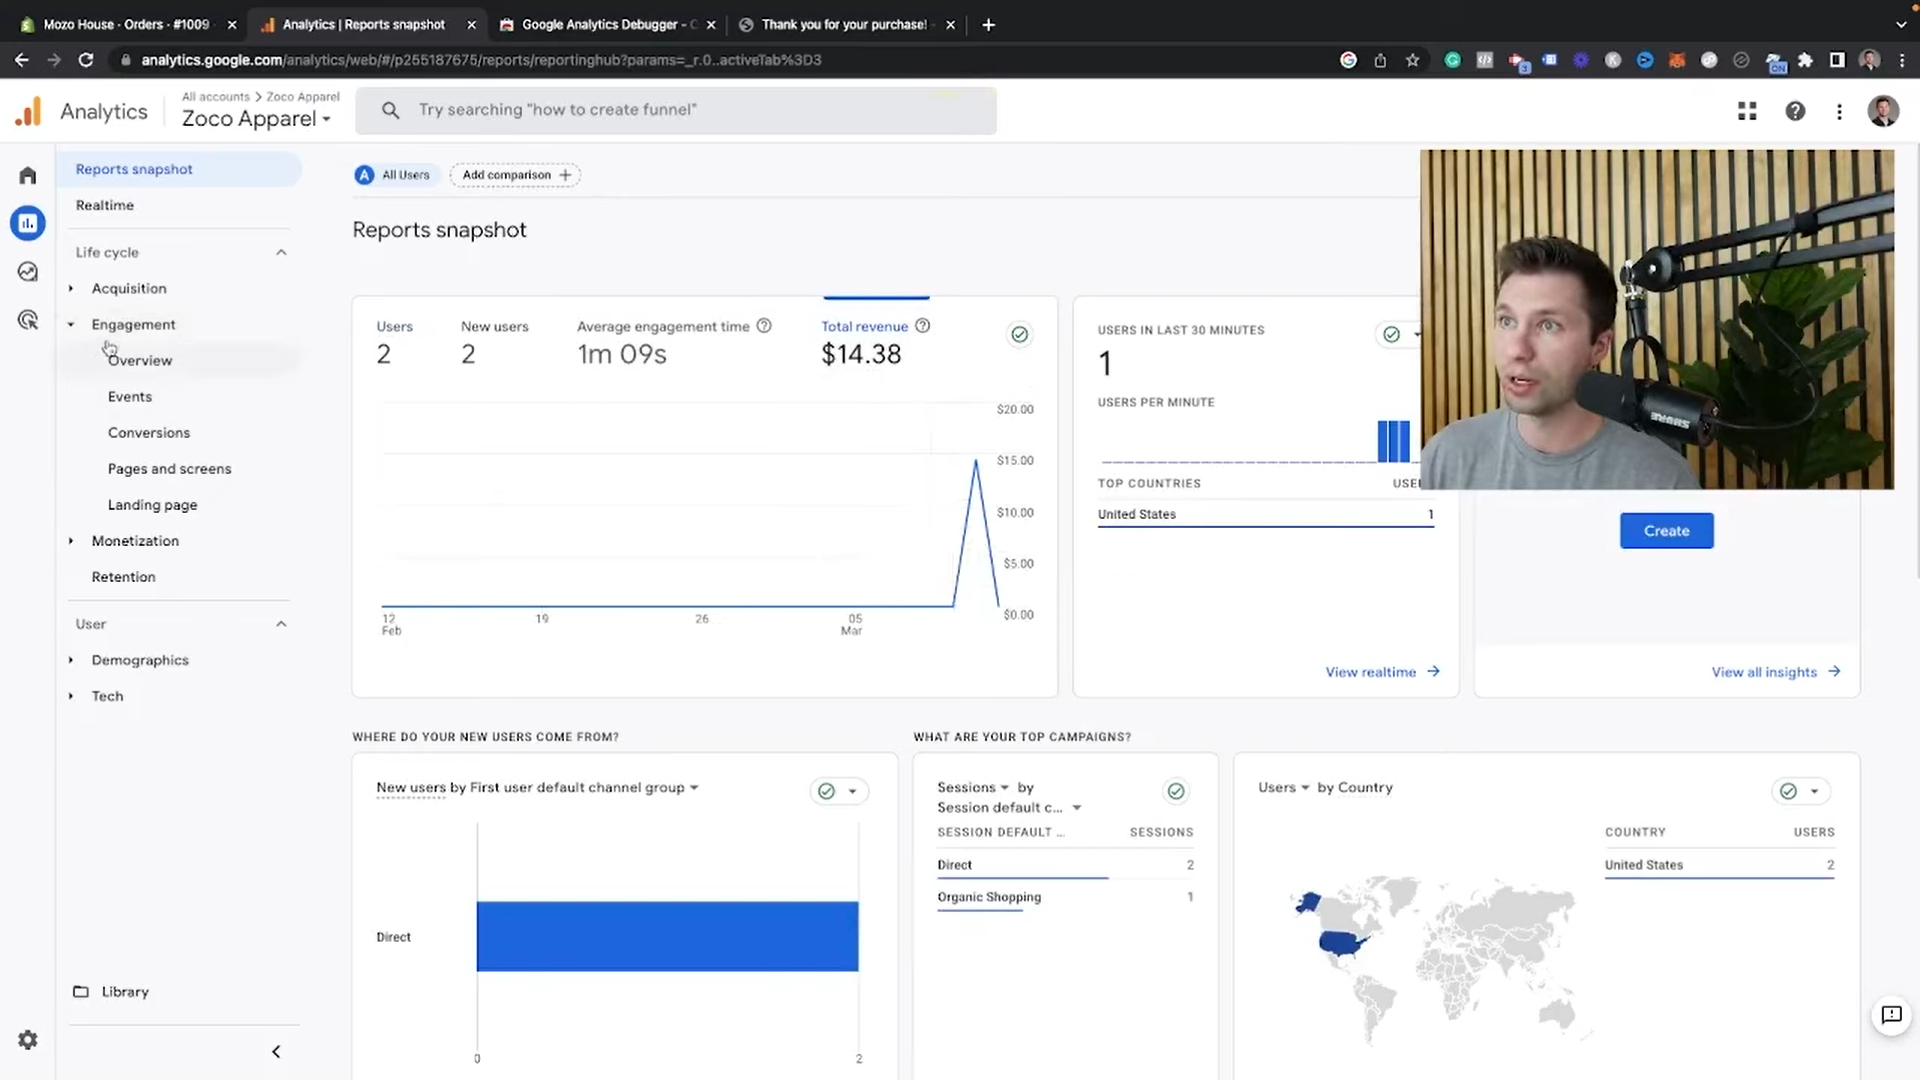
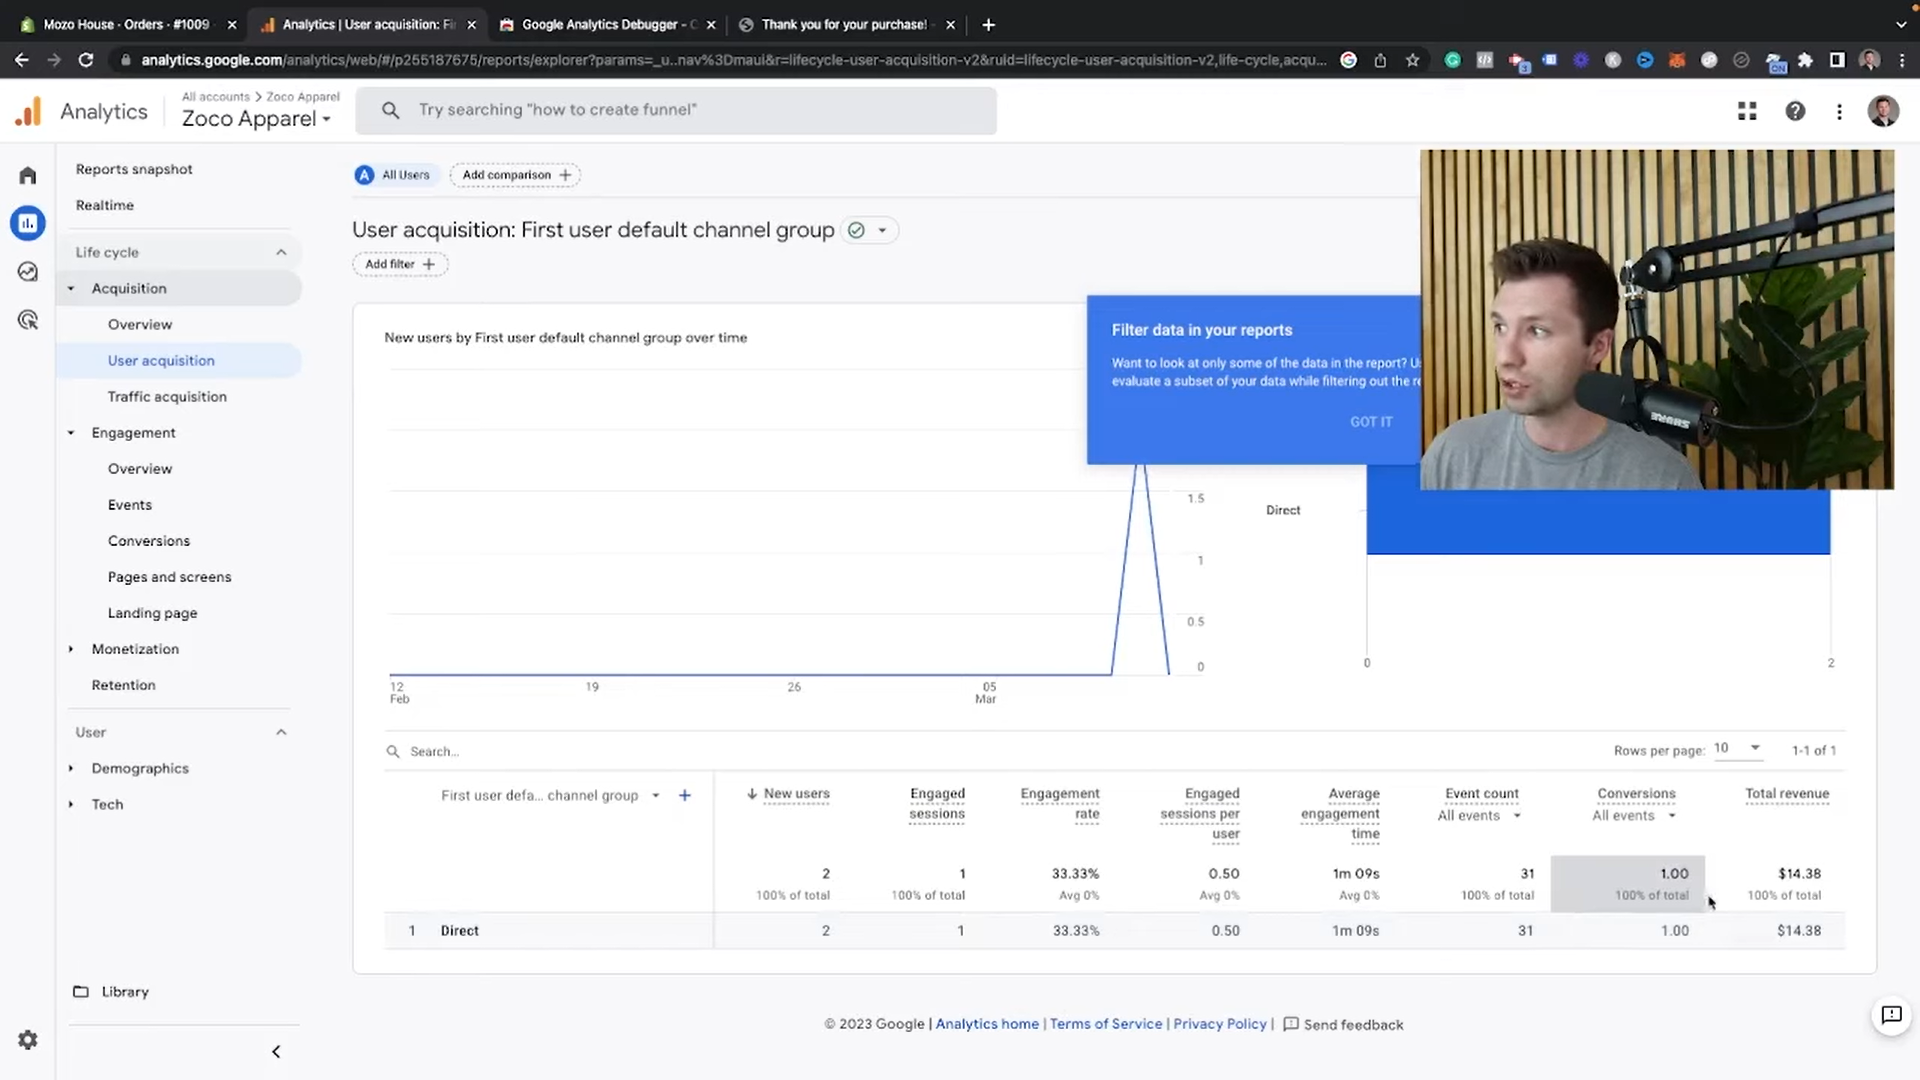
Under the ‘Acquisition’ section, you can uncover your specific revenue sources. These insights can help you discover the effectiveness of your marketing campaigns, identify the most profitable customer acquisition channels, and unlock a world of growth opportunities for your e-commerce business.
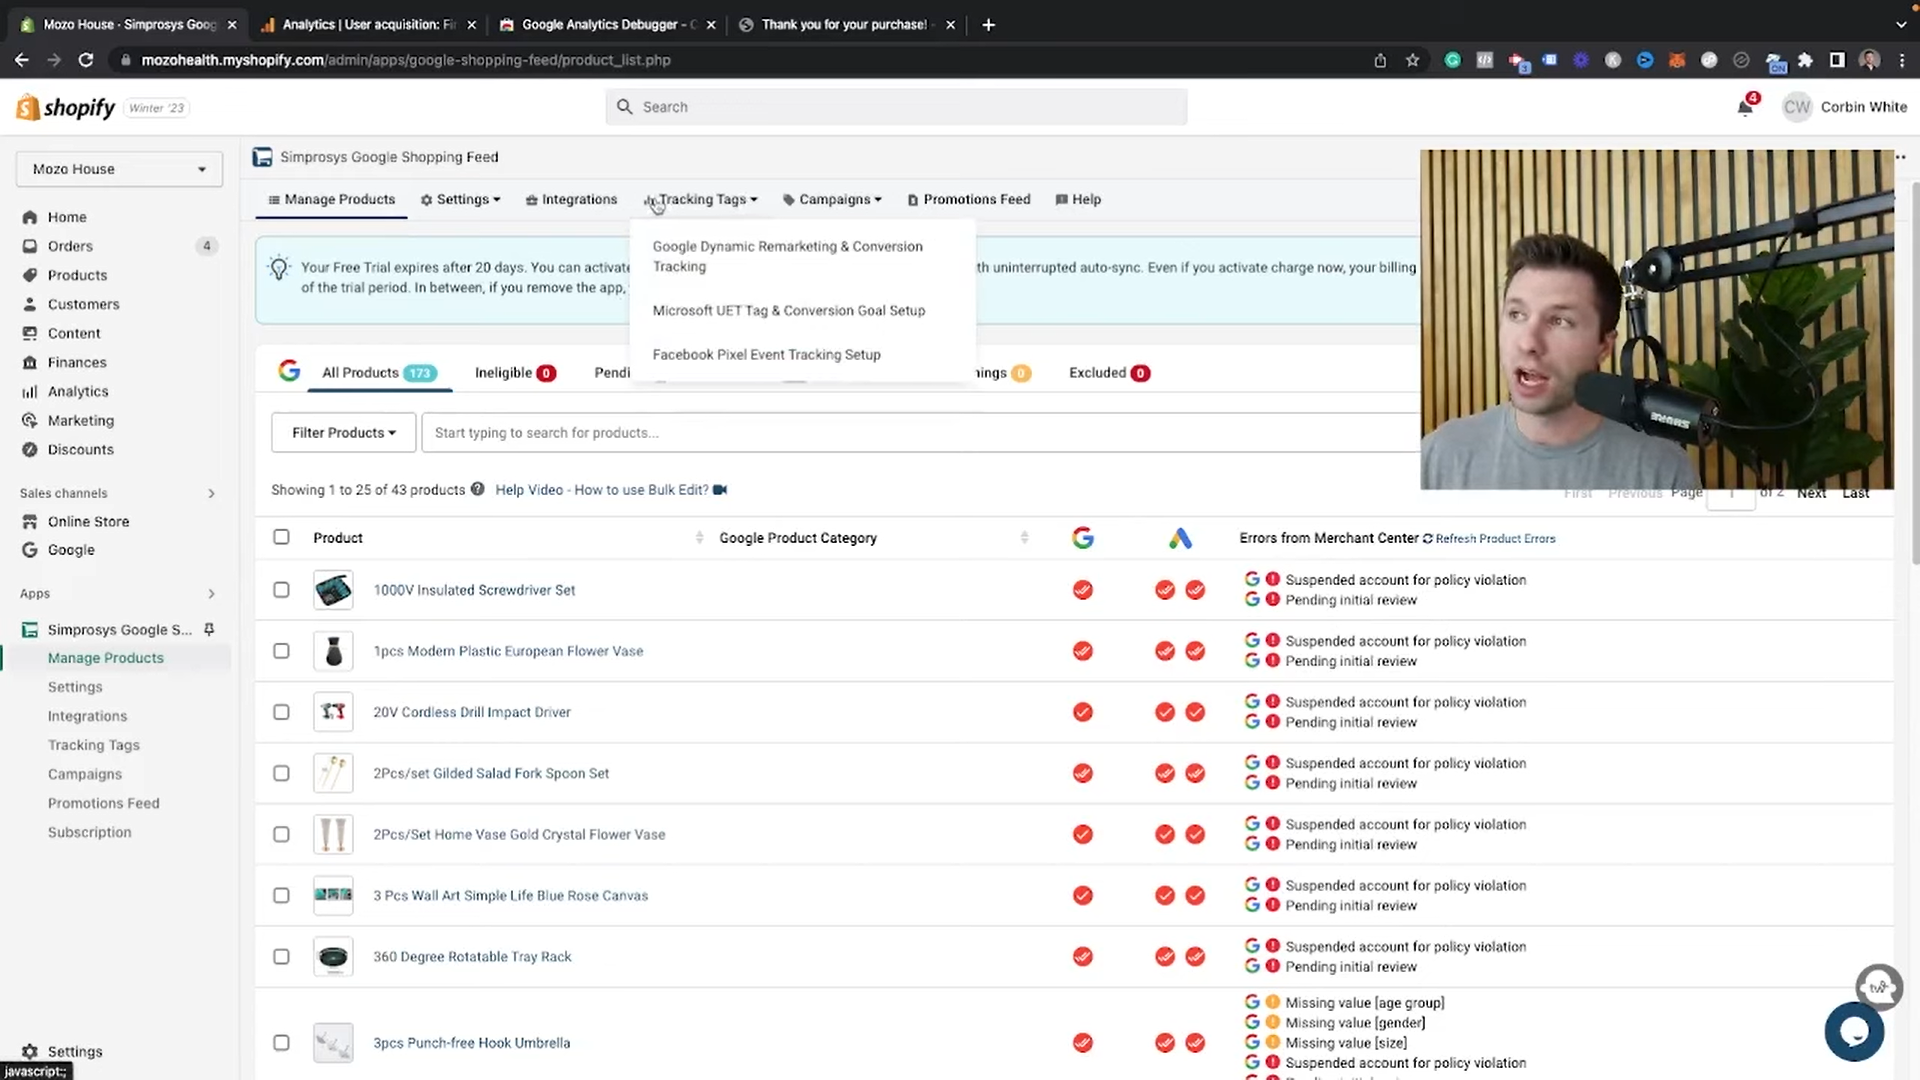
Alternative Setup for Simprosys Users
For those using Simprosys instead of the Google Channel App, you can still set up Google Analytics 4 E-Commerce Tracking. It will appear in the ‘Tracking Tags’ dropdown as an option labelled ‘Google Analytics 4 Tracking Event’. Click on it and follow all the provided steps in this article to complete the setup process.
Read: How To Connect Google Search Console To Google Analytics
What’s Next?
Now that you have revenue tracking in your Google Analytics, the next step is to set up your Google Shopping Ads Campaigns and start running ads within it.
If you are interested in learning how to do that, I recommend checking out our Full Guide on Google Shopping Ads.